A Fresh Coat

teen boy room makeover

House of Hockey...Room #1

Teen Boys RoomJenny SulpizioComment

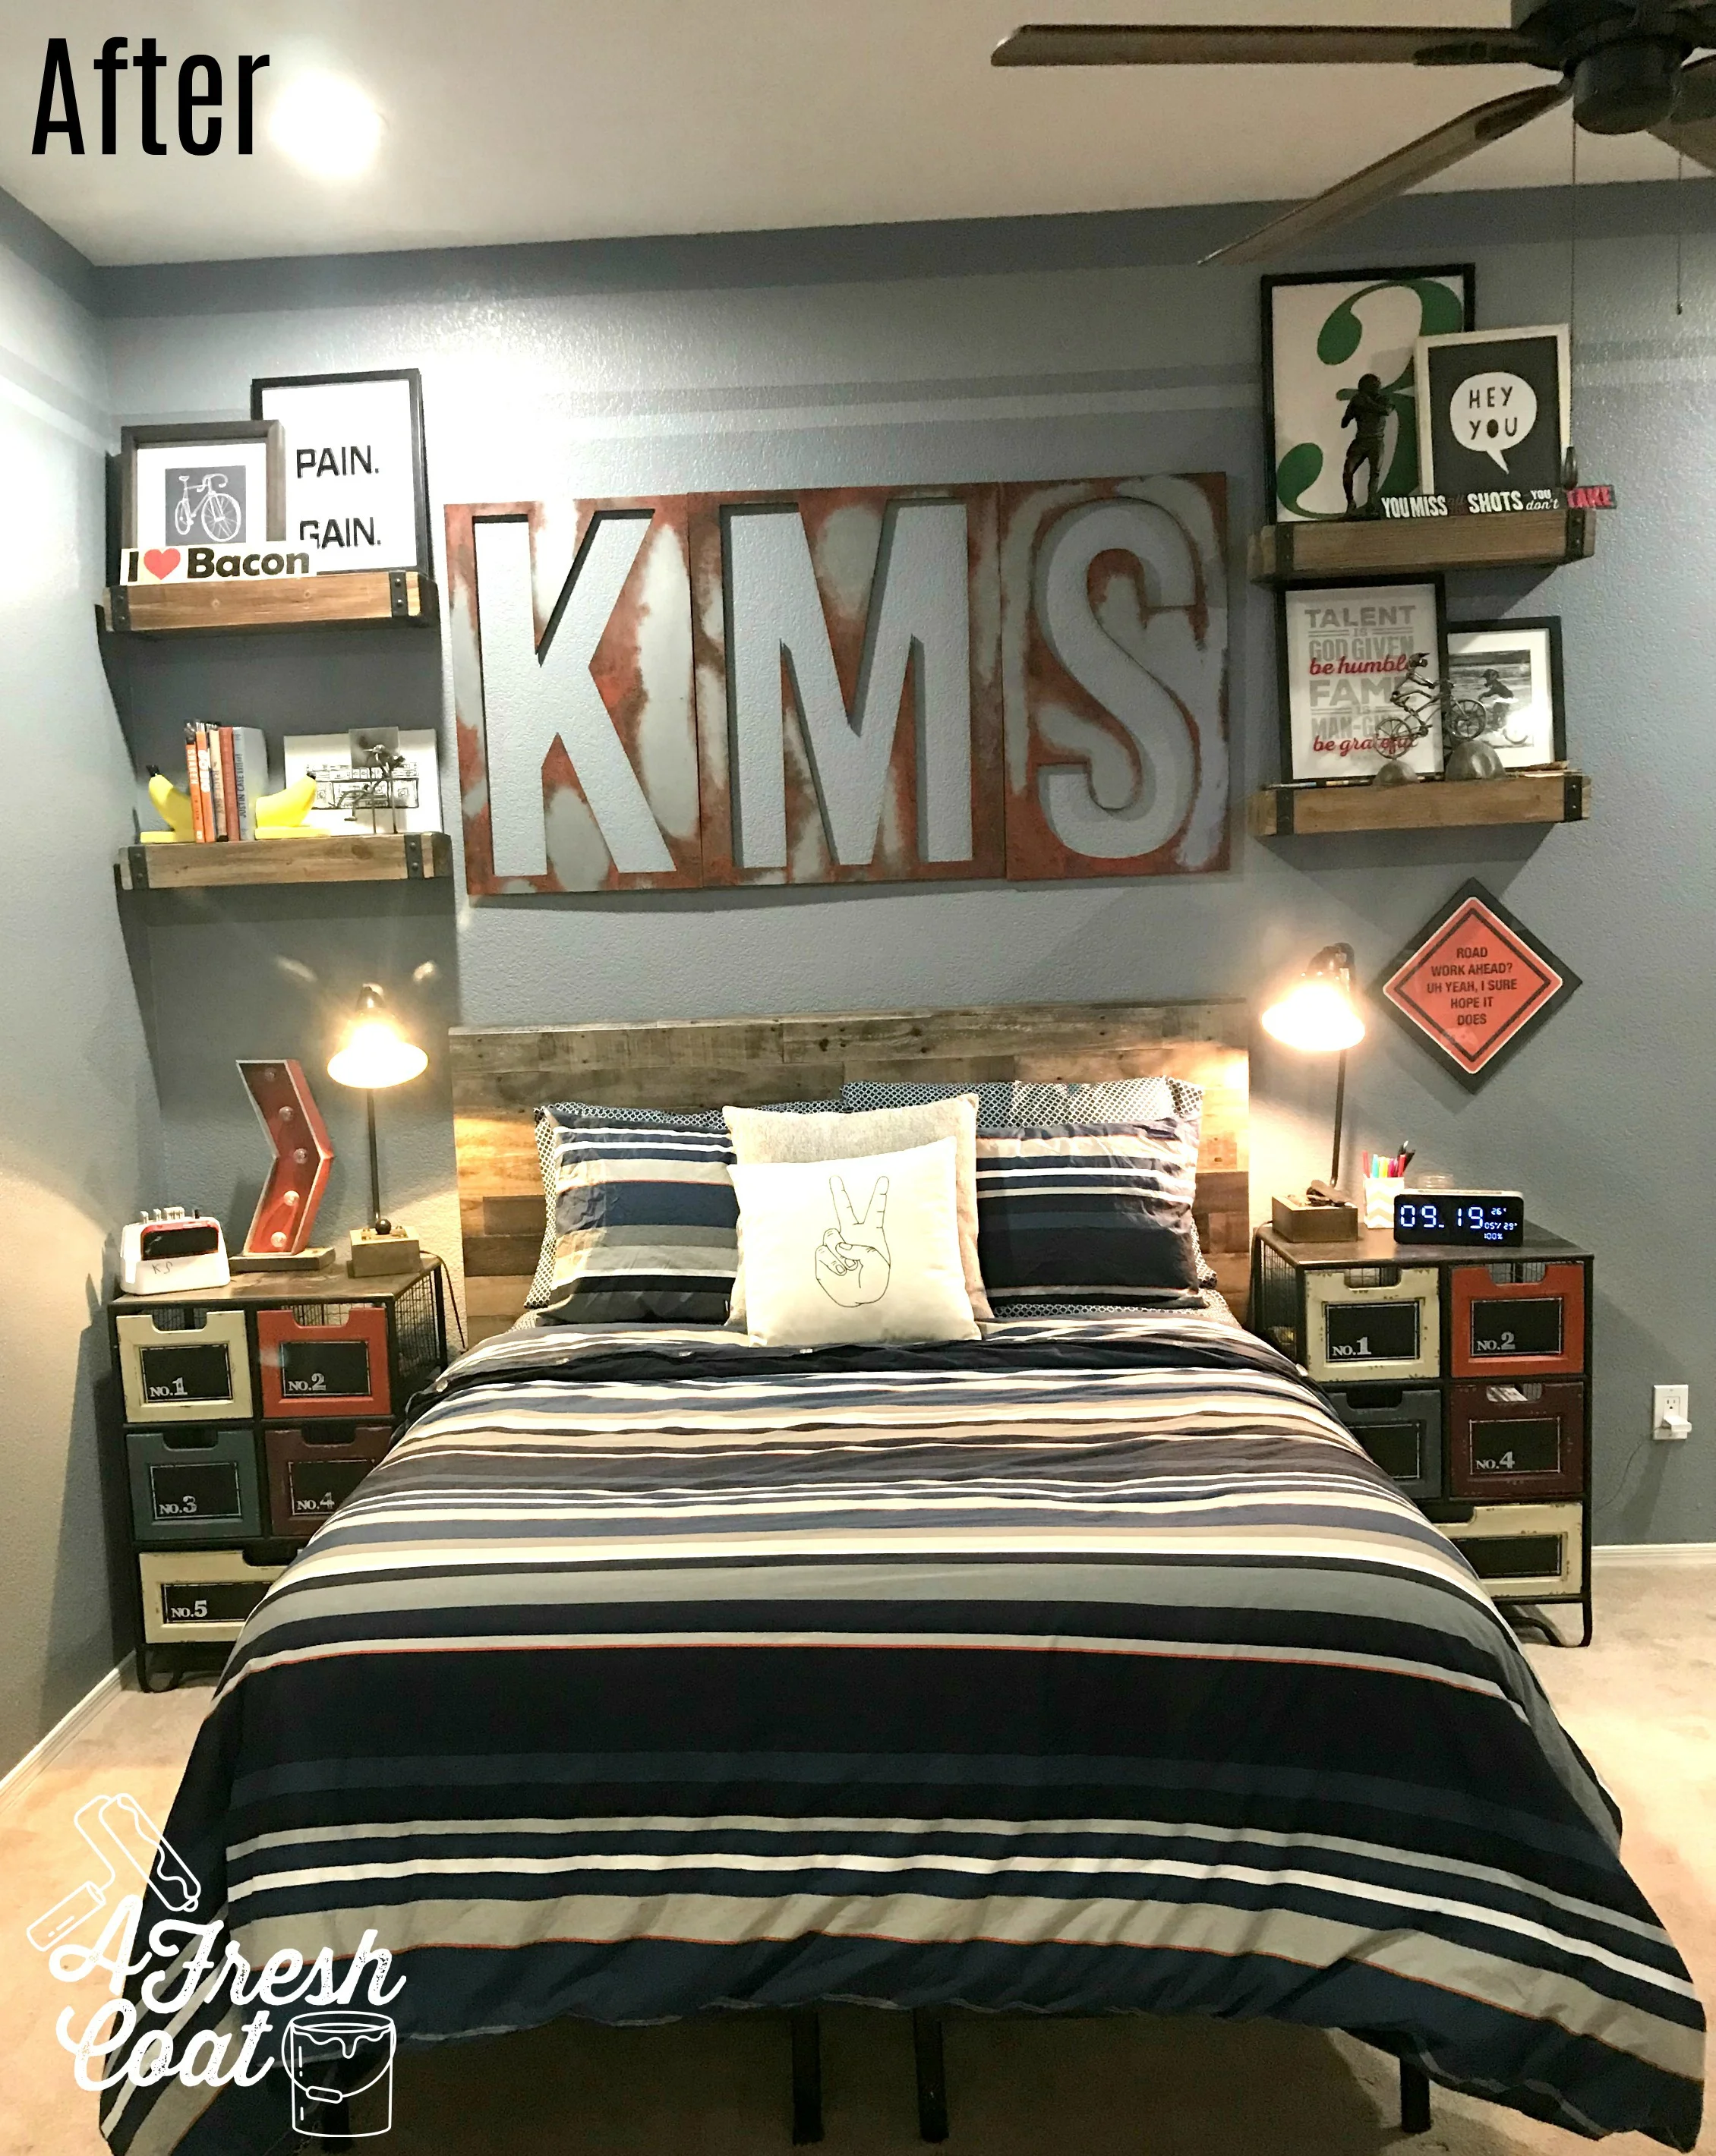
This is actually a two-part blog post involving two different bedrooms, two teenage brothers, and two serious hockey fans—”B” and “T.”

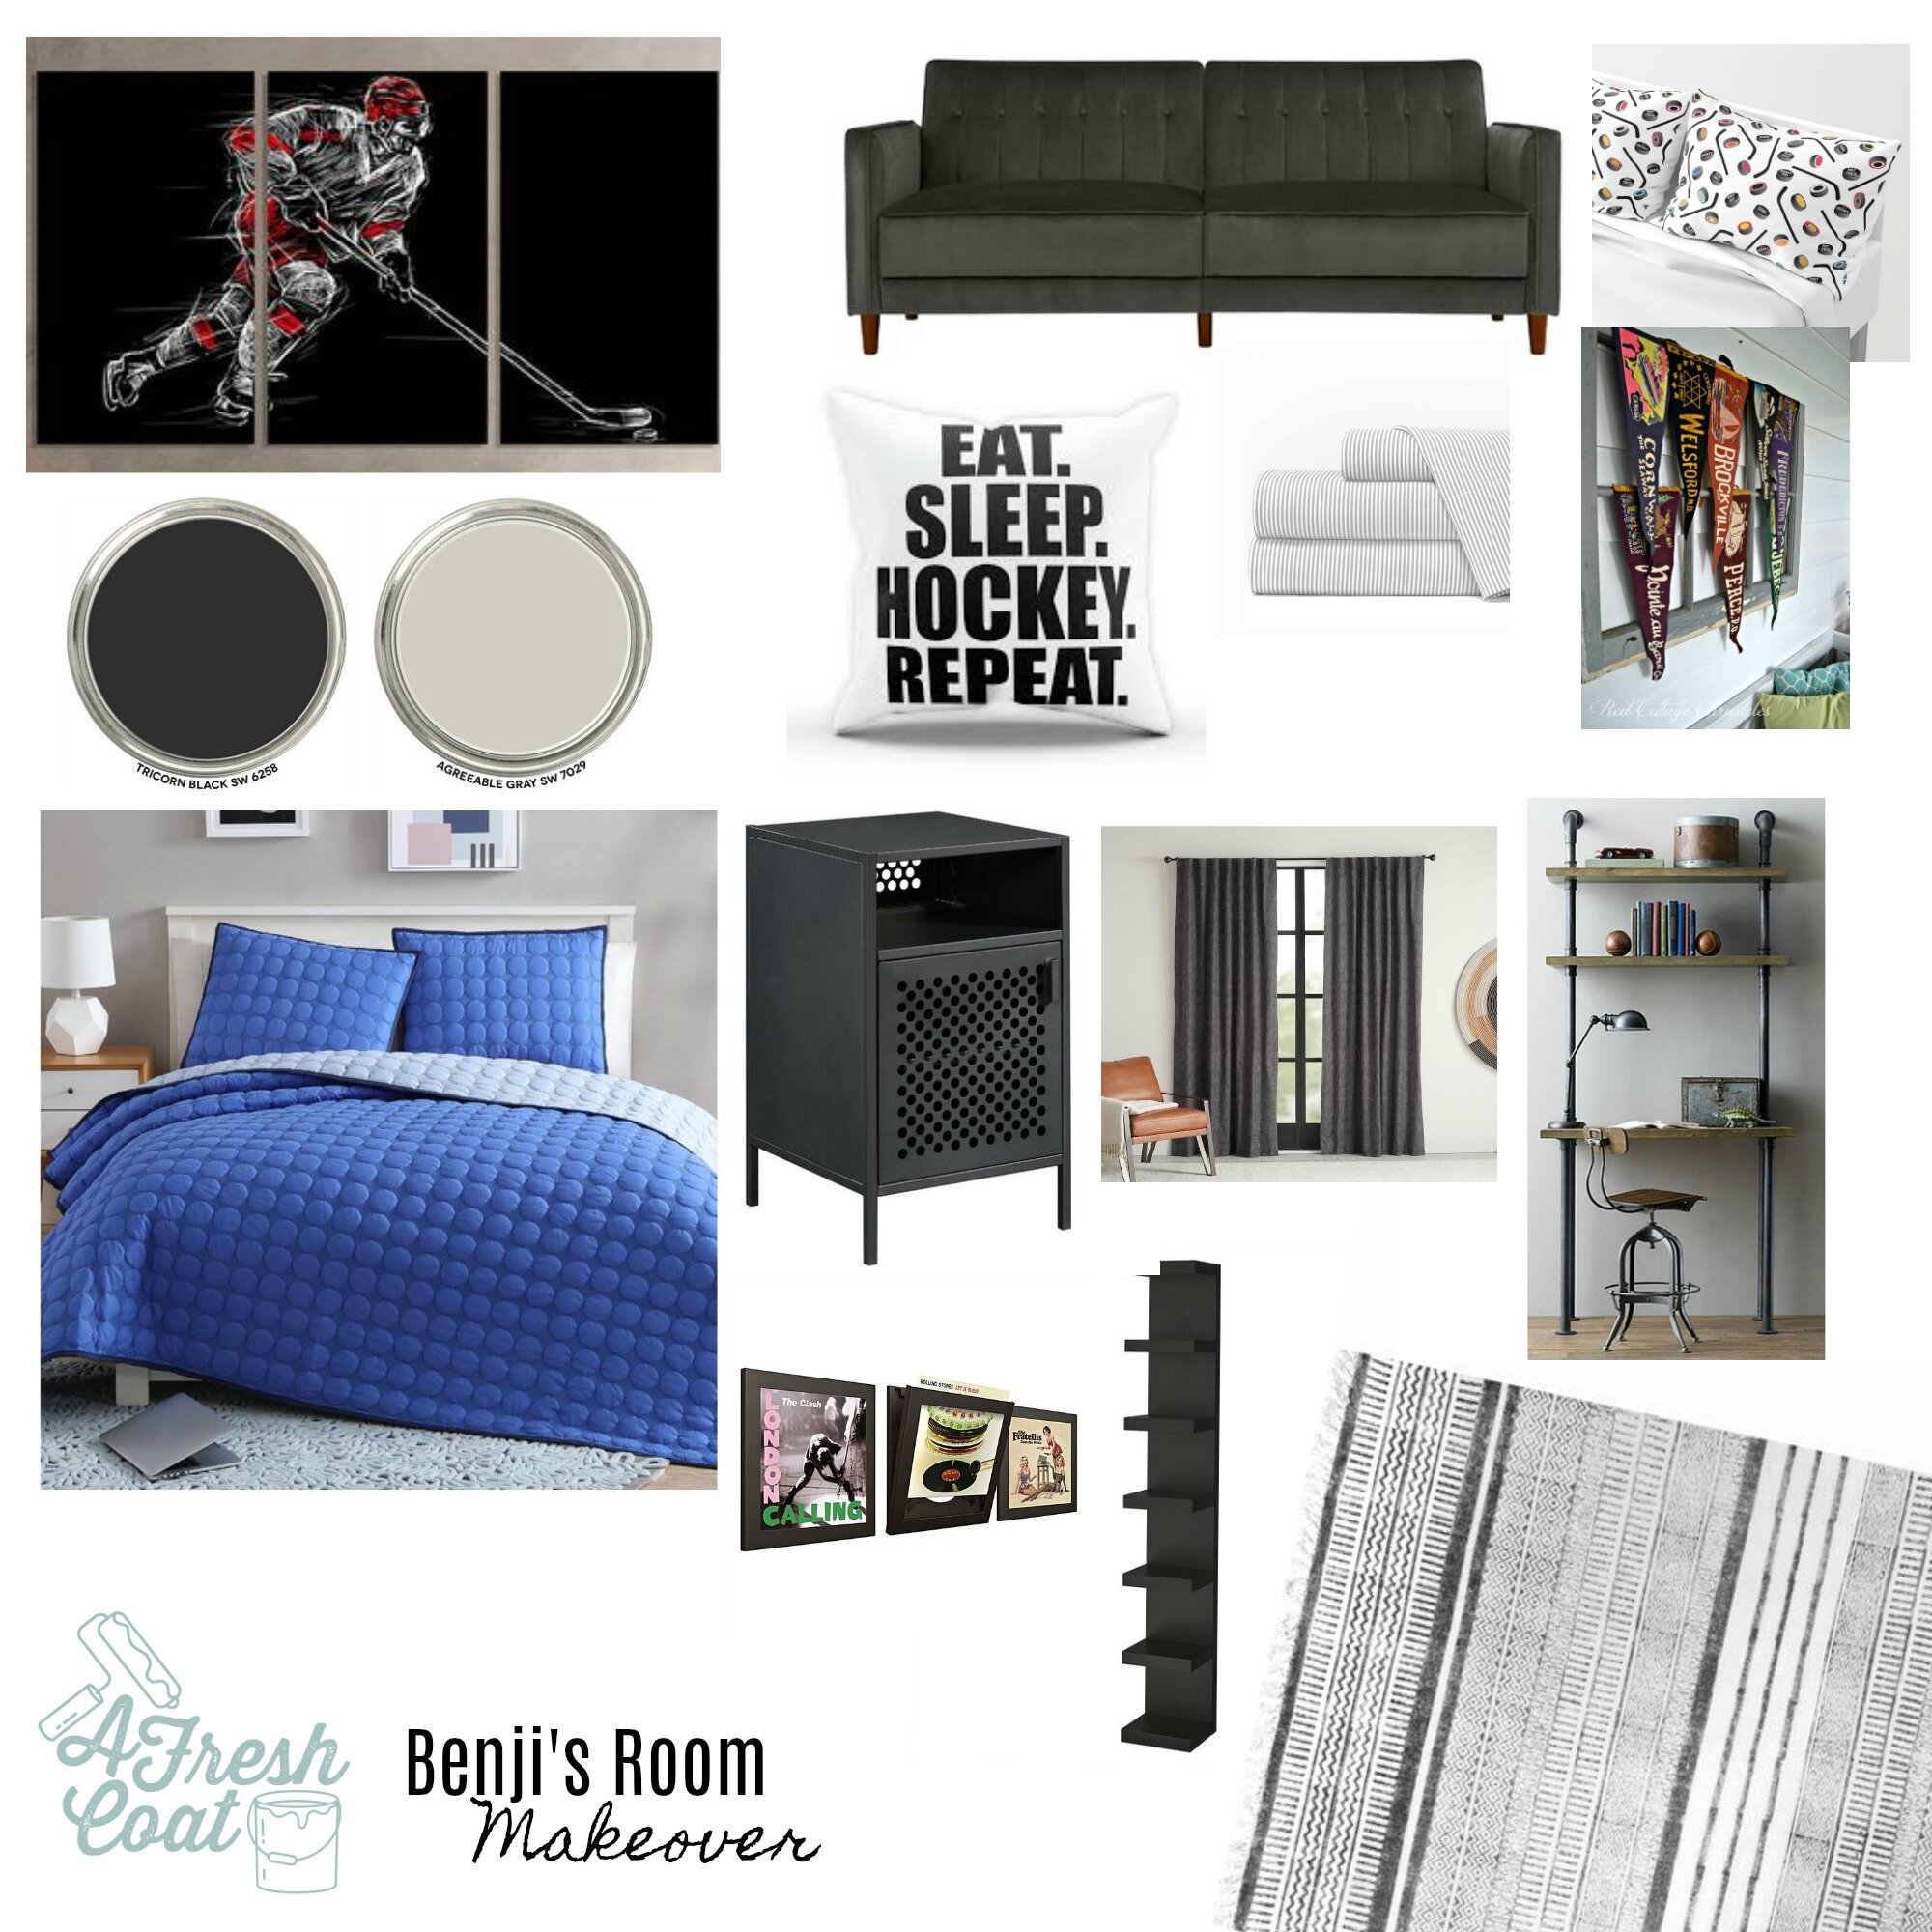
We’ll start with “B’s” room first. A high school senior, “B” needed a room that reflected his fun personality, hobbies, interests, and likes. He liked the idea of using black in his room but also wanted pops of color throughout. He also needed a new gaming station area, seating, shoe storage and wall decor. Here is where we started:

House%20of%20Hockey%20Room%201%201.jpg
House%20of%20Hockey%20Room%201%202.jpg
House%20of%20Hockey%20Room%201%203.jpg

“B” had a great space to work with—large and capable of so much, including reassigning furniture and adding in elements that would make his room more functional and reflective of him.

It started with the vision board. I immediately felt a fresh coat of paint would give this space an instant makeover. ..followed by some fun hockey pieces, new nightstands, lamps, bedding, and the likes. “B’s” mom was on board and the revamp got underway!

Benji's Room Makeover.jpg

Ready for the reveal?

House%20of%20Hockey%20Room%201%205.jpg
House%20of%20Hockey%20Room%201%207.jpg

This is one of my favorite reveals to date because of the major changes that took place, those bold pops of color against a black backdrop, the the super fun elements we added in to make this room into the finished product it is today.

House%20of%20Hockey%20Room%201%208.jpg

Remember the built-in desk unit? Gone! In its place is this sweet couch, side tables, industrial lighting with Edison bulbs, and great record collection on display.

Oh, and remember the shoe collection that needed a little bit of help? How ‘bout this?

House%20of%20Hockey%20Room%201%2010.jpg

These LACK units from IKEA are perfect!

Last but definitely not least was the gaming station that needed a little “umph.” Nate Koogle came in and constructed this awesome structure! Look at the pipe he sprayed black! Looks so good and is perfect for this little nook of “B’s” room.

House%20of%20Hockey%20Room%201%209.jpg

Want to see the before and after pics one more time? I seriously love this room makeover.

House%20of%20Hockey%20Room%201%202.jpg
House%20of%20Hockey%20Room%201%205.jpg

The Details:

YUMA Airport Terminal Pillow: Etsy

Throw Pillows: Etsy/Zazzle

Paint Colors: SW Tricorn/SW Agreeable Grey

Paint Labor: A Fresh Coat

Hockey Artwork: Etsy

Bedding: Wayfair

Table Lamps: Wayfair

Nightstands: Wayfair

Couch: Wayfair

Shoe Displays: IKEA

Rug: Wayfair

Gaming Station: Nate Koogle

Love, J


Seeing Stripes: Teen Boy Room Makeover

Teen Boys RoomJenny Sulpizio5 Comments

Some projects seem like they take forever to finish and this room was no exception. Sometimes you’re just waiting on one last detail to “make” the space, and for me and my middle son’s room, it was these amazing metal-looking negative space oversized letters above his bed. But before I gush on those awesome things, let’s start from the beginning of this room reno.

We moved into our home almost ten months ago and as I’ve mentioned in previous posts, there’s a LOT to do. A. Lot. But the first area(s) I wanted to focus my attention on were my kiddos’ bedrooms. By no means does this indicate they are actually finished but we’re getting closer and closer with each passing day. So close, that I decided to post the before and after pics of this room for you all.

Here’s where we started:

Teen Boy Room Makover 2.jpg
Teen Boy Room Makover 3.jpg

The tan walls and matching carpet were fine and all but I like to add personality and character into my rooms and this was missing a whole bunch of both. Besides, prior to moving into this home I created Pinterest boards for each of my kid’s rooms and consulted with them on colors and the overall look they wanted to achieve. My boys were the easiest to work with (go figure), and here is where we’re at with “K’s” digs today:

Teen Boy Room Makover 5.jpg

The first step was to paint the walls a cool blue-grey and he selected Valspar’s Stormcloud (with a 25% reduction) followed up with Valspar’s Drizzling Mist (same color reduction) for the large and small striping up top (courtesy of AFC).

Next was the layout of the room. With a double bed, it created a bit of a problem with how the room was initially designed—so I opted to frame in the not-so-centered bed with shelving and nightstands to make it all work a bit better and yet still provide him enough space to perfect his Fortnite moves…seriously. ;)

Teen Bedroom Makeover.jpg

Most people have a tendency to shove a bed up against the wall but if a room is large enough, placing the bed in the middle or even off-center as I did here, could be an option. It all depends on the size of the furniture you have and the amount of room you have to work with.

When it came to syling this space, decor was super easy with this son o’ mine. He’s got a lot of personality and spunk so the pieces selected had to reflect who he is. I think we got it right.

Teen Boy Room Makover 9.jpg

Even better? Most were on clearance. As it turns out, not a ton of people are interested in buying banana bookends, ghetto blaster art pieces, or even framed bicycle prints. But me? I will take them and love them even more since they were crazy cheap. Sometimes, the weirder, the better.

And how about those letters? Originally I wanted oversized steel letters (we’re talking 39” each) to create a really bold look above his bed. Simple but bold. However, the only place I could find such a thing was through Restoration Hardware Teen. Even though I loved (like, love-loved) these letters, the price tag of $149 each was a dealbreaker. I just couldn’t justify it. But aren’t they pretty?!!

rhtn_prod100539_E87016817_F.jpeg

Instead, I found Jillian Van Horn of Lazy J Signs here in Yuma, AZ. Rather than use the actual letter, I asked for the negative space instead. This gave me the height and width I needed inbetween the shelving units pictured below. I asked her to create a rustic metal look on top of these wood cut-outs and she rocked it. These actually look like metal and I love how it completes the space.

Teen Boy Room Makover 4.jpg

Last but not least were the small finishing touches which included a set of old lockers (I painted black) for additional storage, an oversized cork board, and large industrial clock.

Teen Boy Room Makover 7-2.jpg

That’s it! We’re just one window treatment, one new door, and one new area rug away from this room being completely finished. So close I can almost taste it. But in the meantime, here is the before and after pics one more time.

Teen Boy Room Makover 3.jpg

and after:

Teen Boy Room Makover 5.jpg

The Details:

Paint: Walls-Valspar’s Stormcloud (25% reduction in color)

Stripes-Valspar’s Drizzling Mist (25% reduction in color)

Paint Labor: A Fresh Coat-Yuma

Shelving: Hobby Lobby

Decor: Target, Hobby Lobby

Side Table Lamps: Kirkland’s

Side Tables: Hobby Lobby

Ceiling Fan: Lowe’s

Bedding: Pottery Barn Teen

Headboard: Wayfair

Negative Space Letters: Lazy J Signs-Yuma, AZ

Clock: Hobby Lobby

Cork Board: Hobby Lobby

Desk: Pottery Barn Teen

Industrial Mail/File Holder: Hobby Lobby

Love, J