A Fresh Coat

Teen Boys Room

COMING OF AGE: TWEEN BEDROOM MAKEOVER

Teen Boys RoomJenny SulpizioComment

Coming of age rooms are always so much fun to create but also bittersweet. Replacing the days of cars, trains, and balls with elements geared around tech, gaming, and more adult themes can be emotional. Sad, even. However, I try to make the process fun for both kiddos and parents alike.

Such was the case with “B.” At twelve, he was ready to ditch his old digs and bring in something new. He loves gaming, and football, math, and also has a great reading library, so he and his mama wanted to focus on a room highlighting those interests.

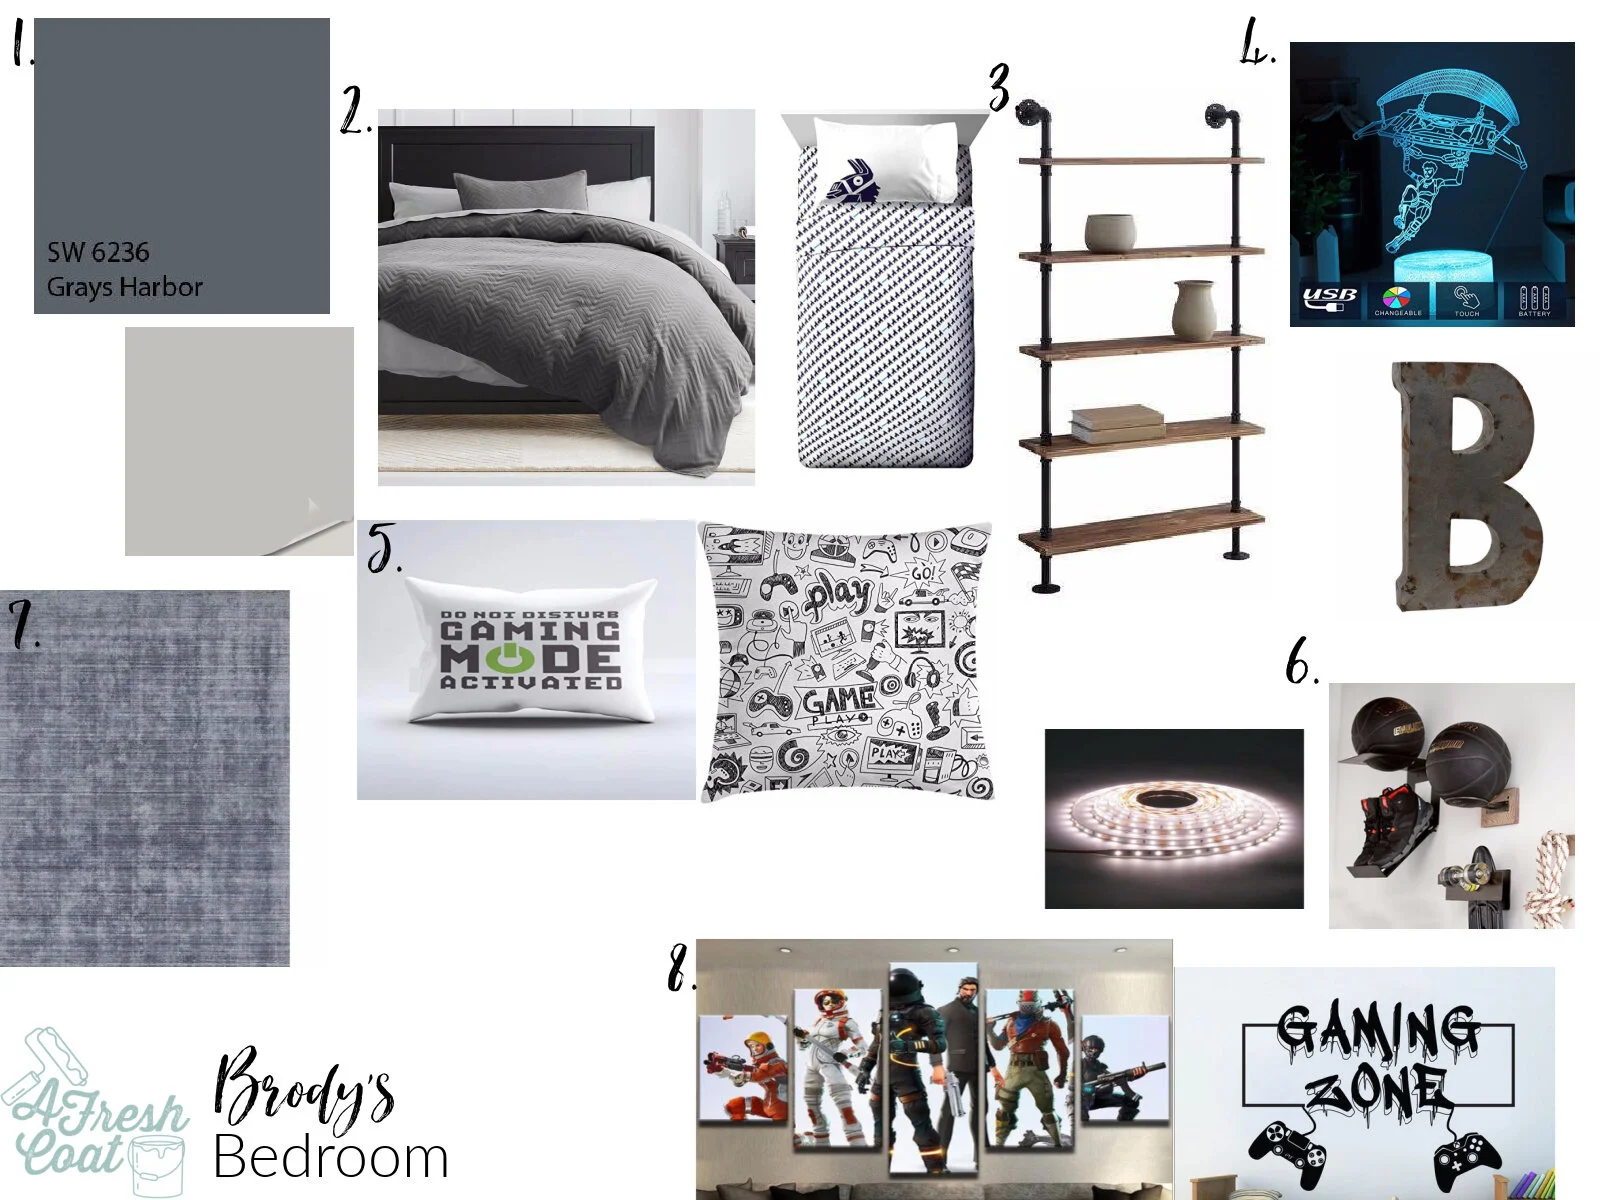
Sometimes, rooms don’t have an overall theme and that’s totally fine. Sometimes, rooms have a number of understated themes taking place…and combining them in a stylish way is key.

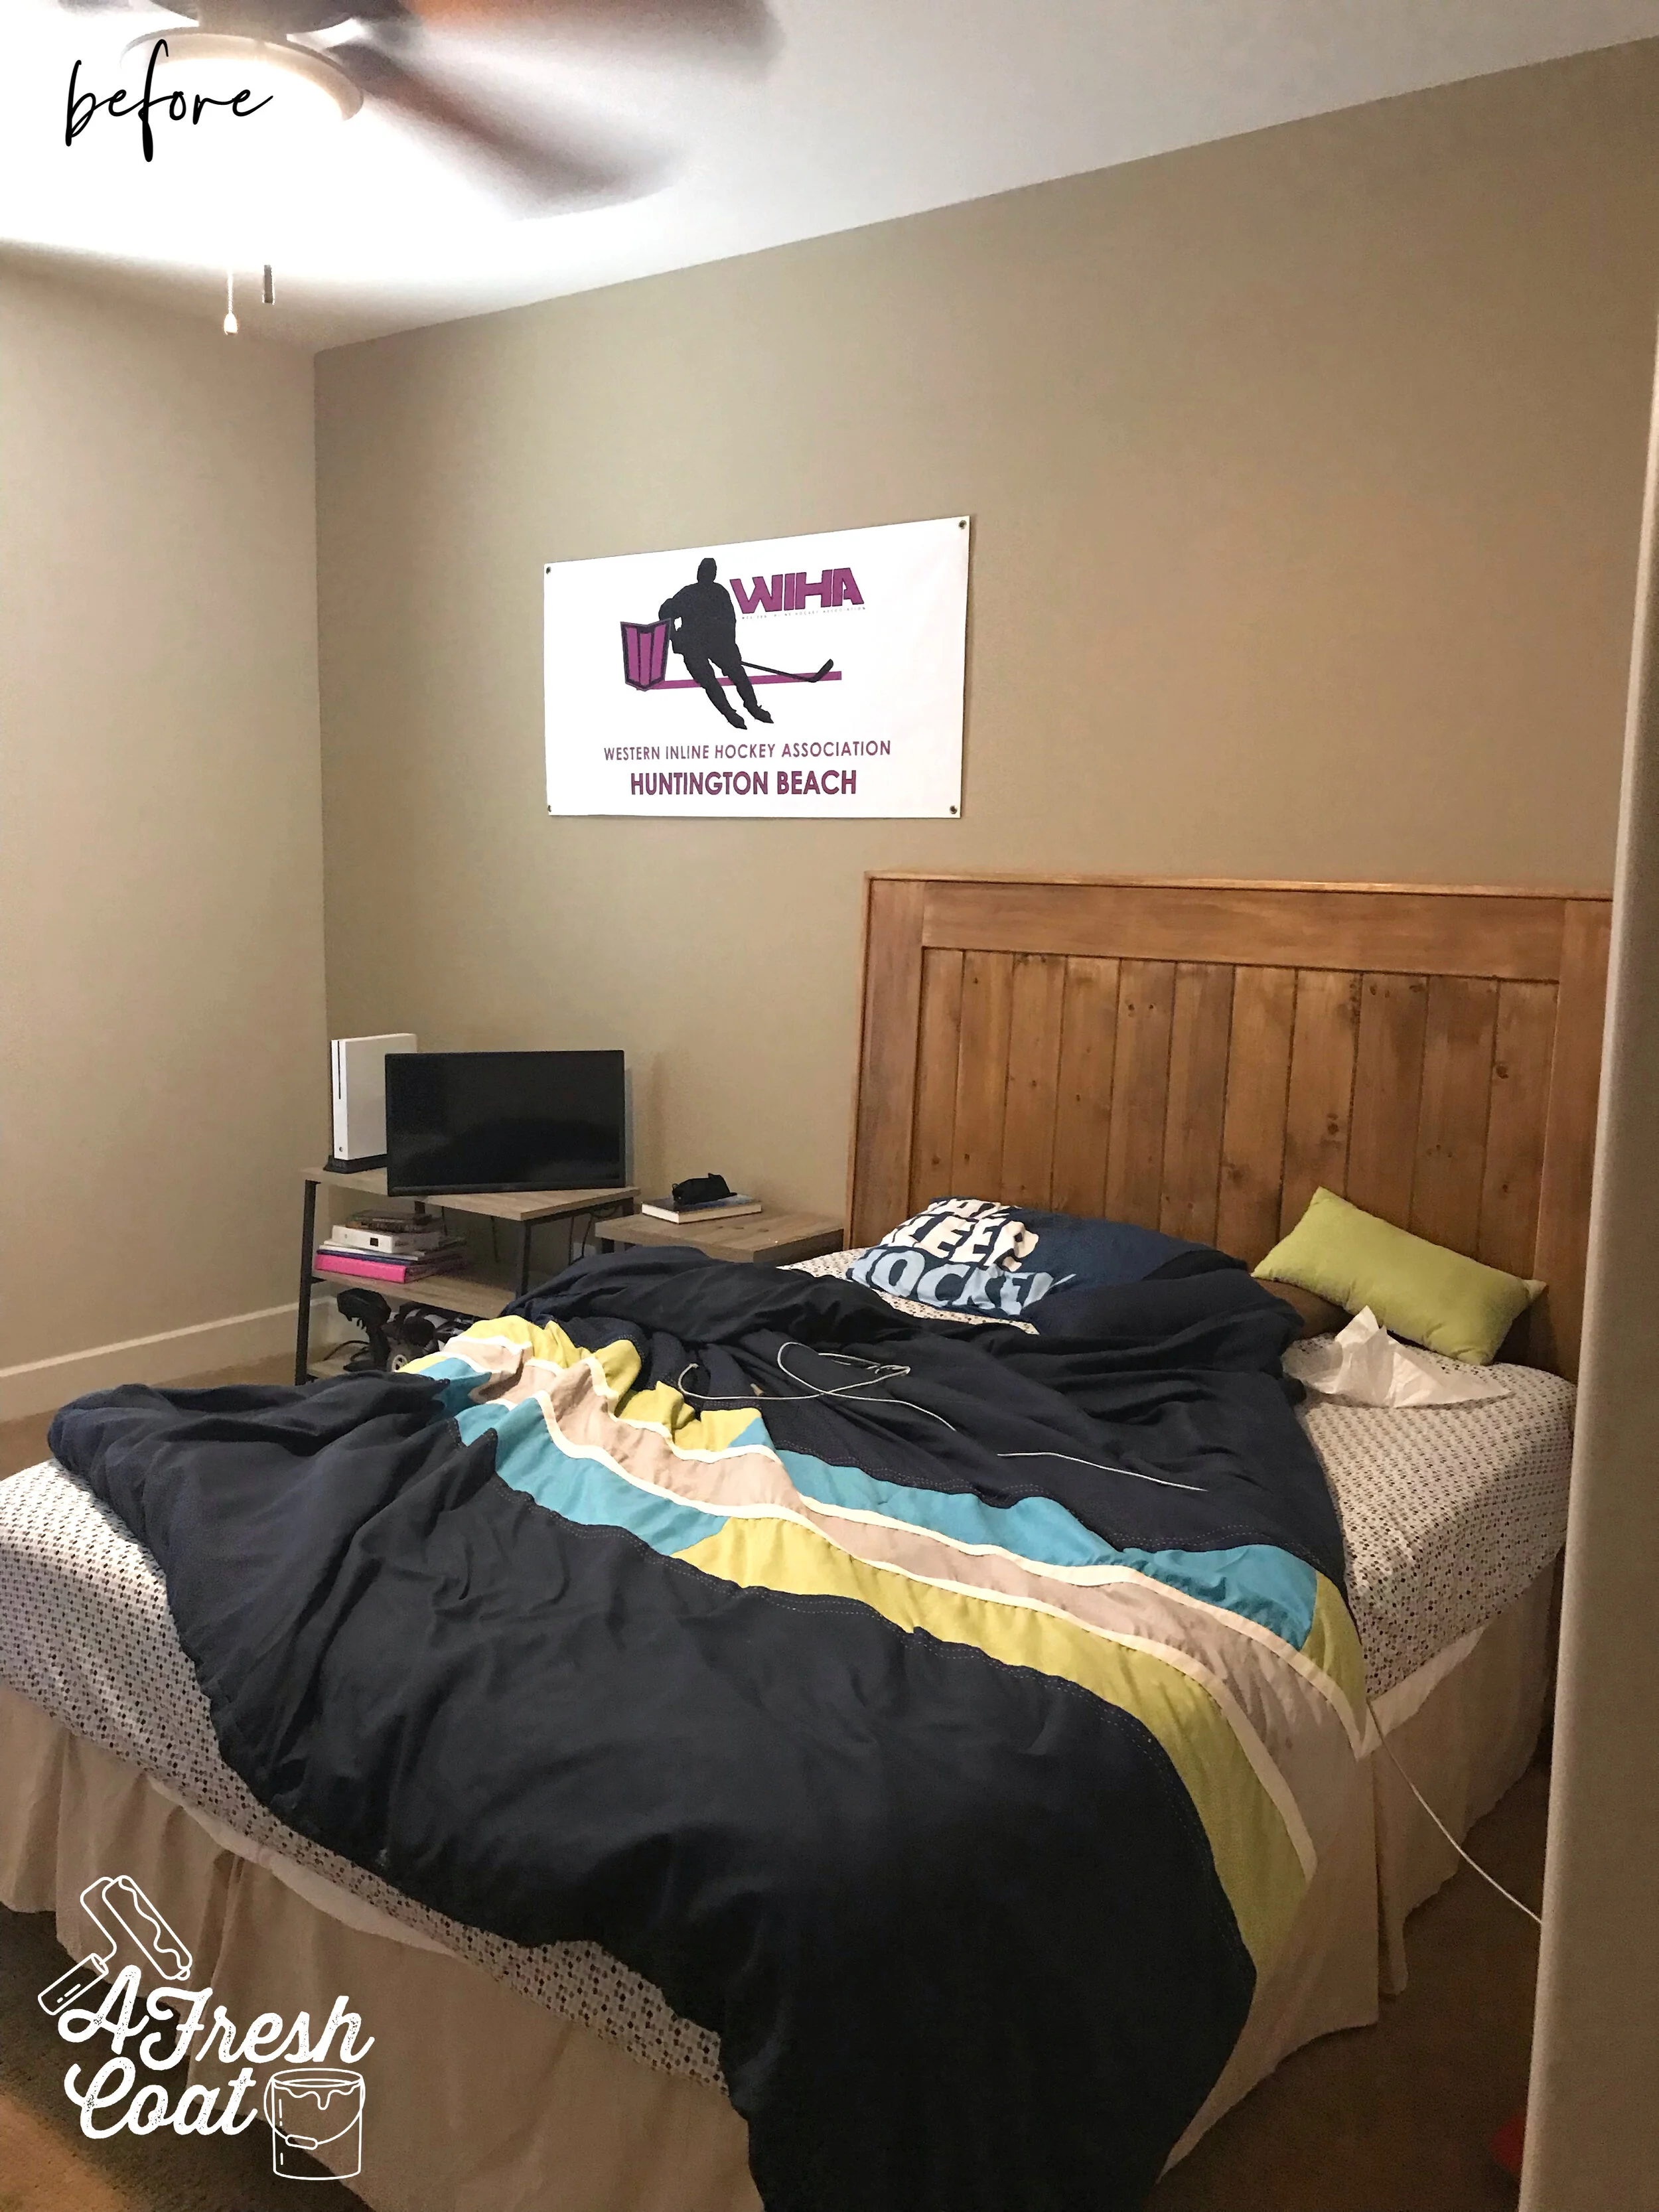
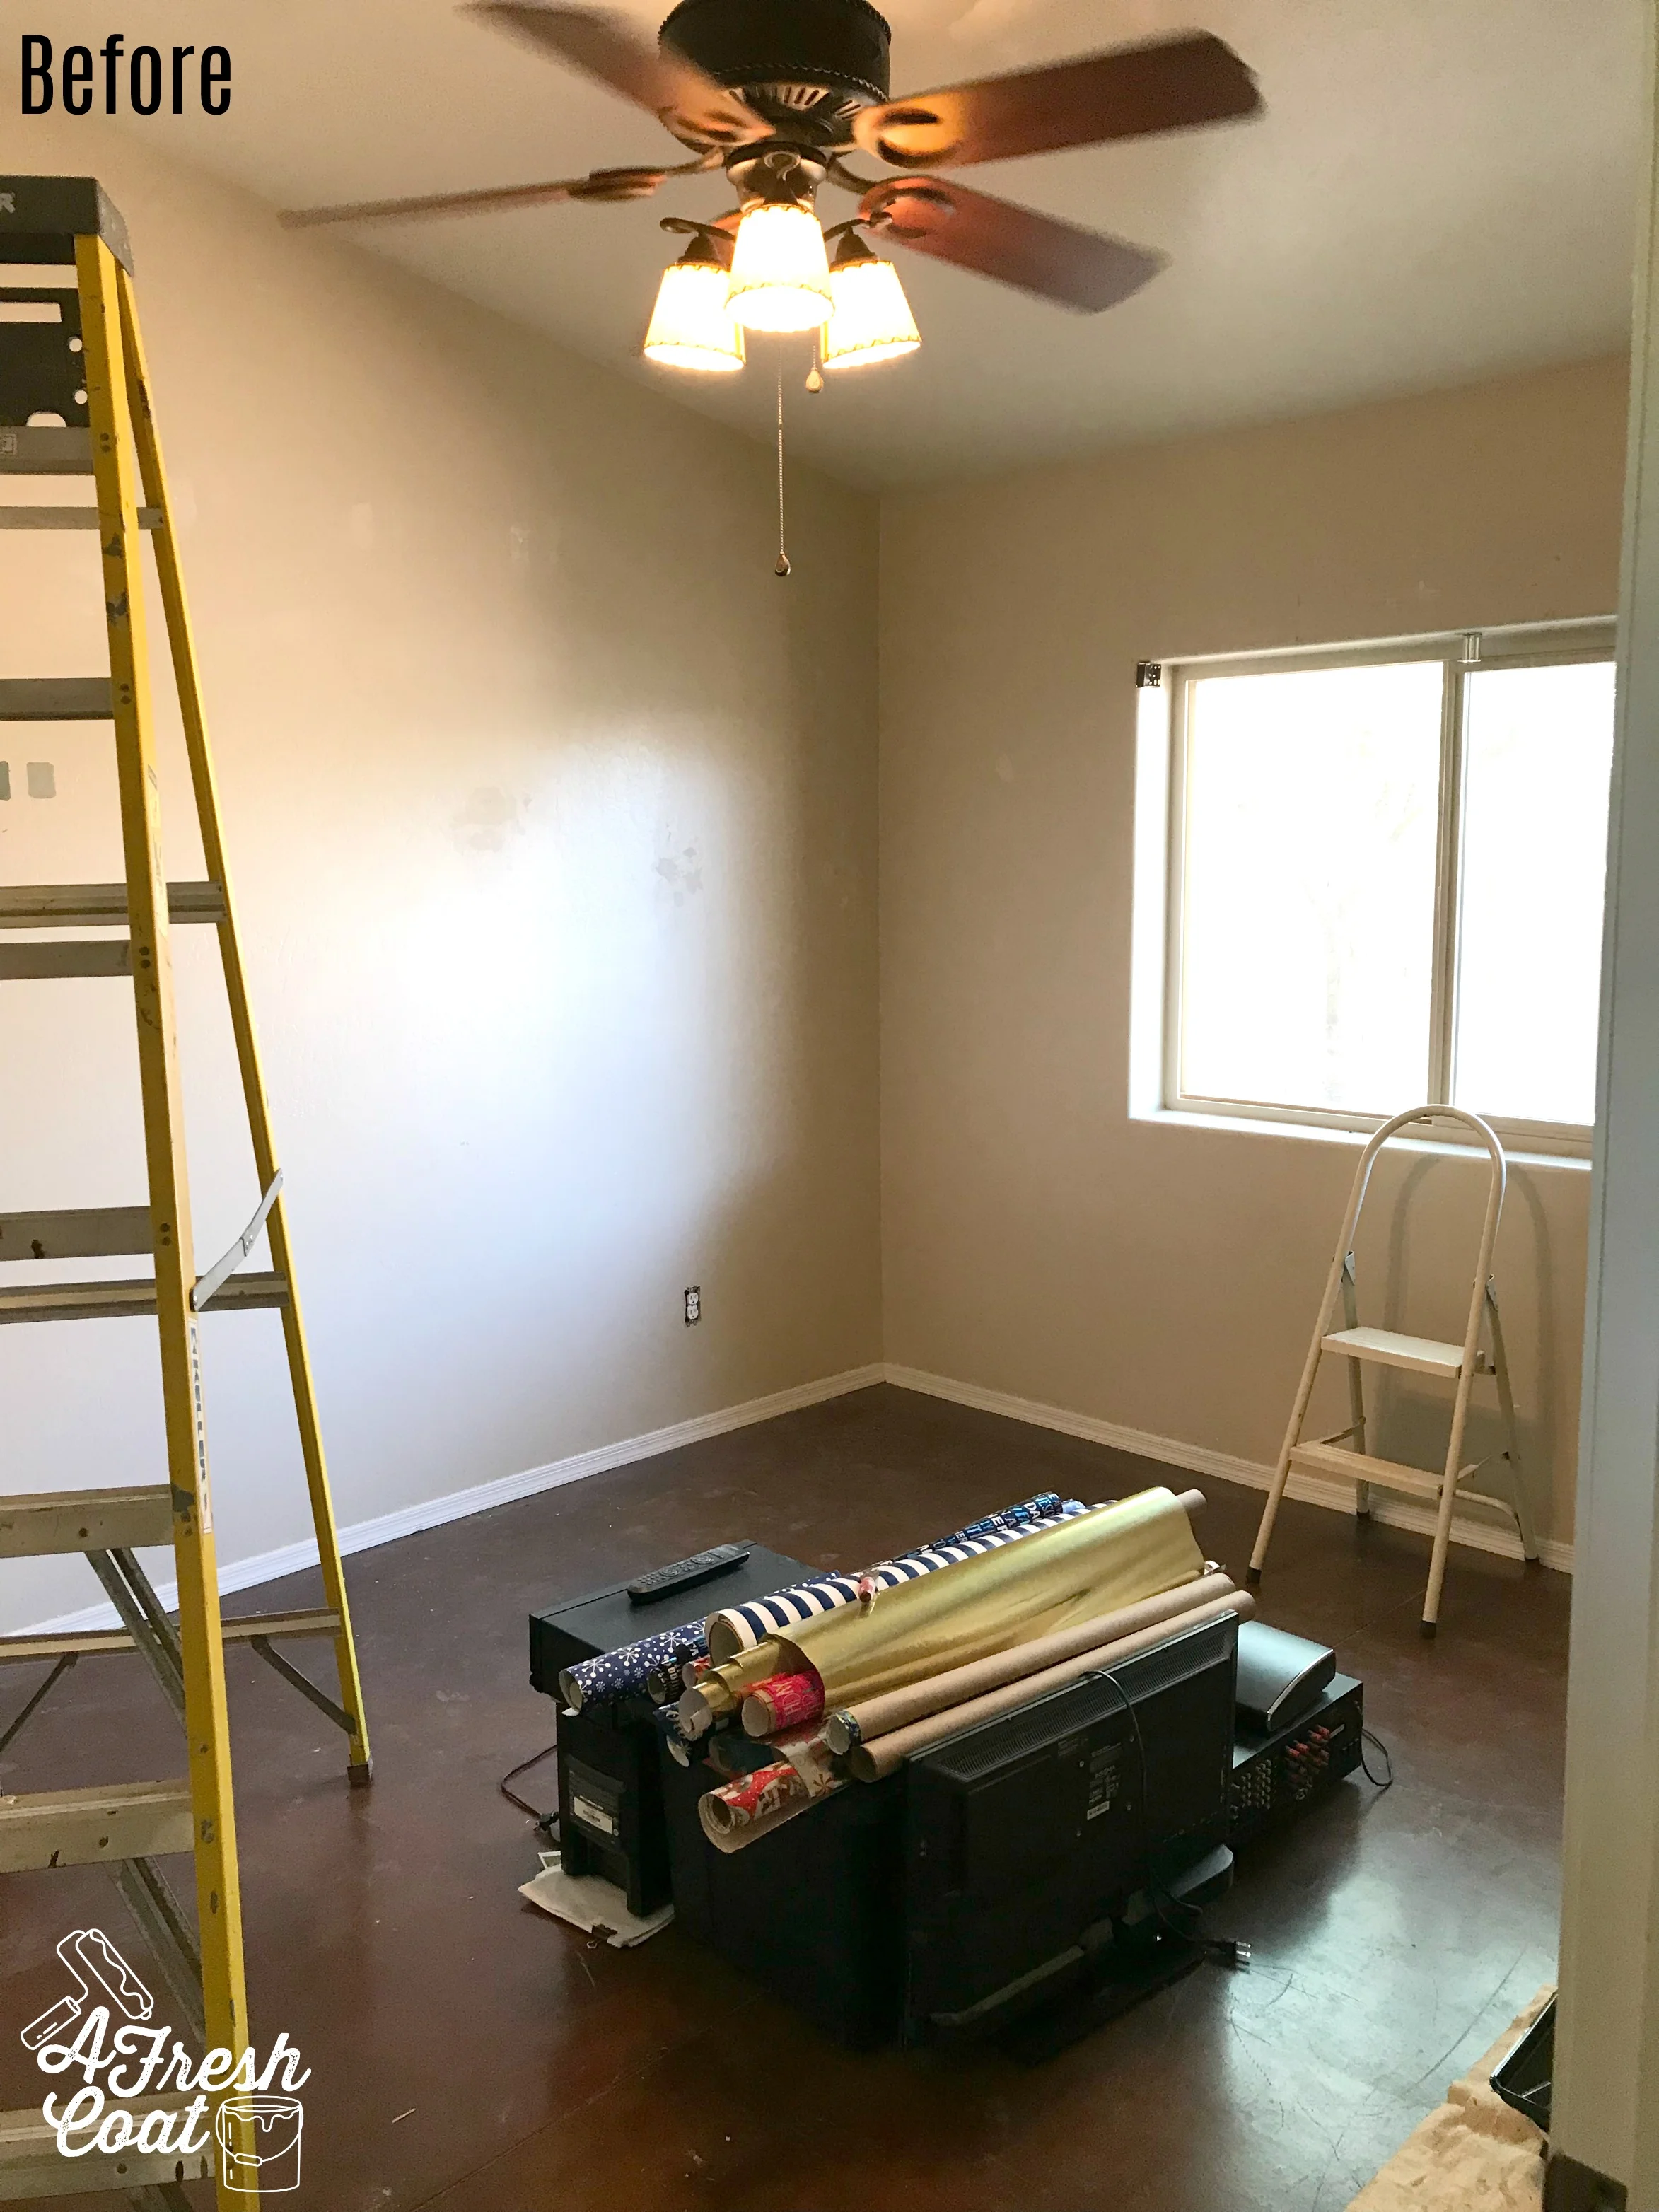
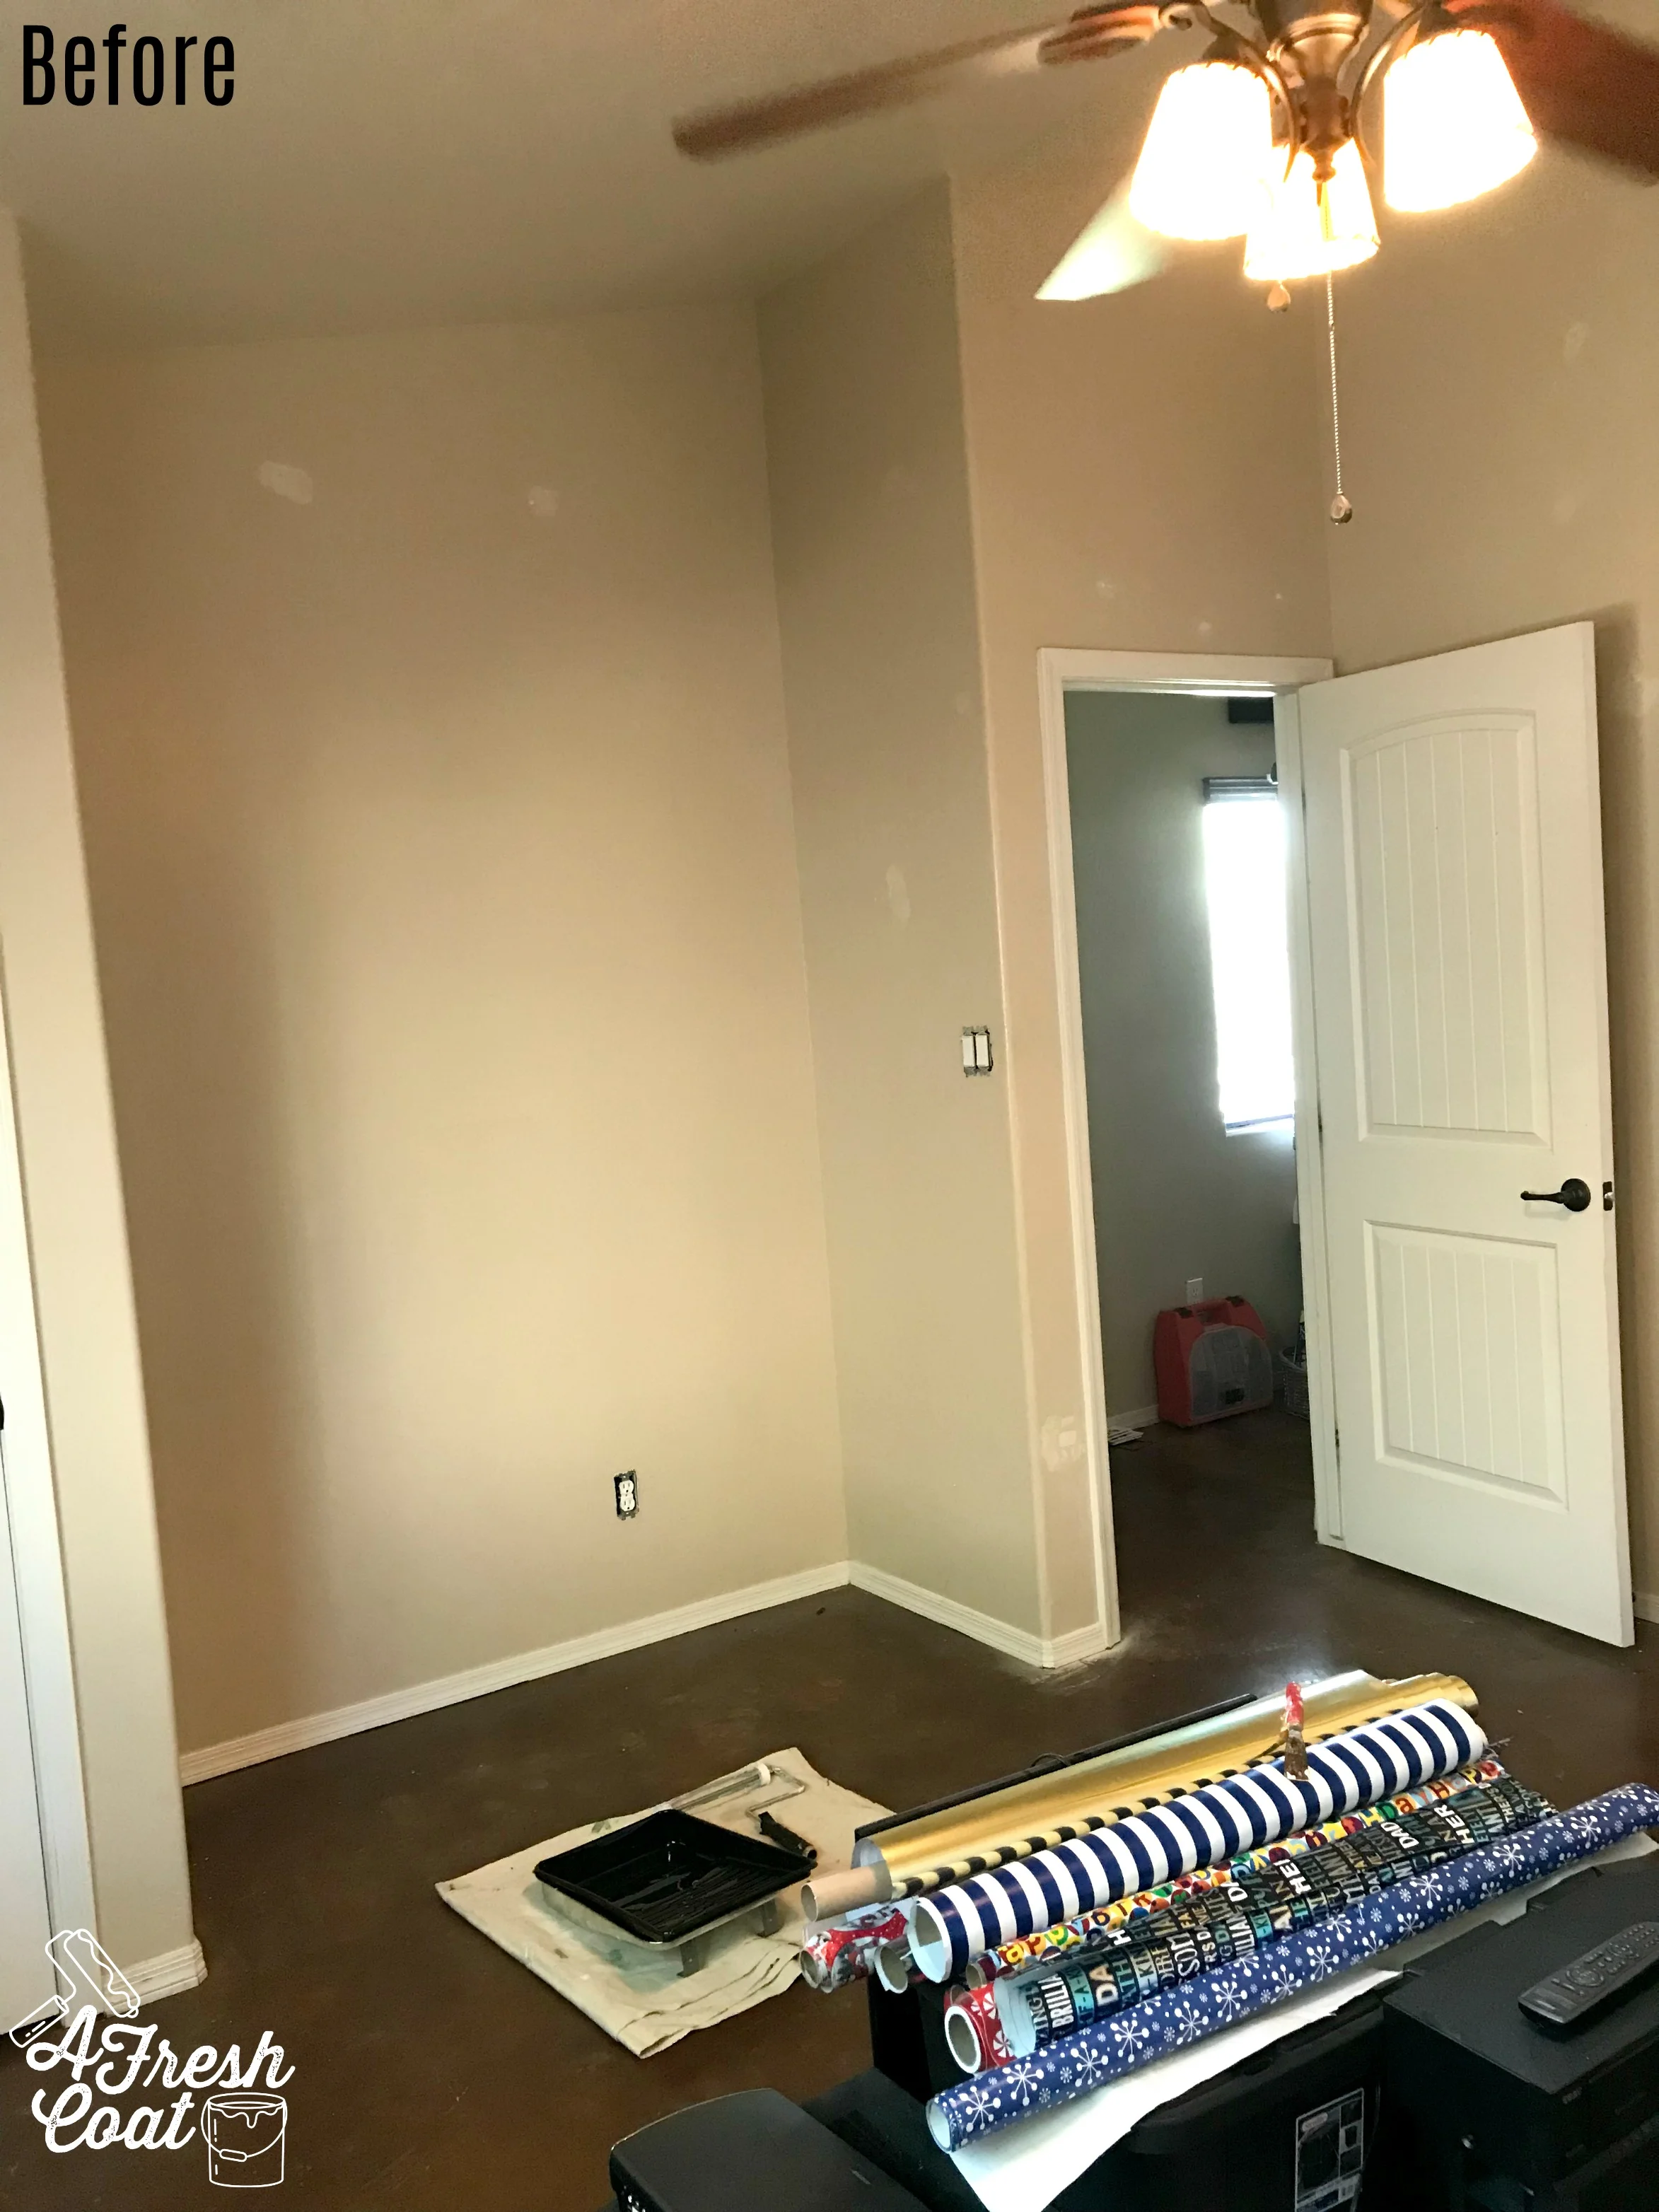
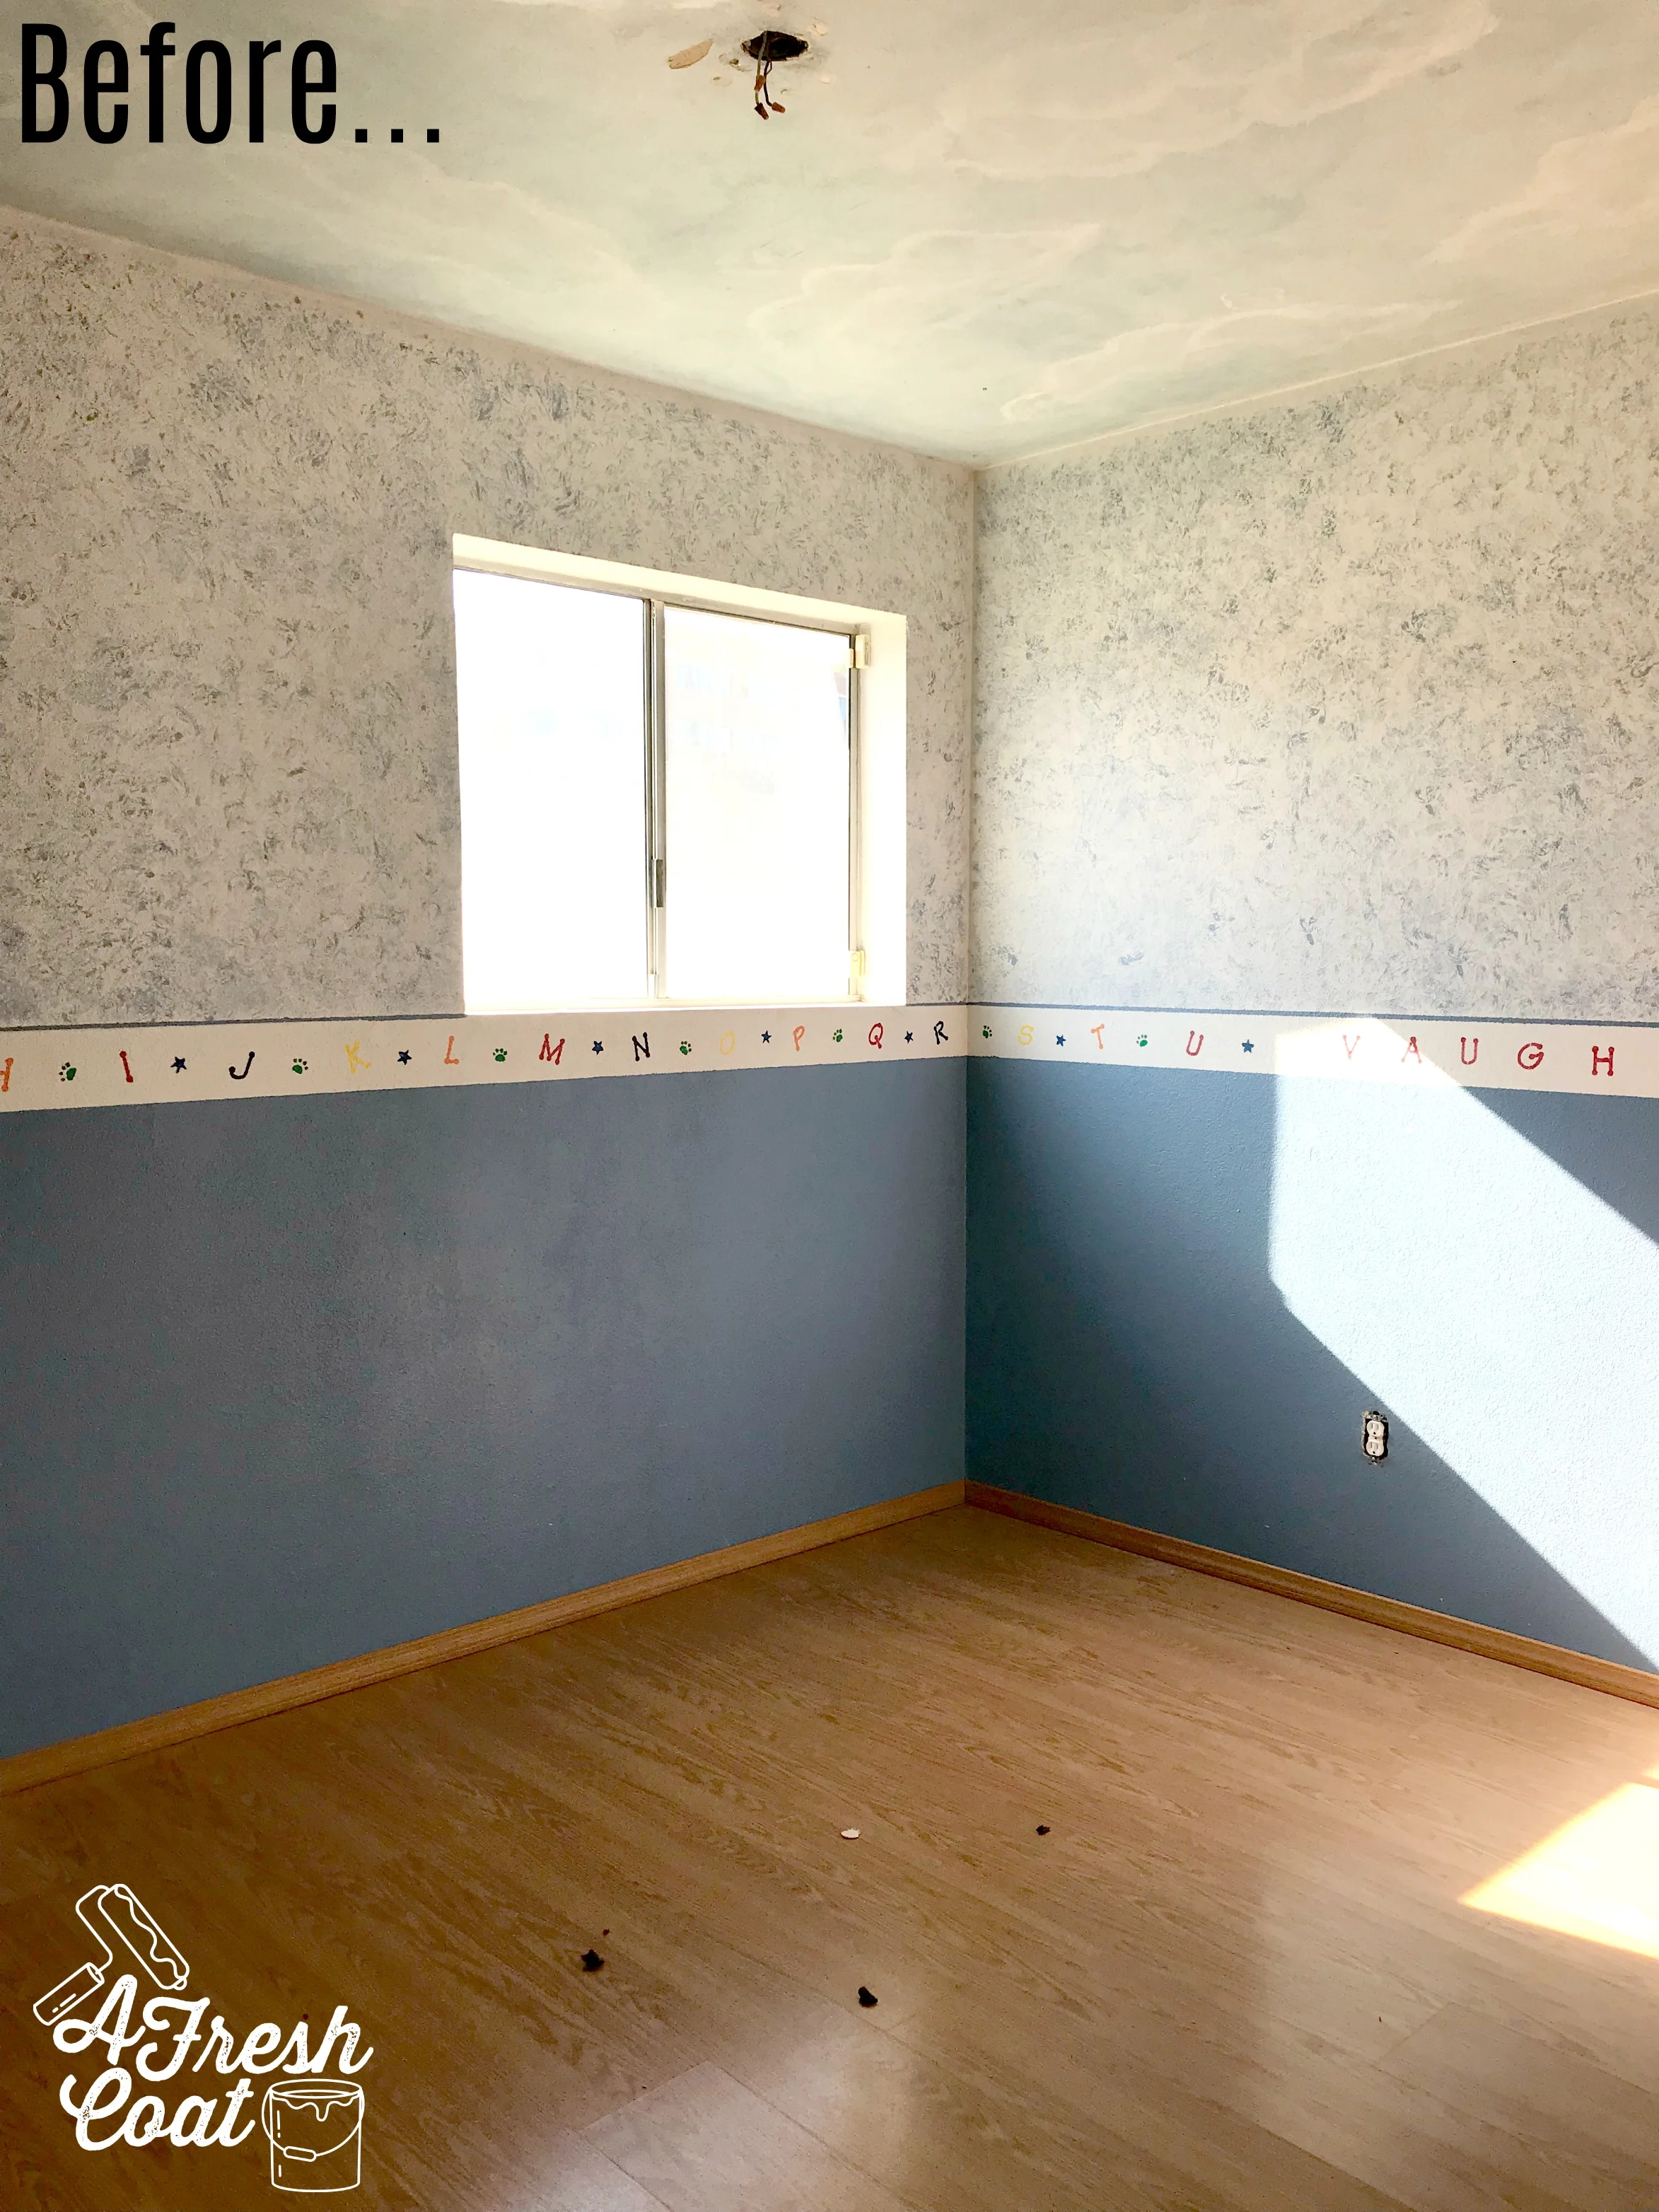
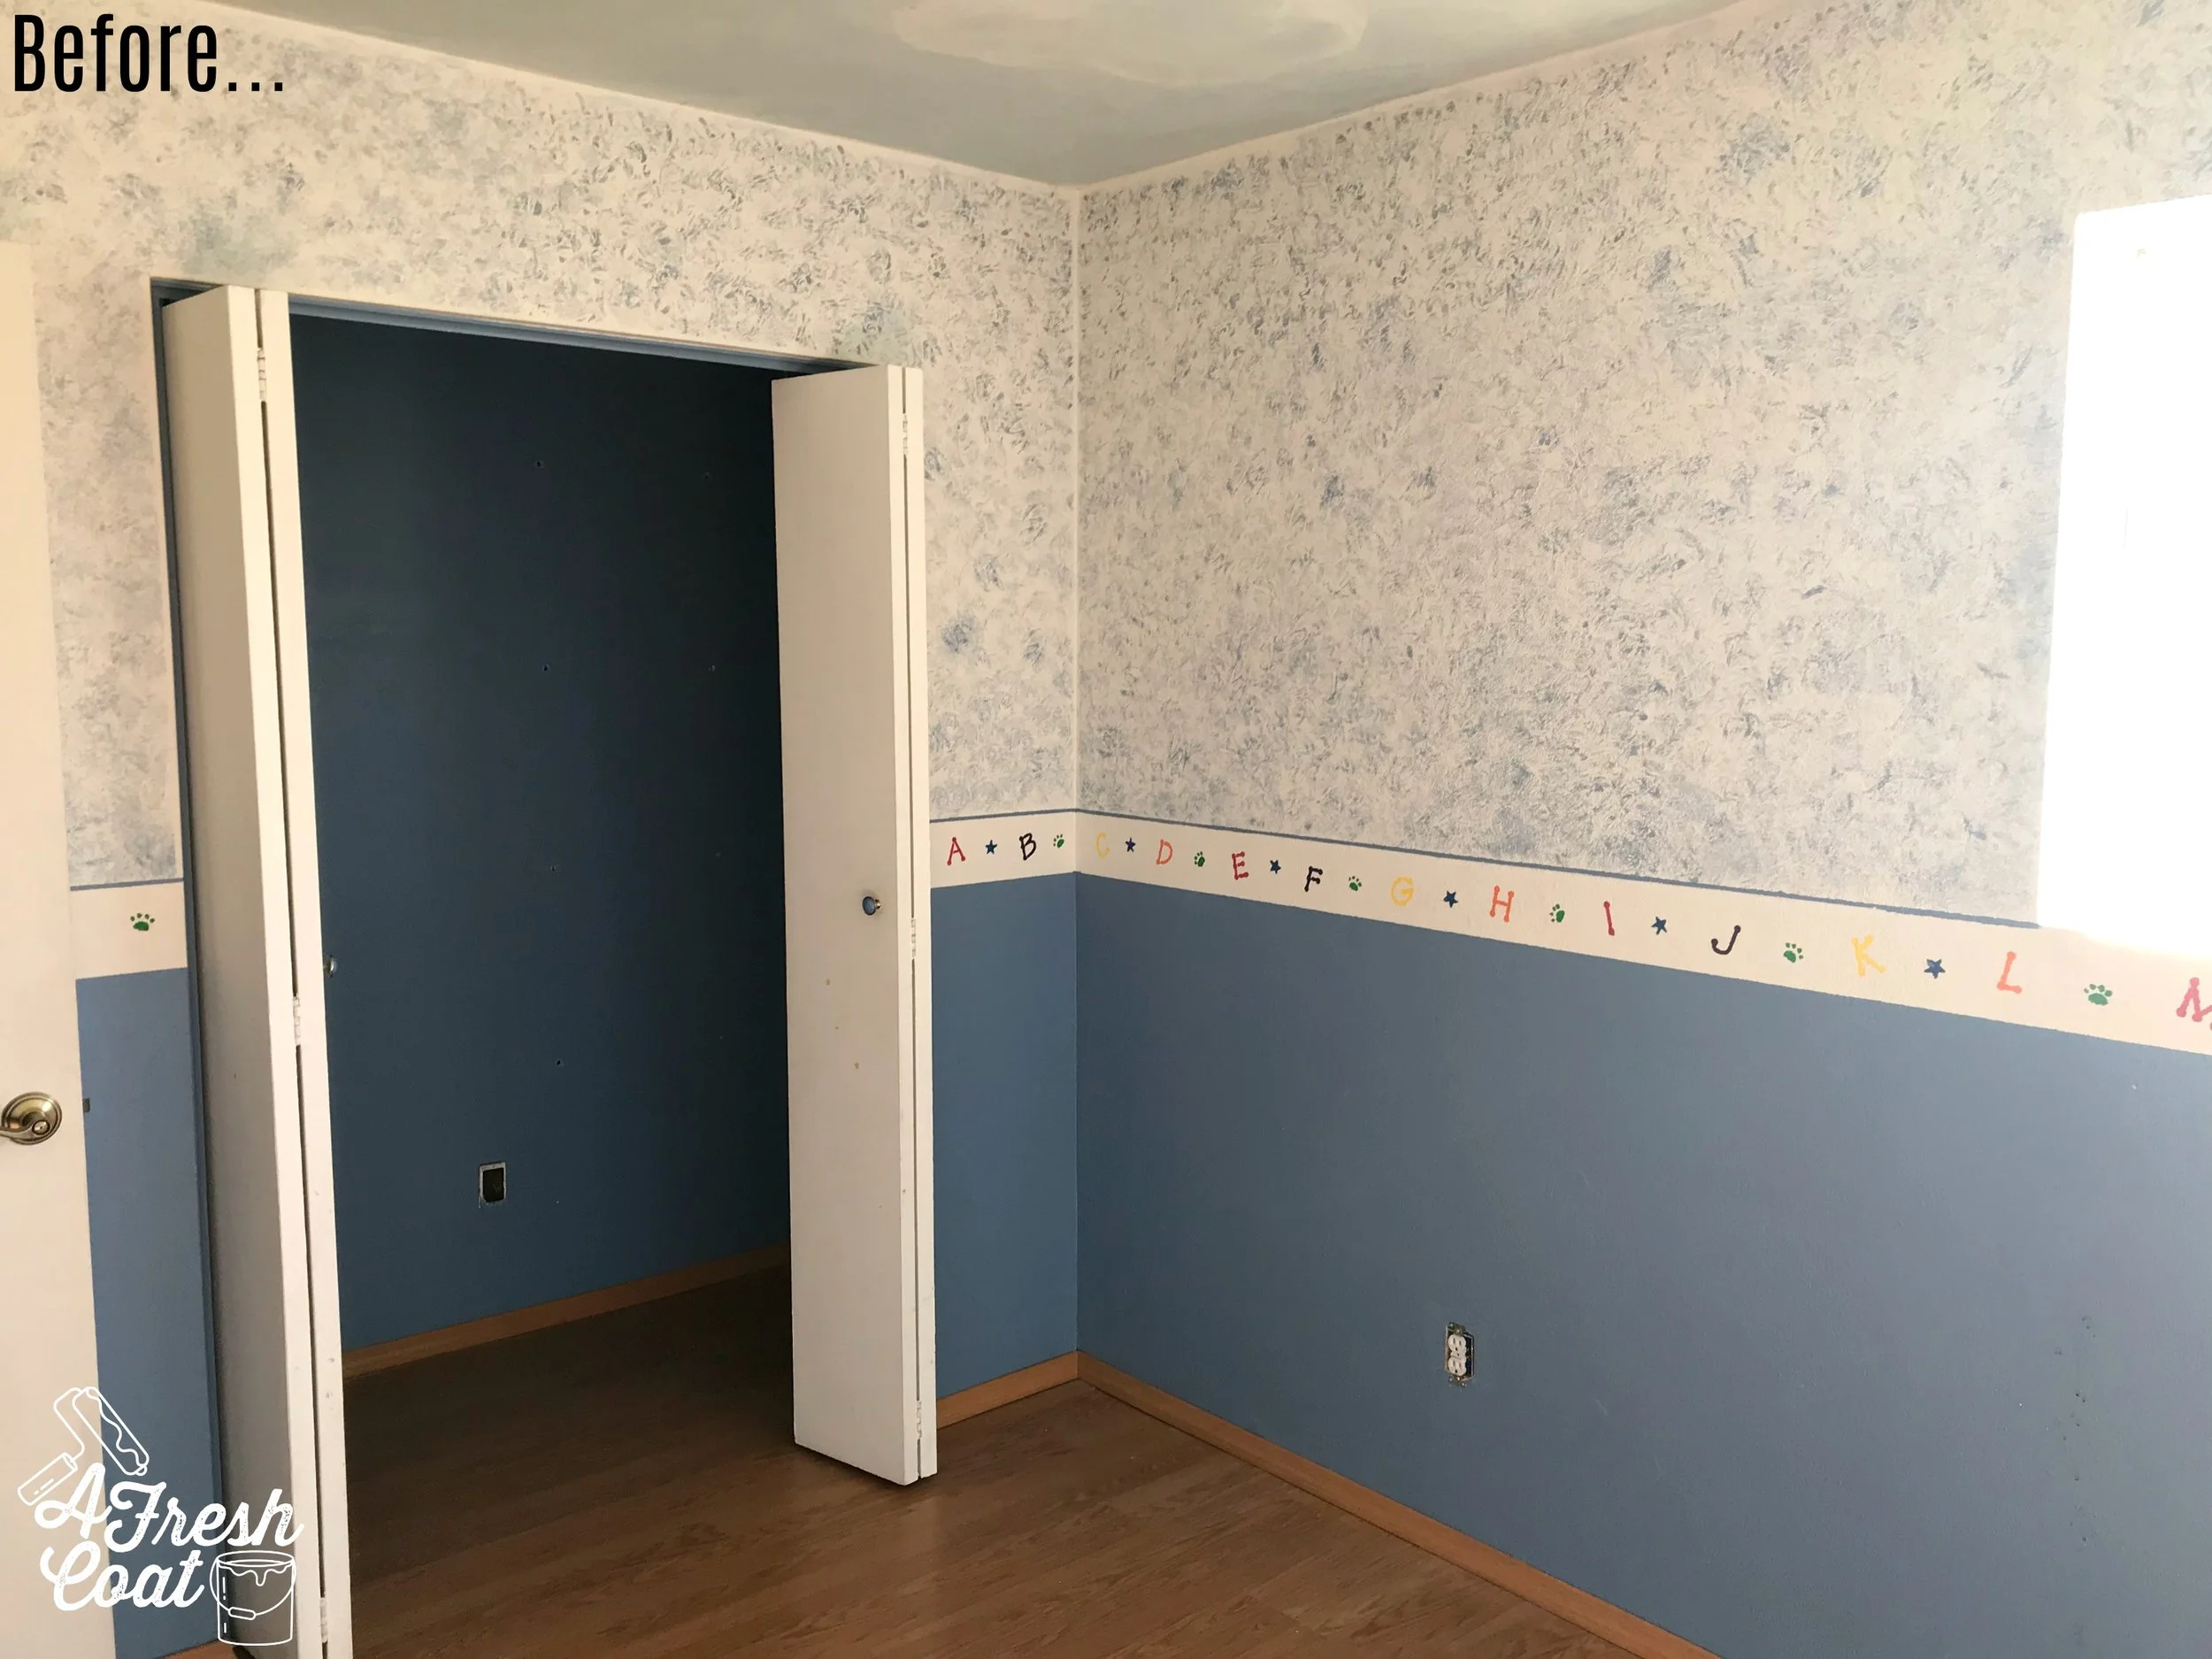
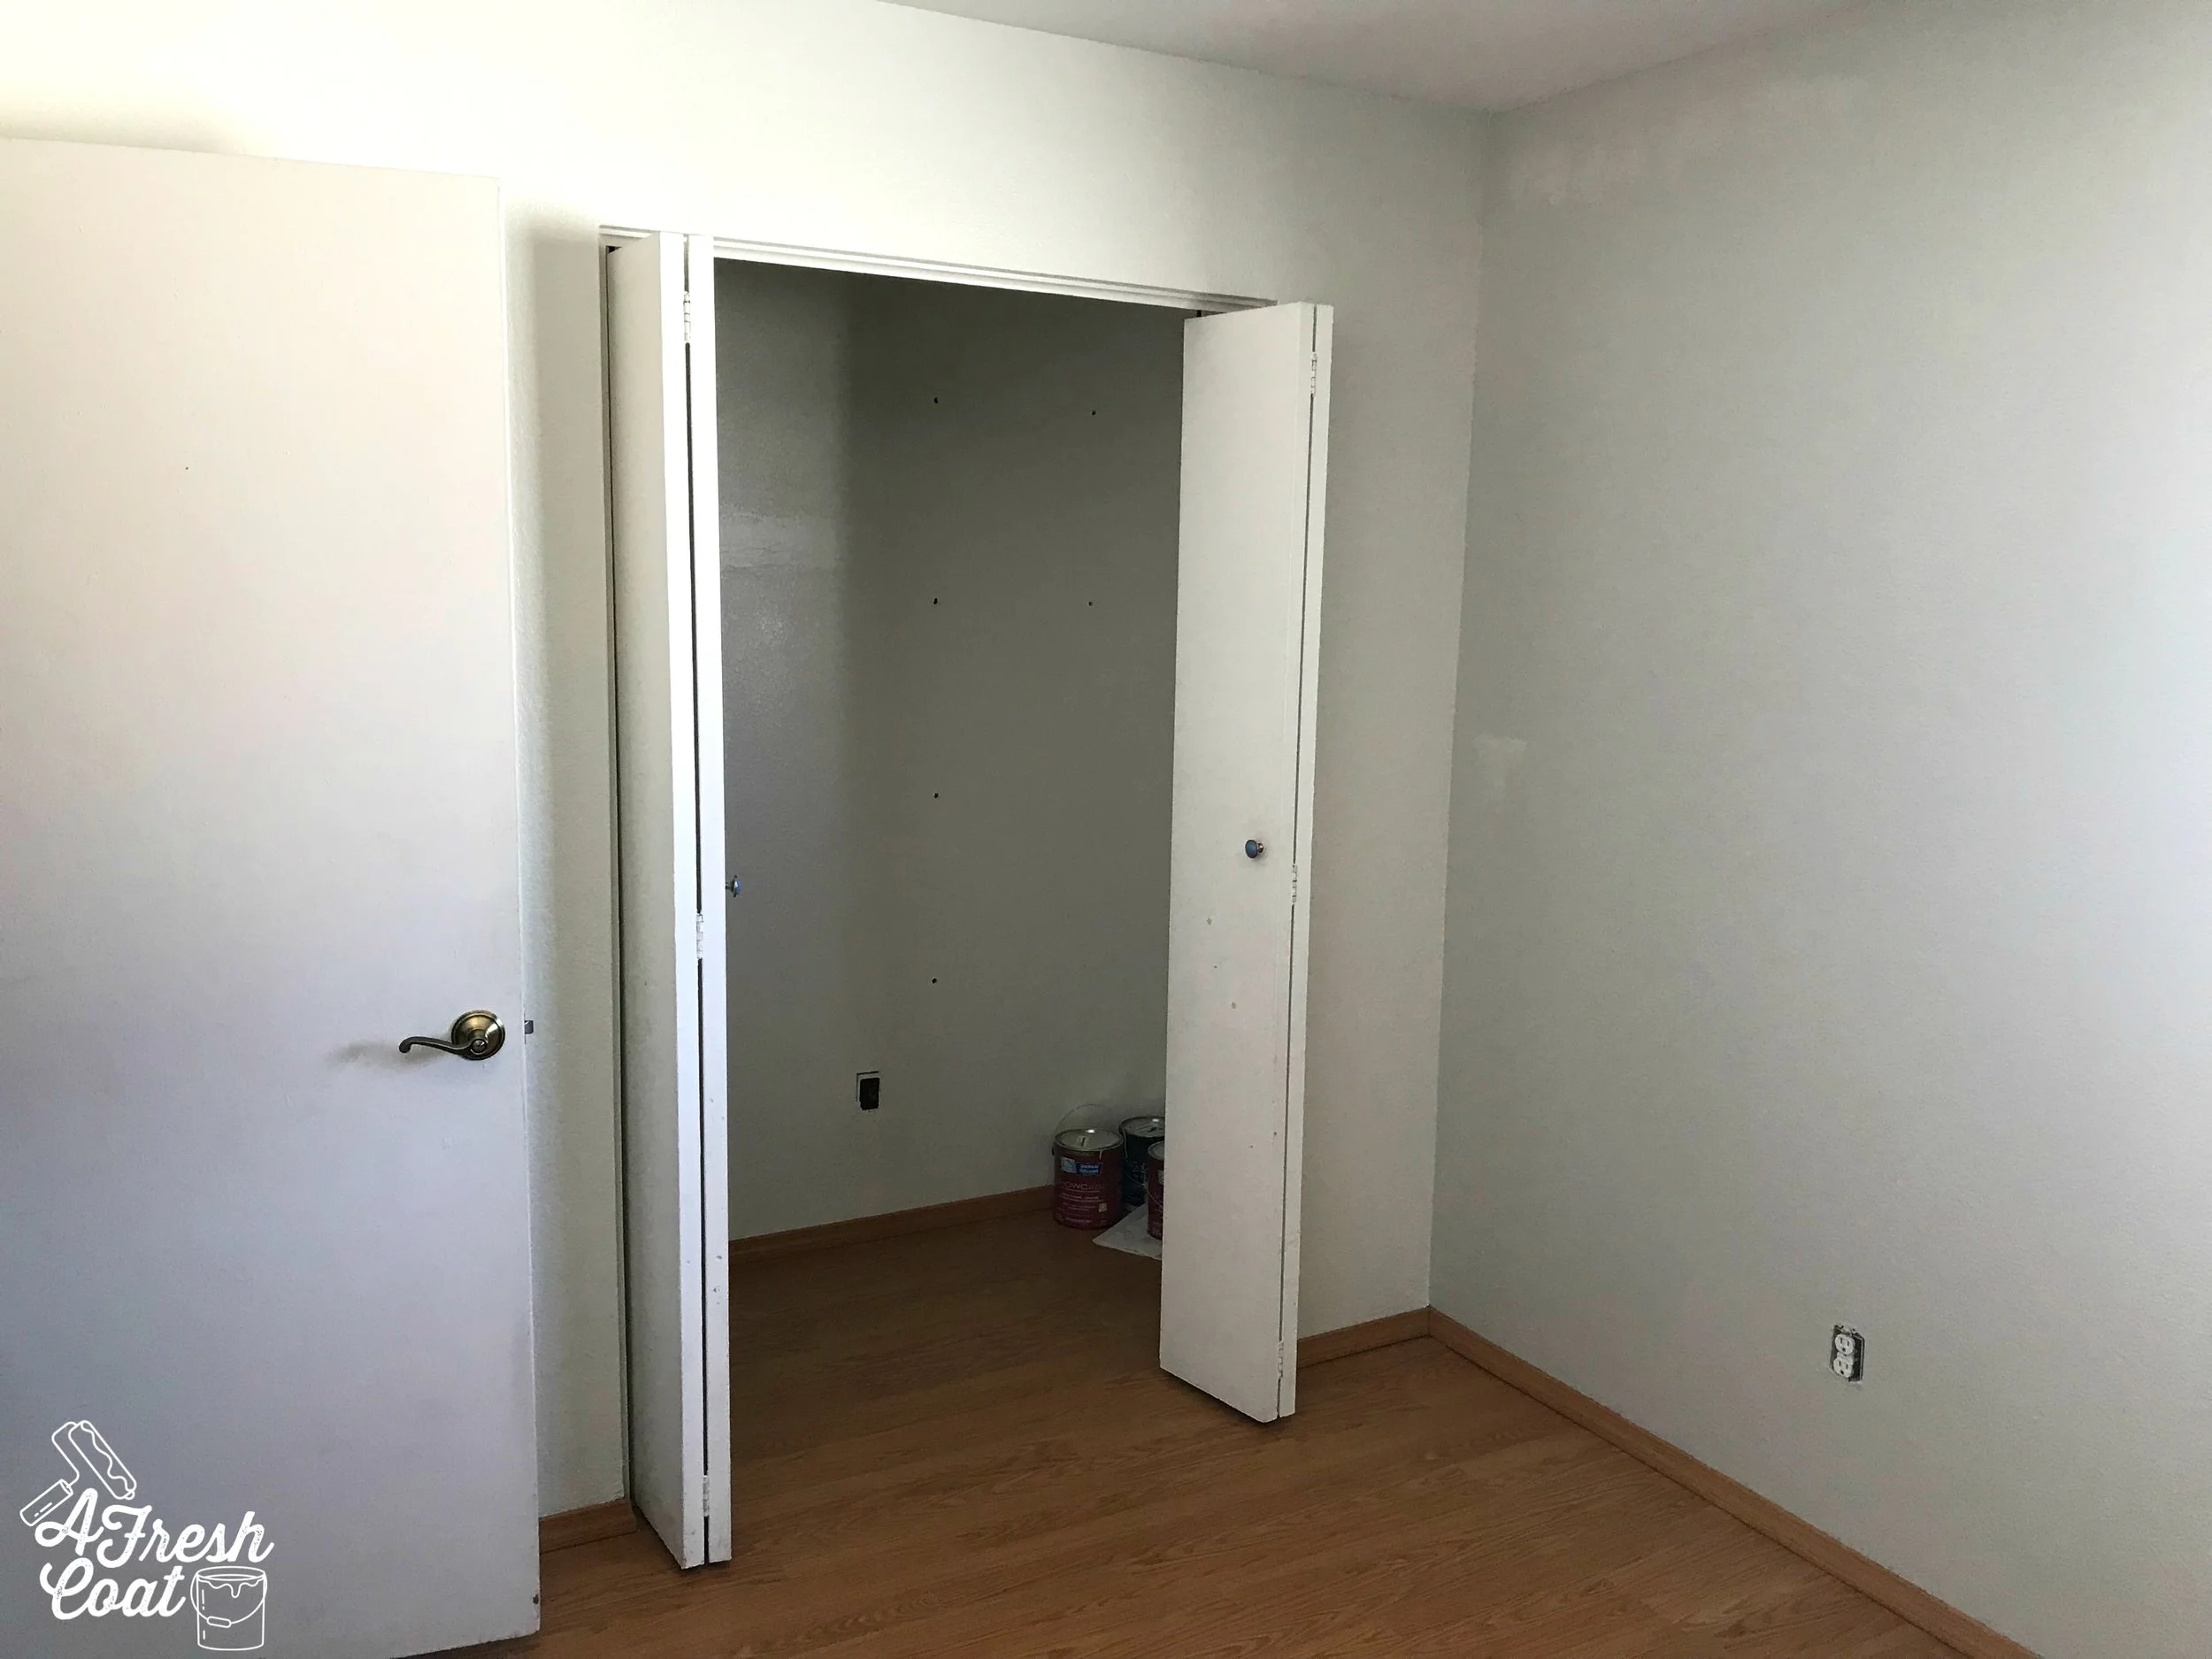
We started off with this space. Already, super cool with it’s loft and ladder, we just needed to spruce up the paint, add in a feature wall, and create a desk system that would compliment the existing furniture.

Here’s the before pic:

COA5.jpg
COA 6.jpg

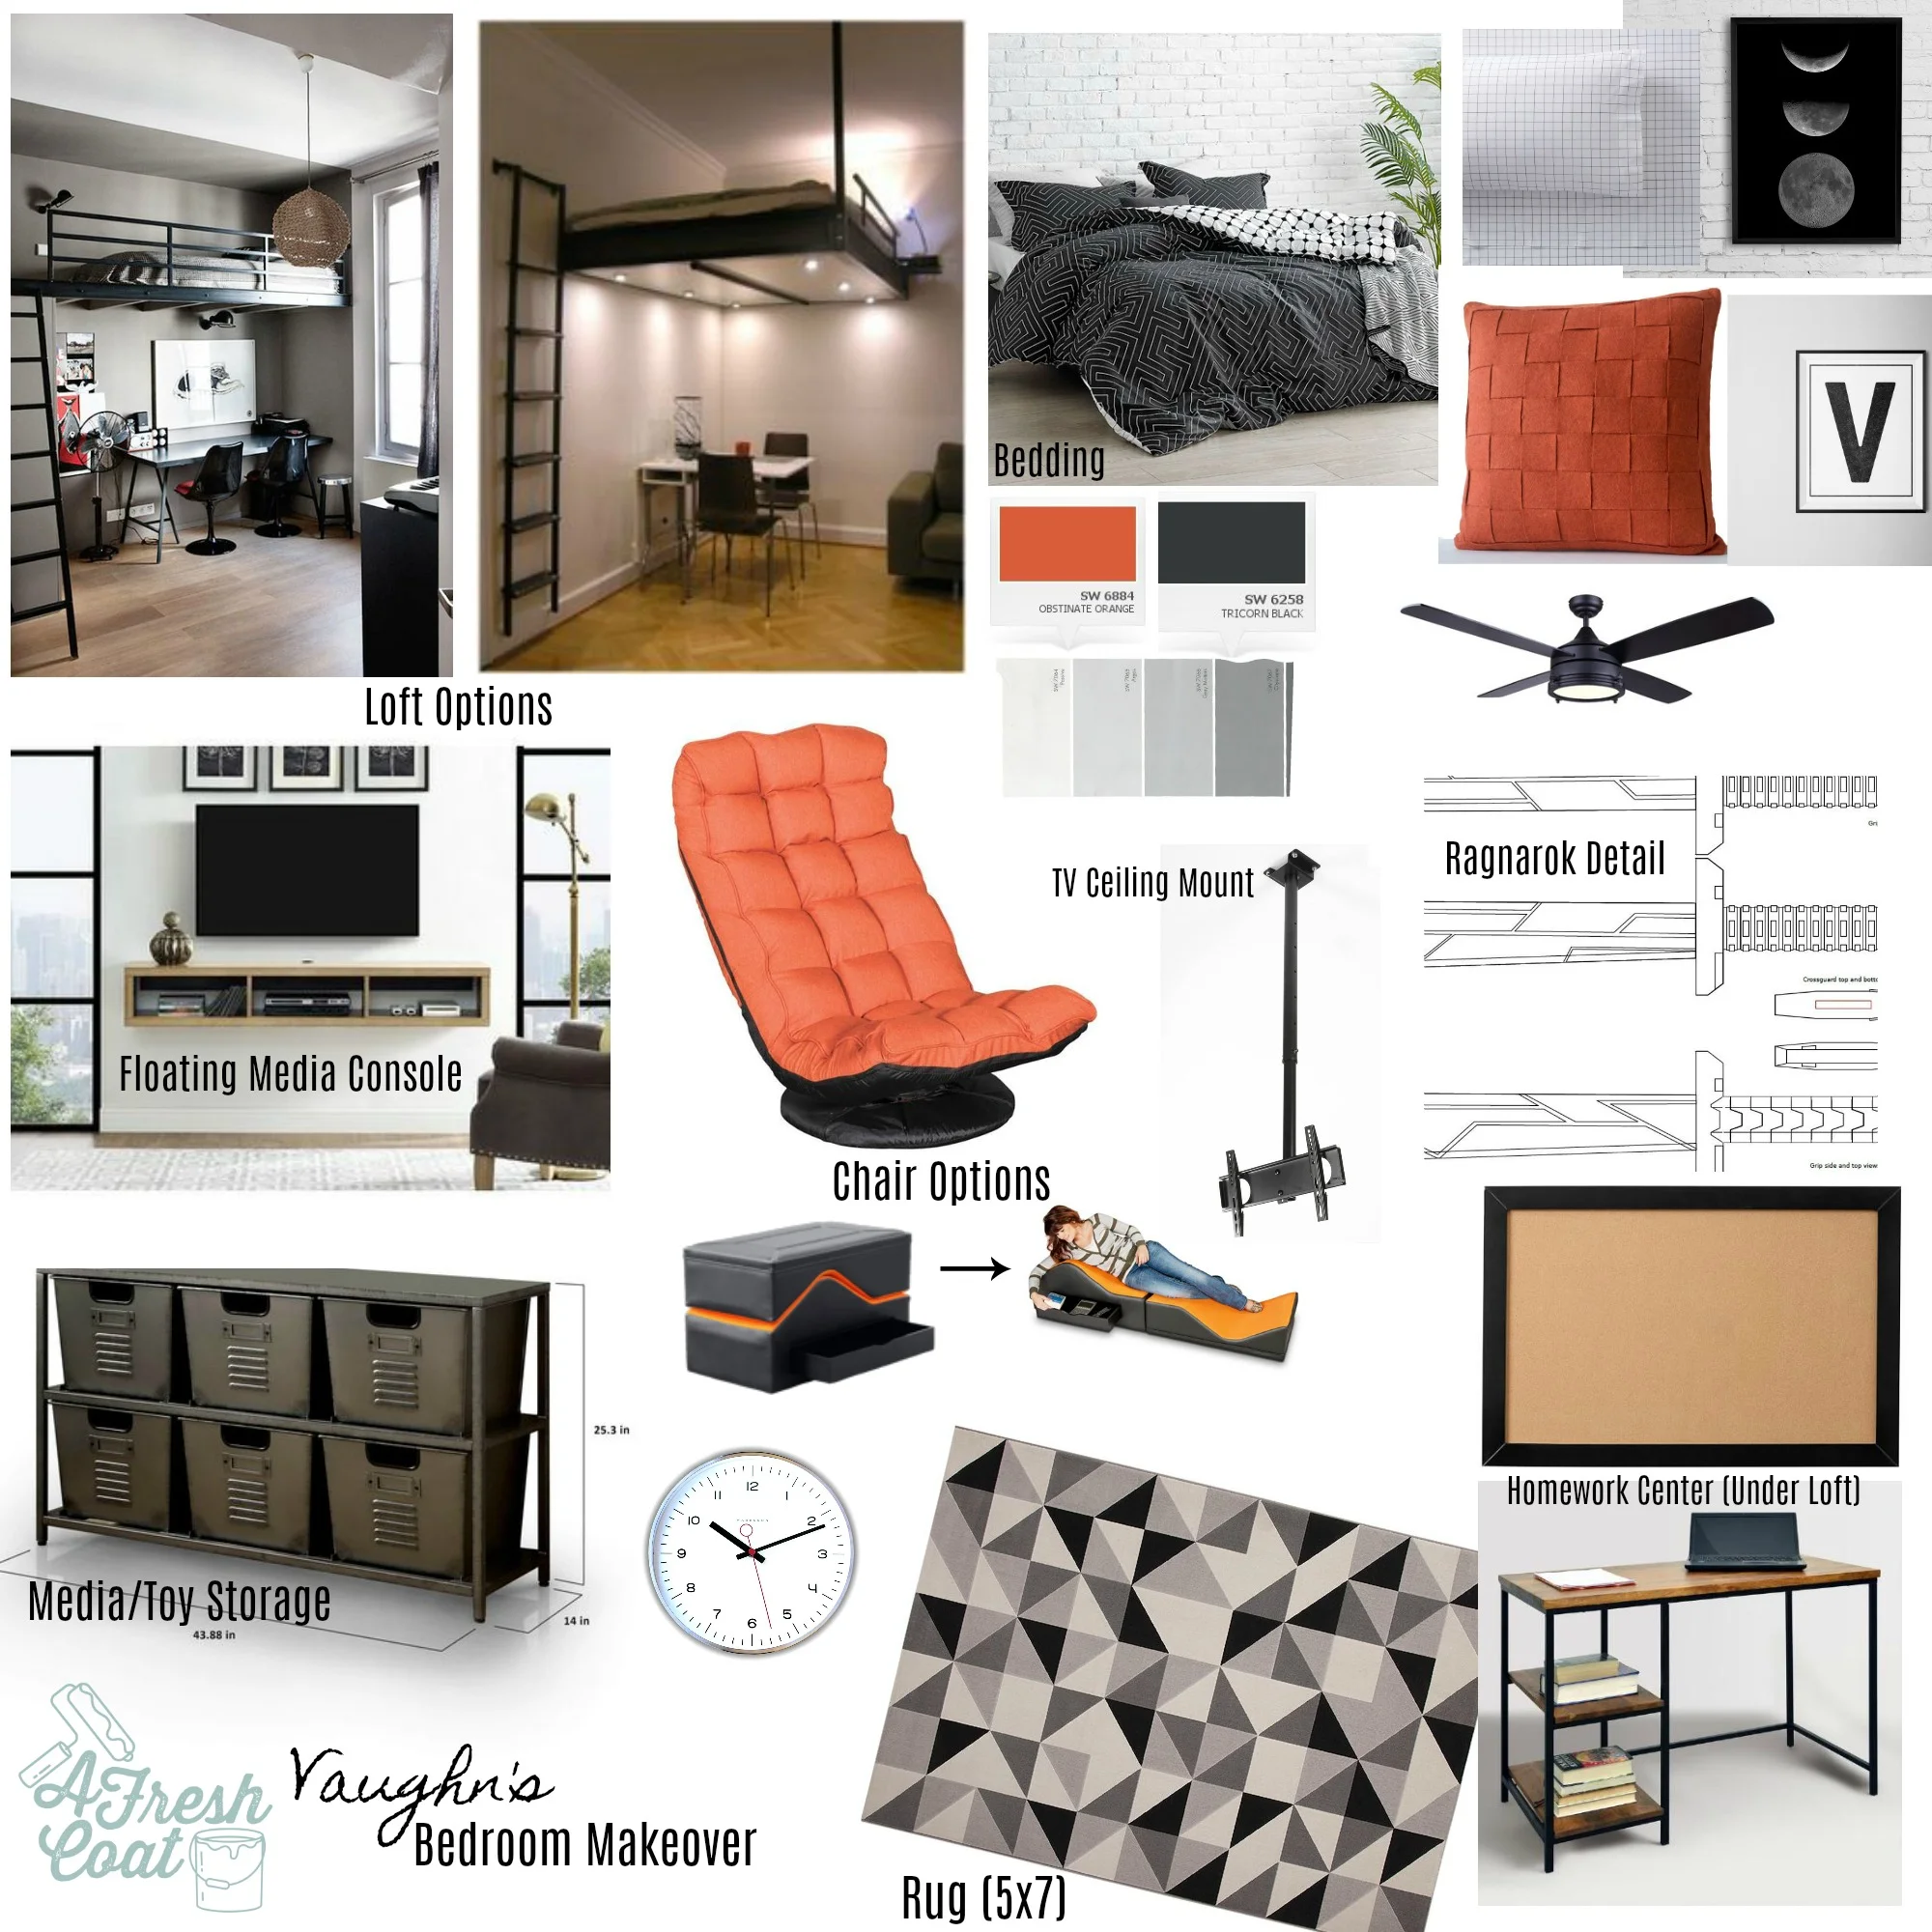
“B” also needed new bedding, wall art, and wanted to implement some sweet LED lighting.

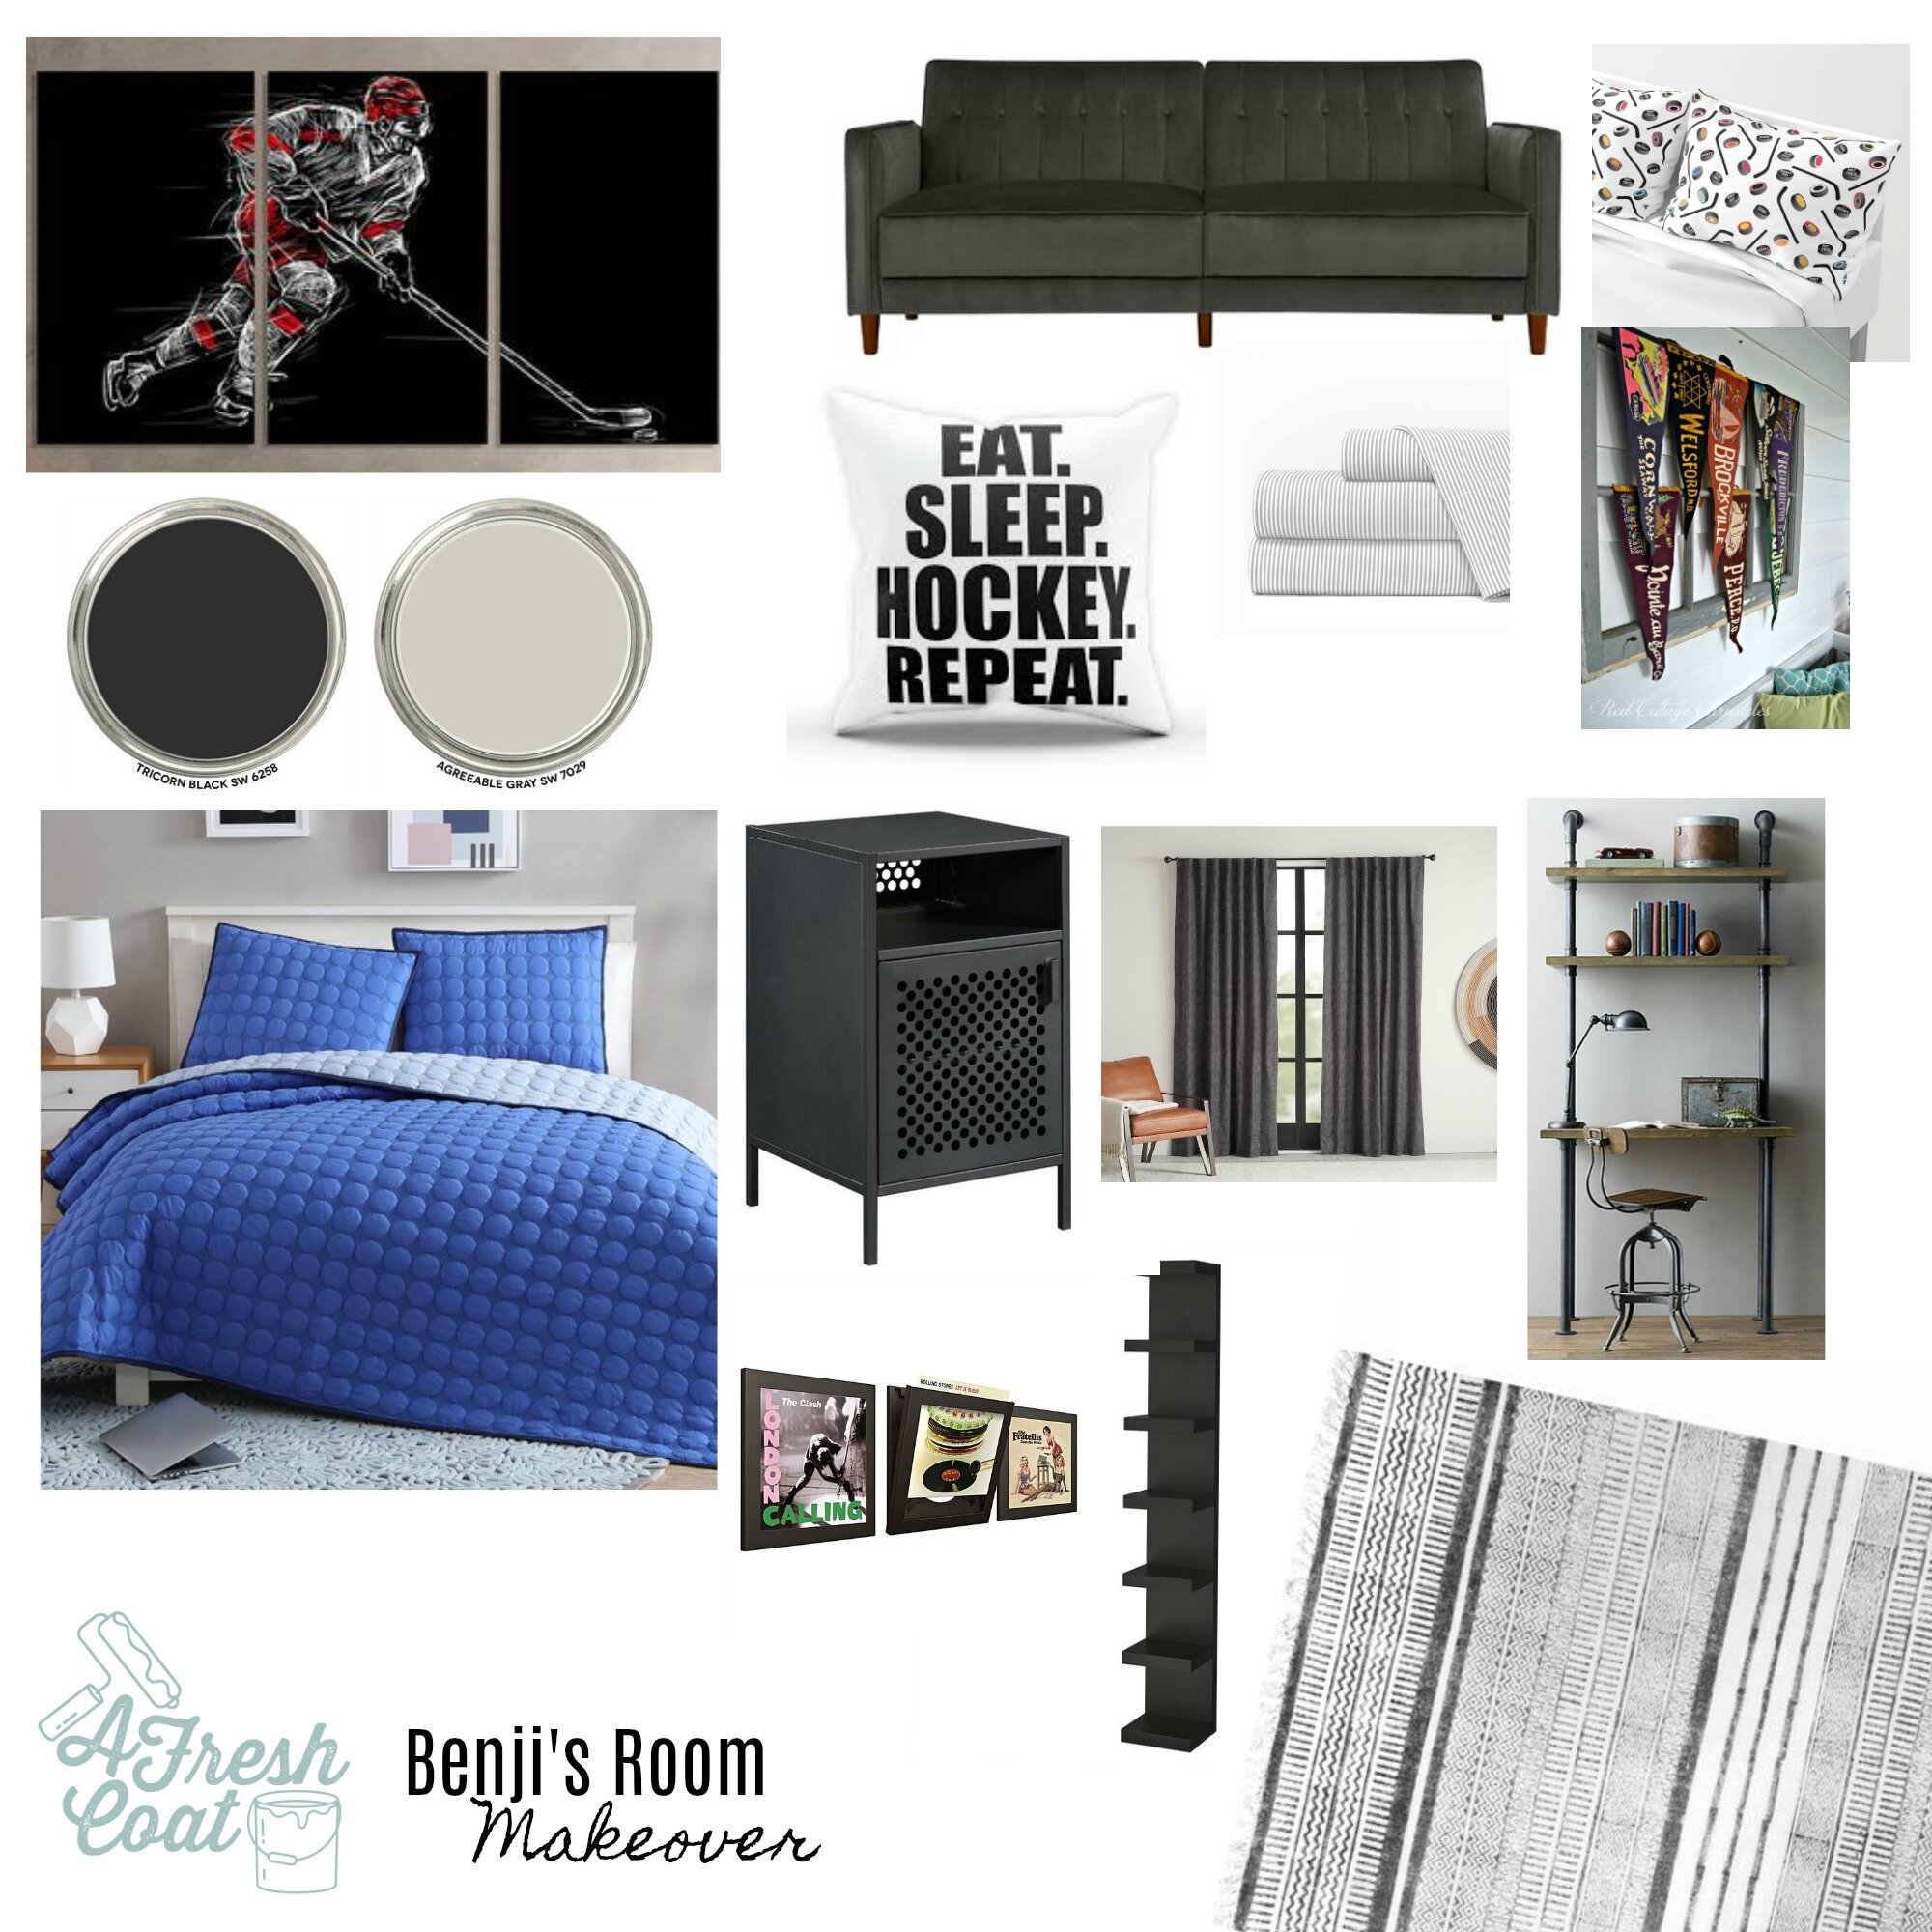
You know how it works. It starts with the vision board.

brody's bedroom.jpg

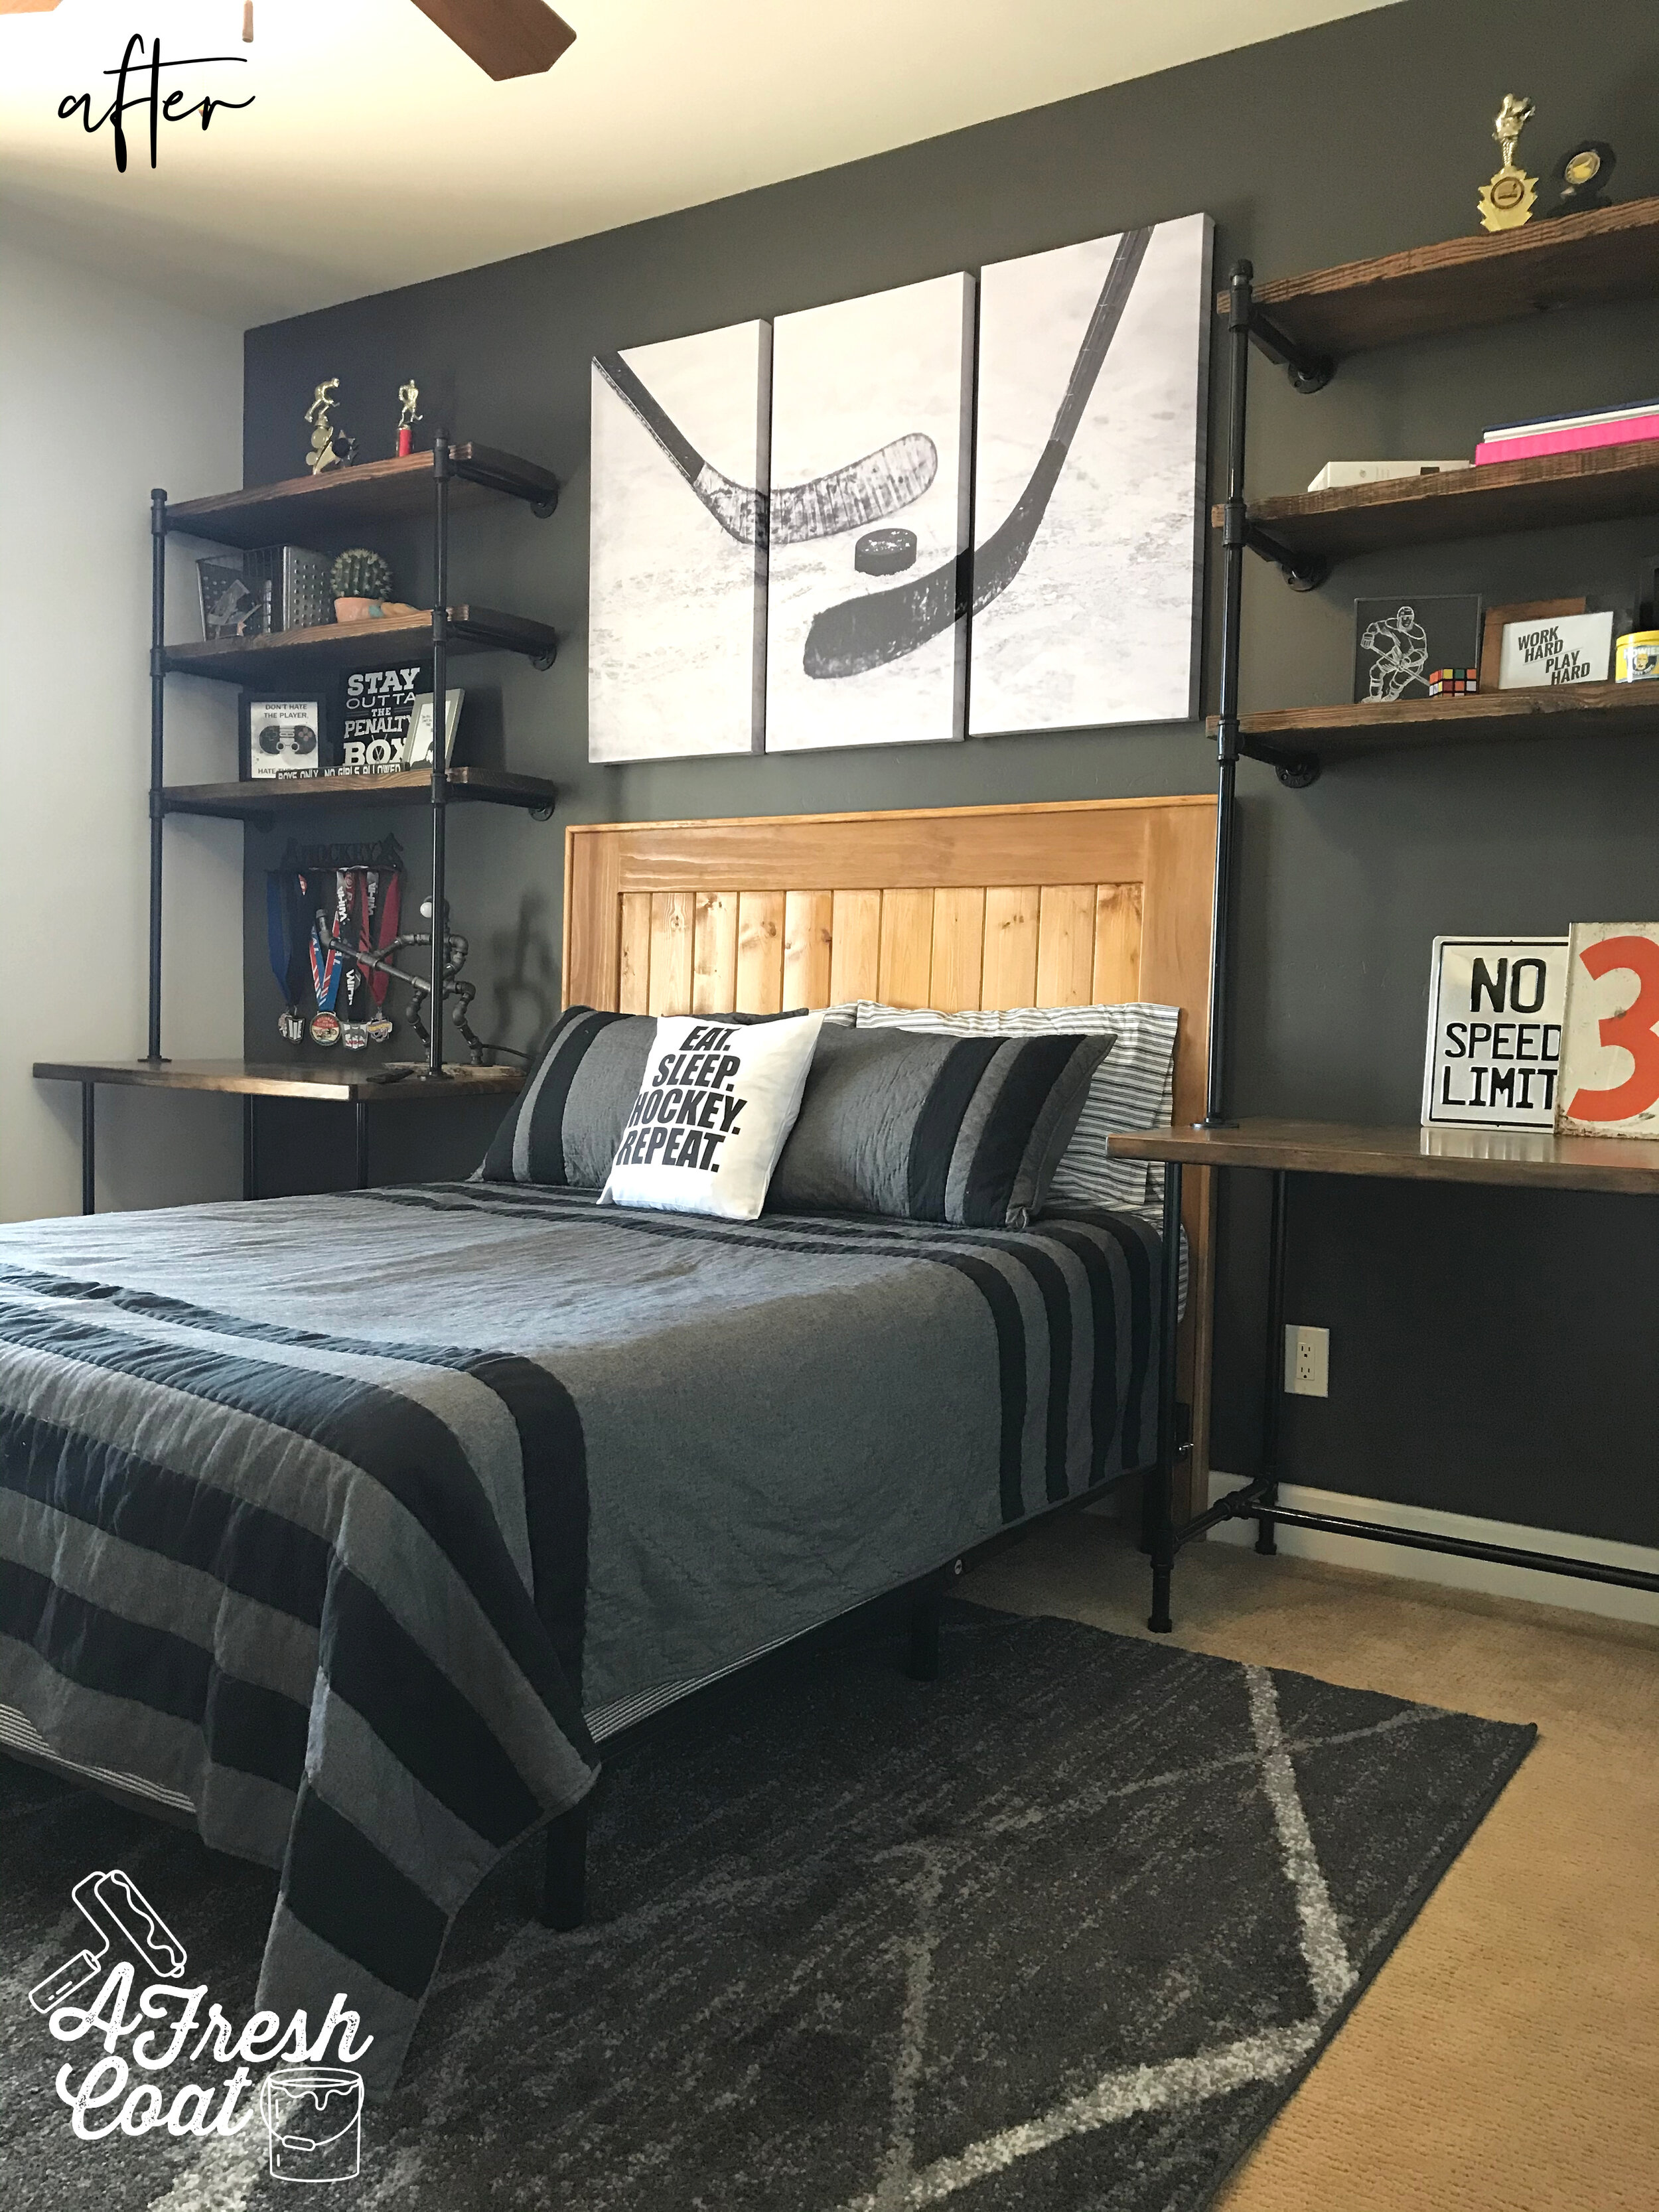
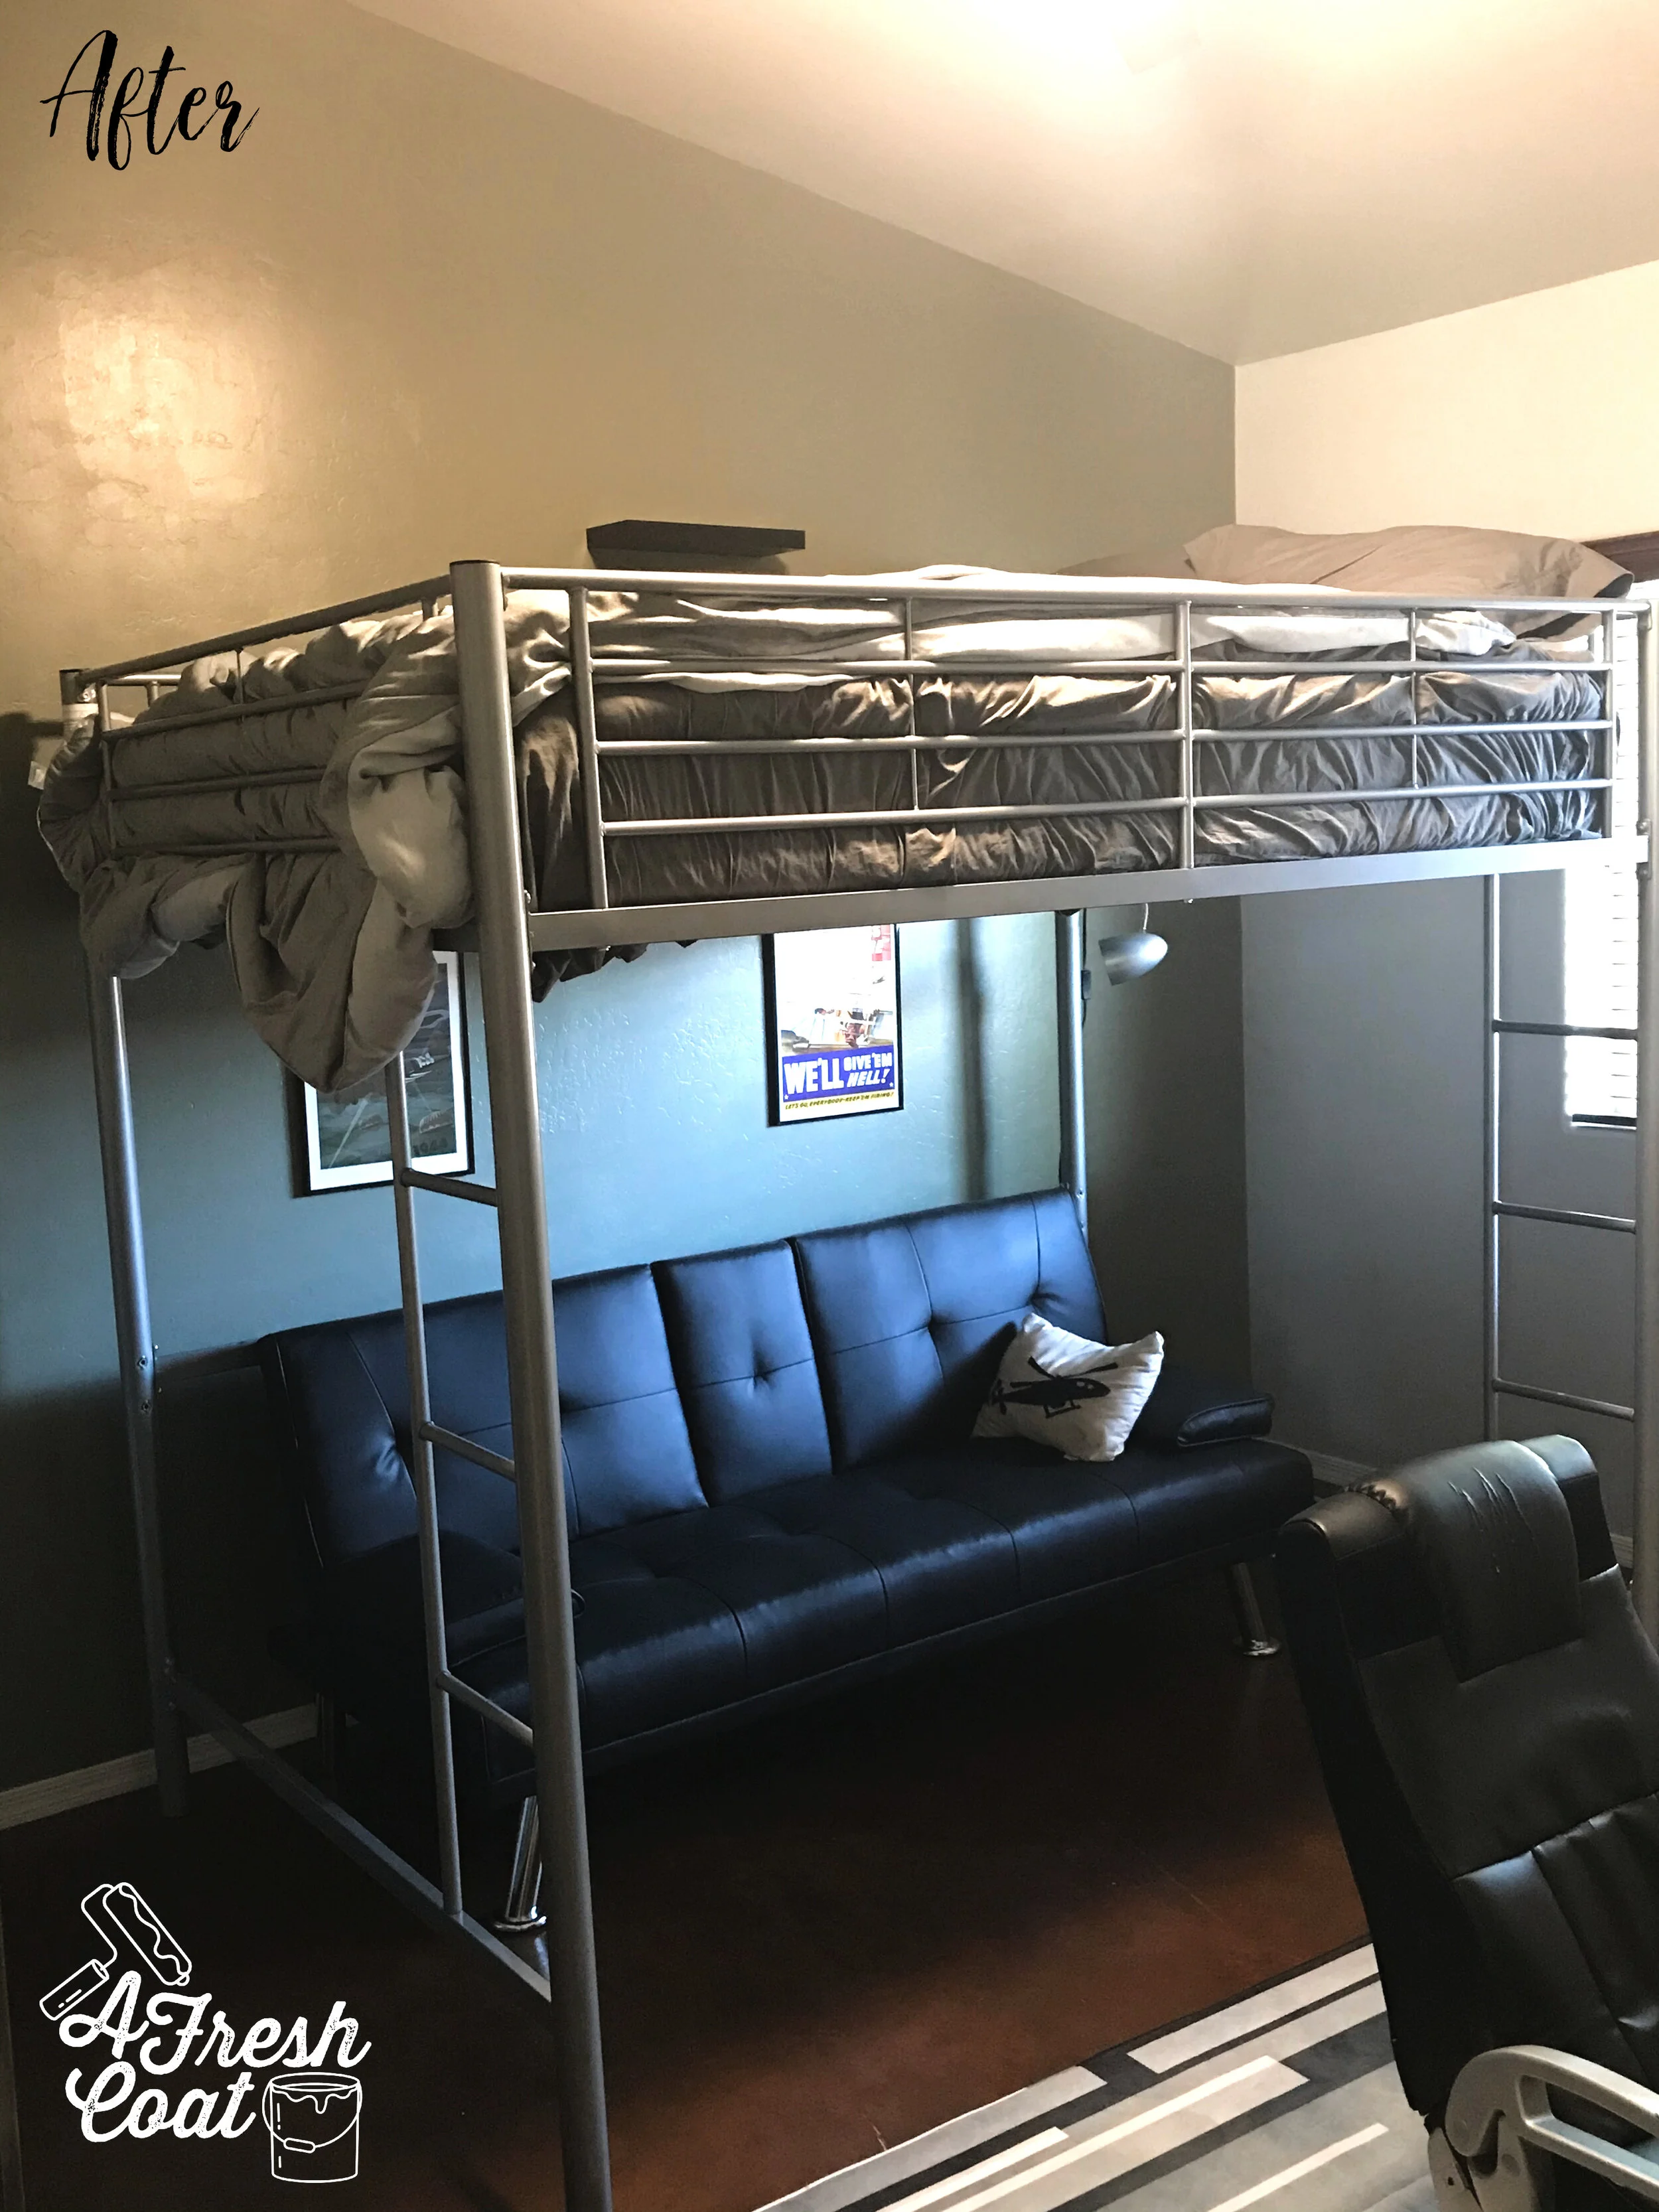
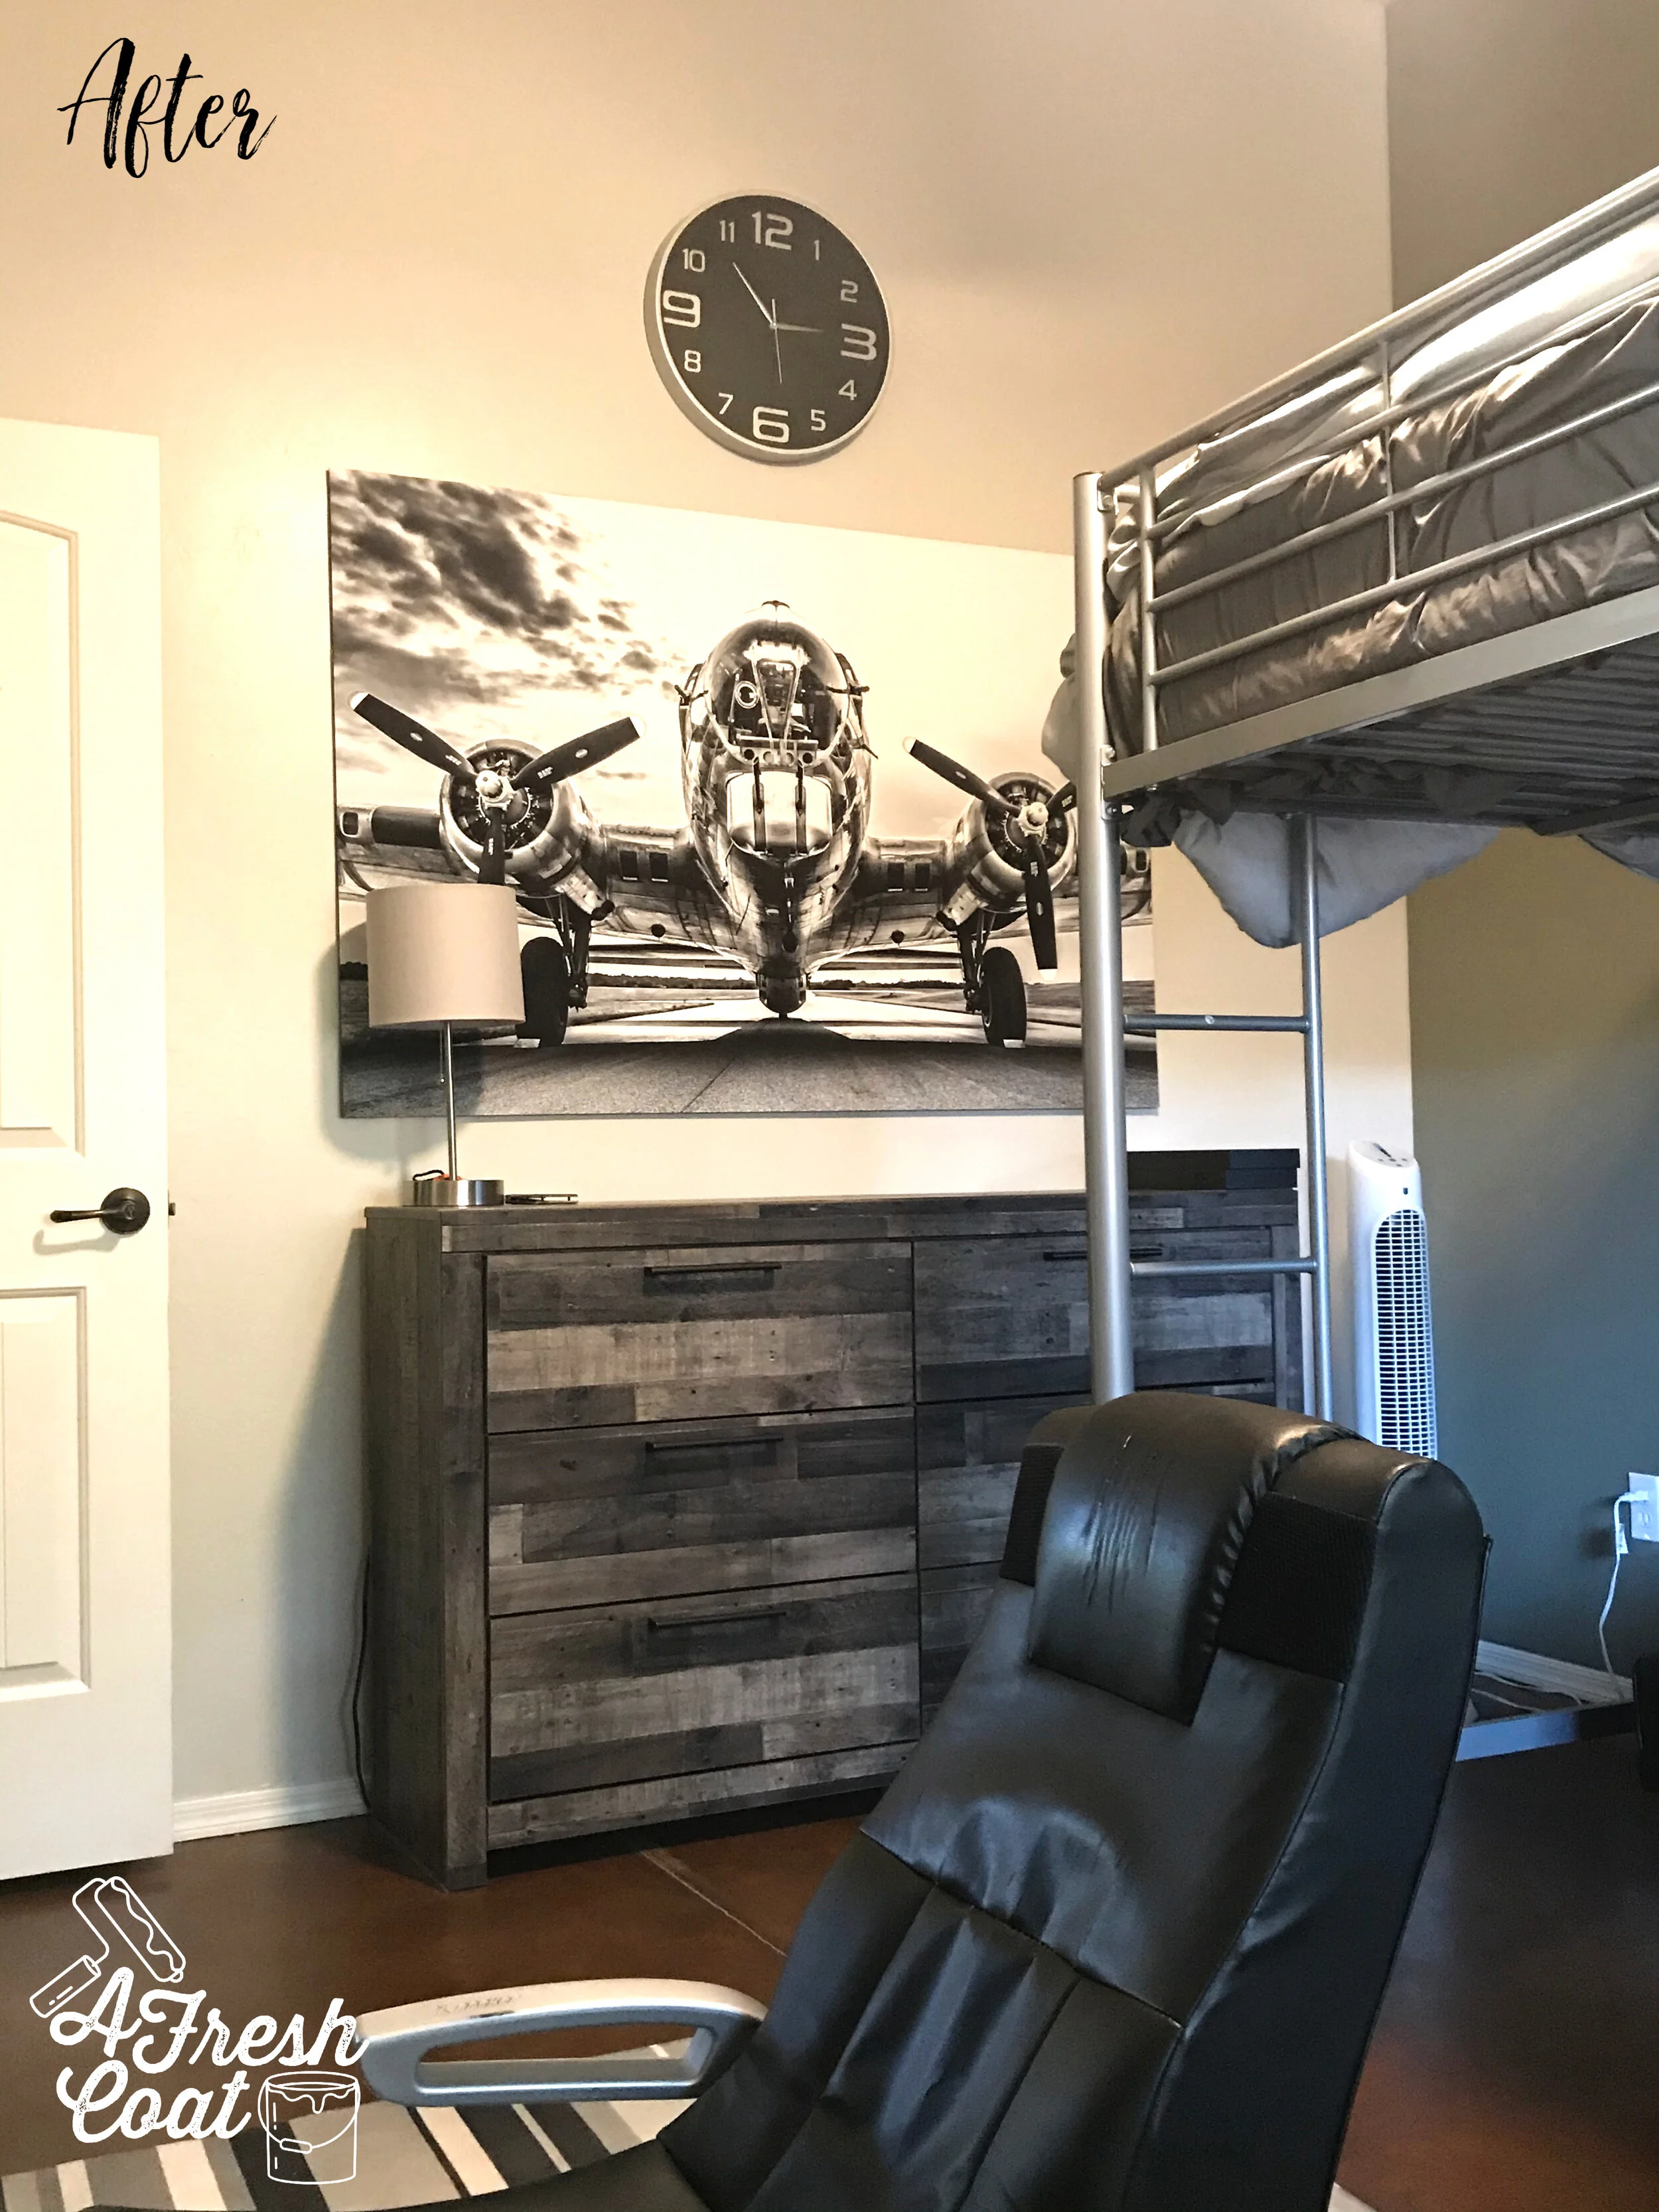
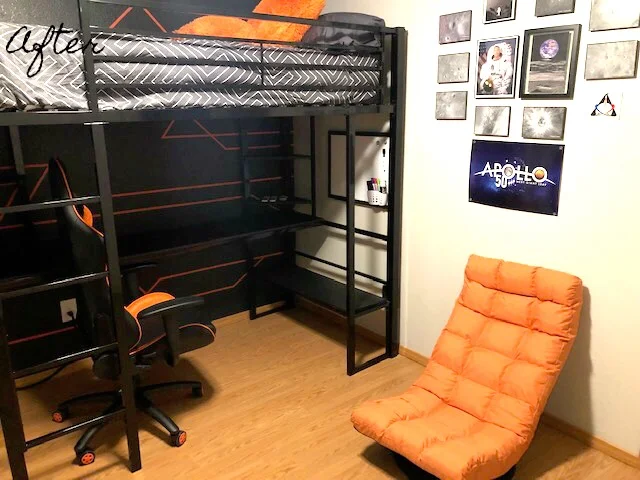
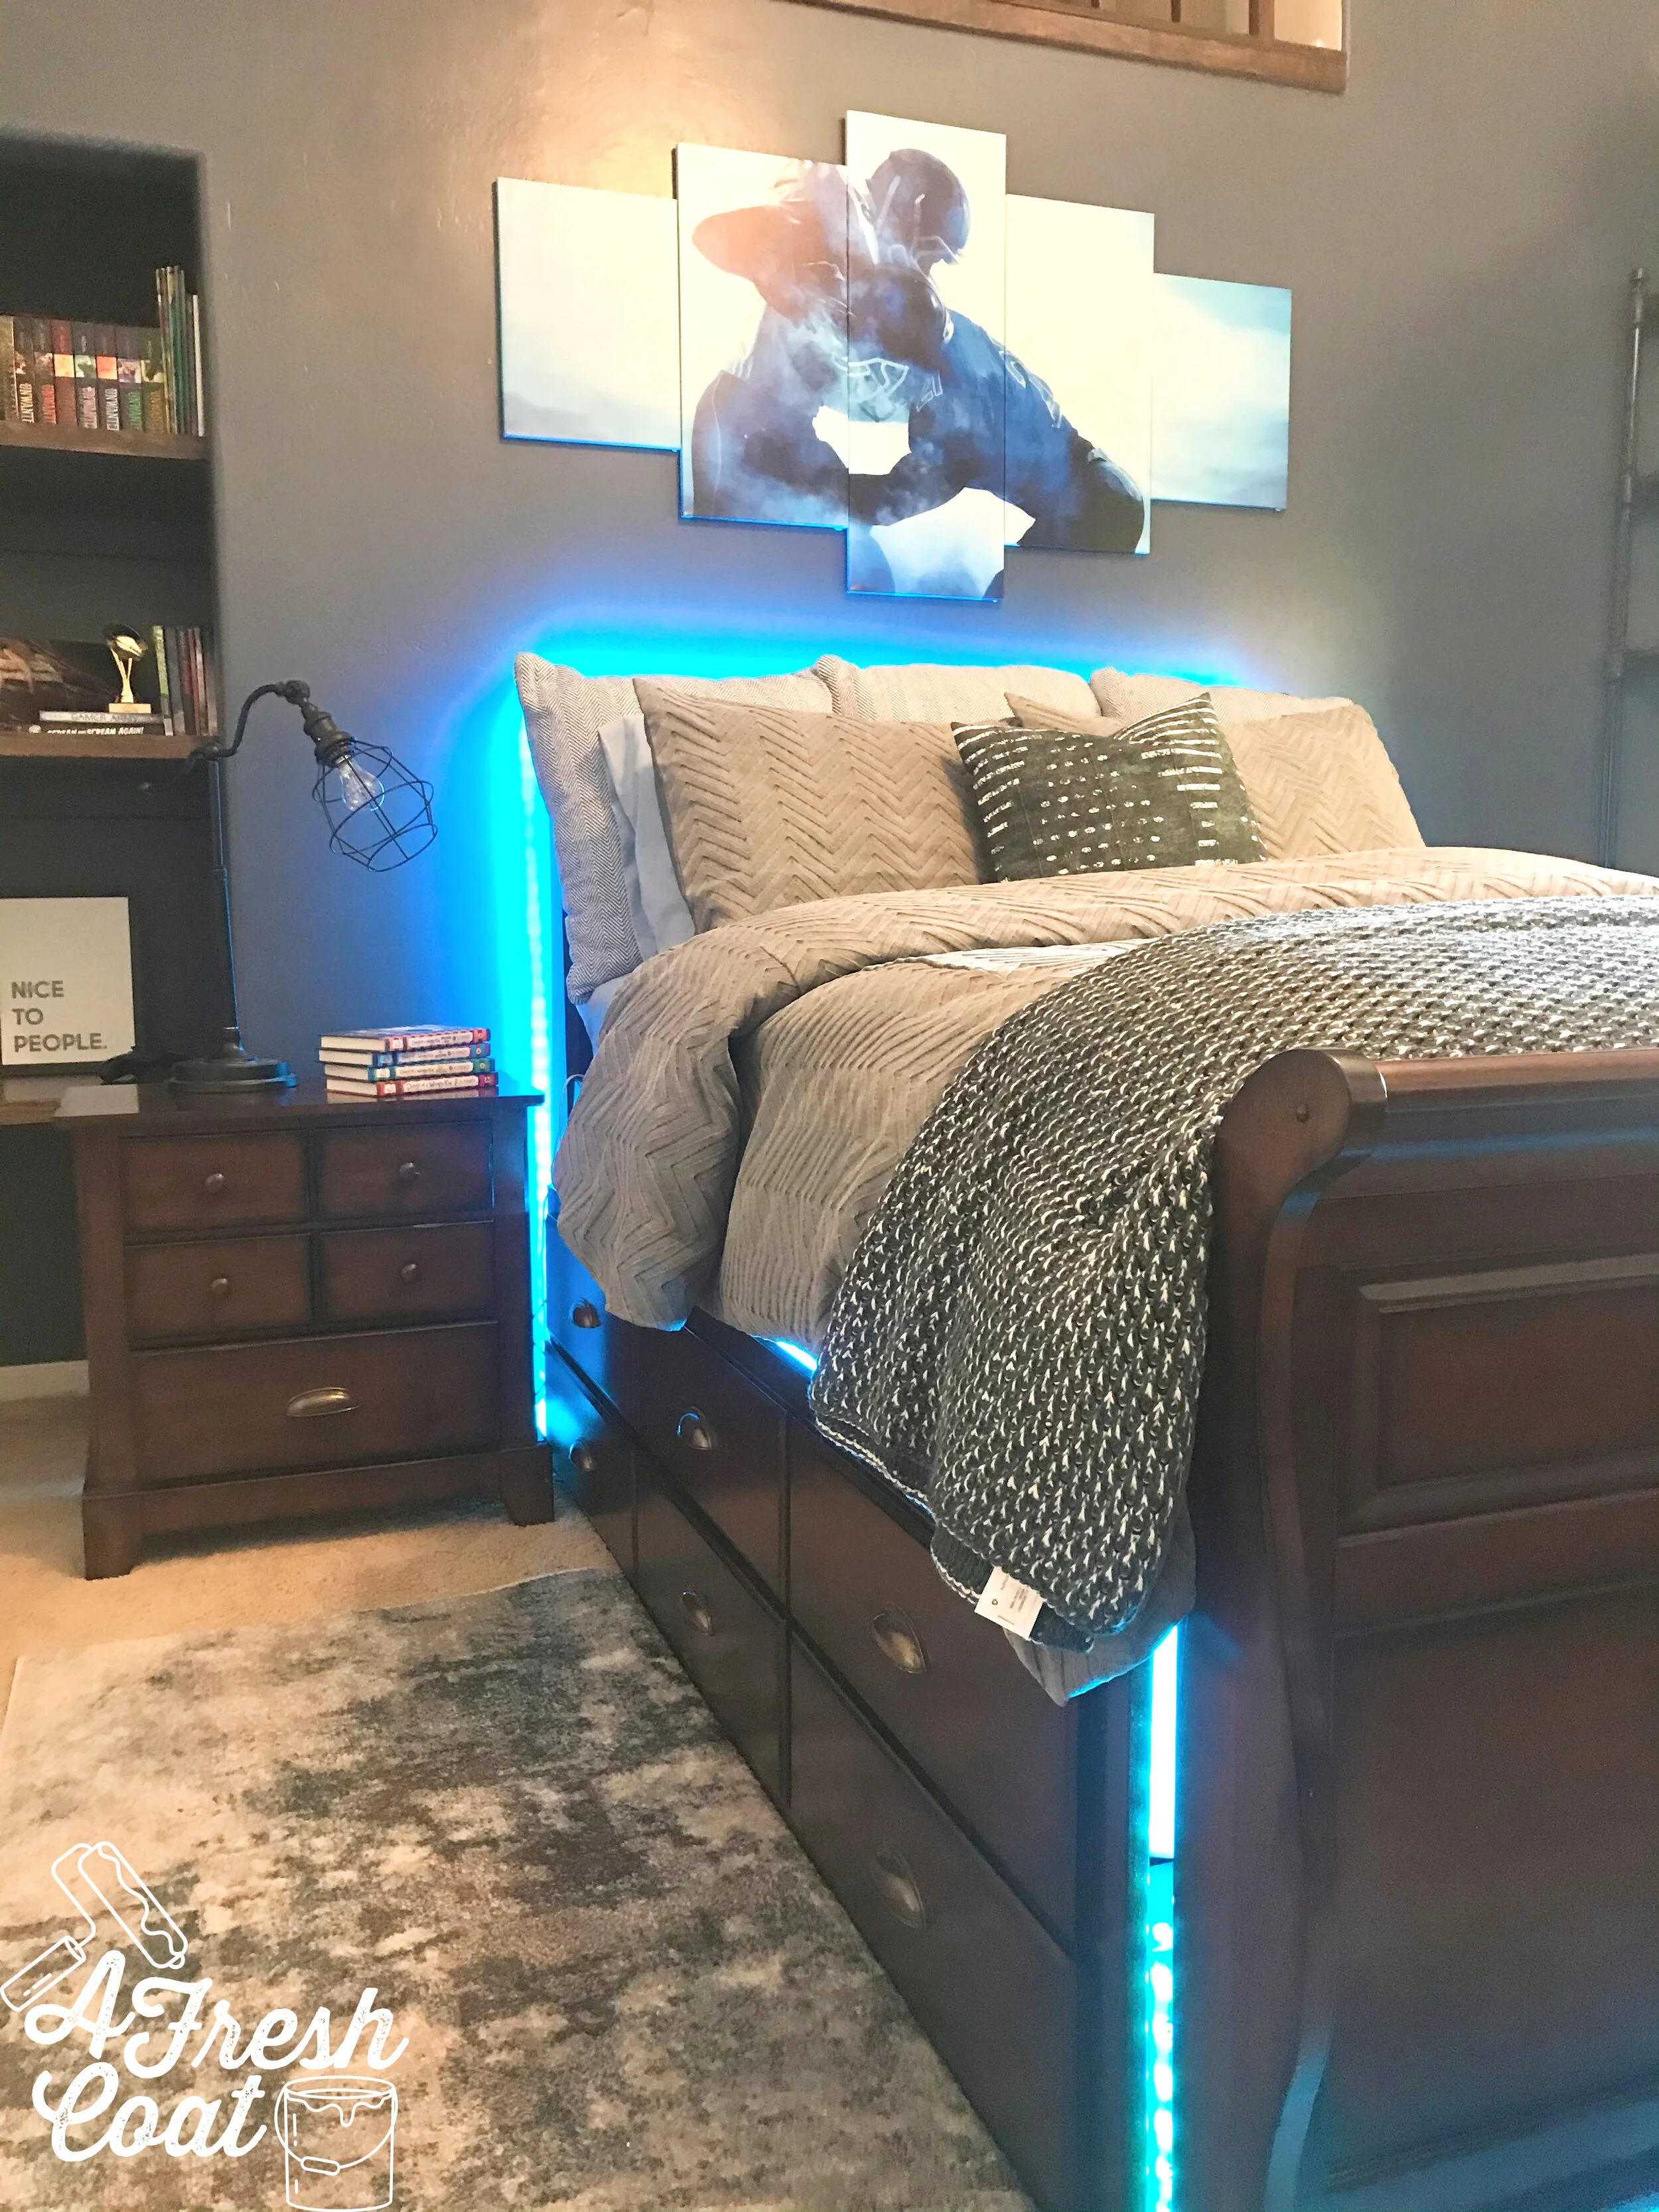
Fun sheets, cool lighting, some sweet paint, as well as rustic and metal elements take this kiddo’s room from little boy to straight tween and beyond.

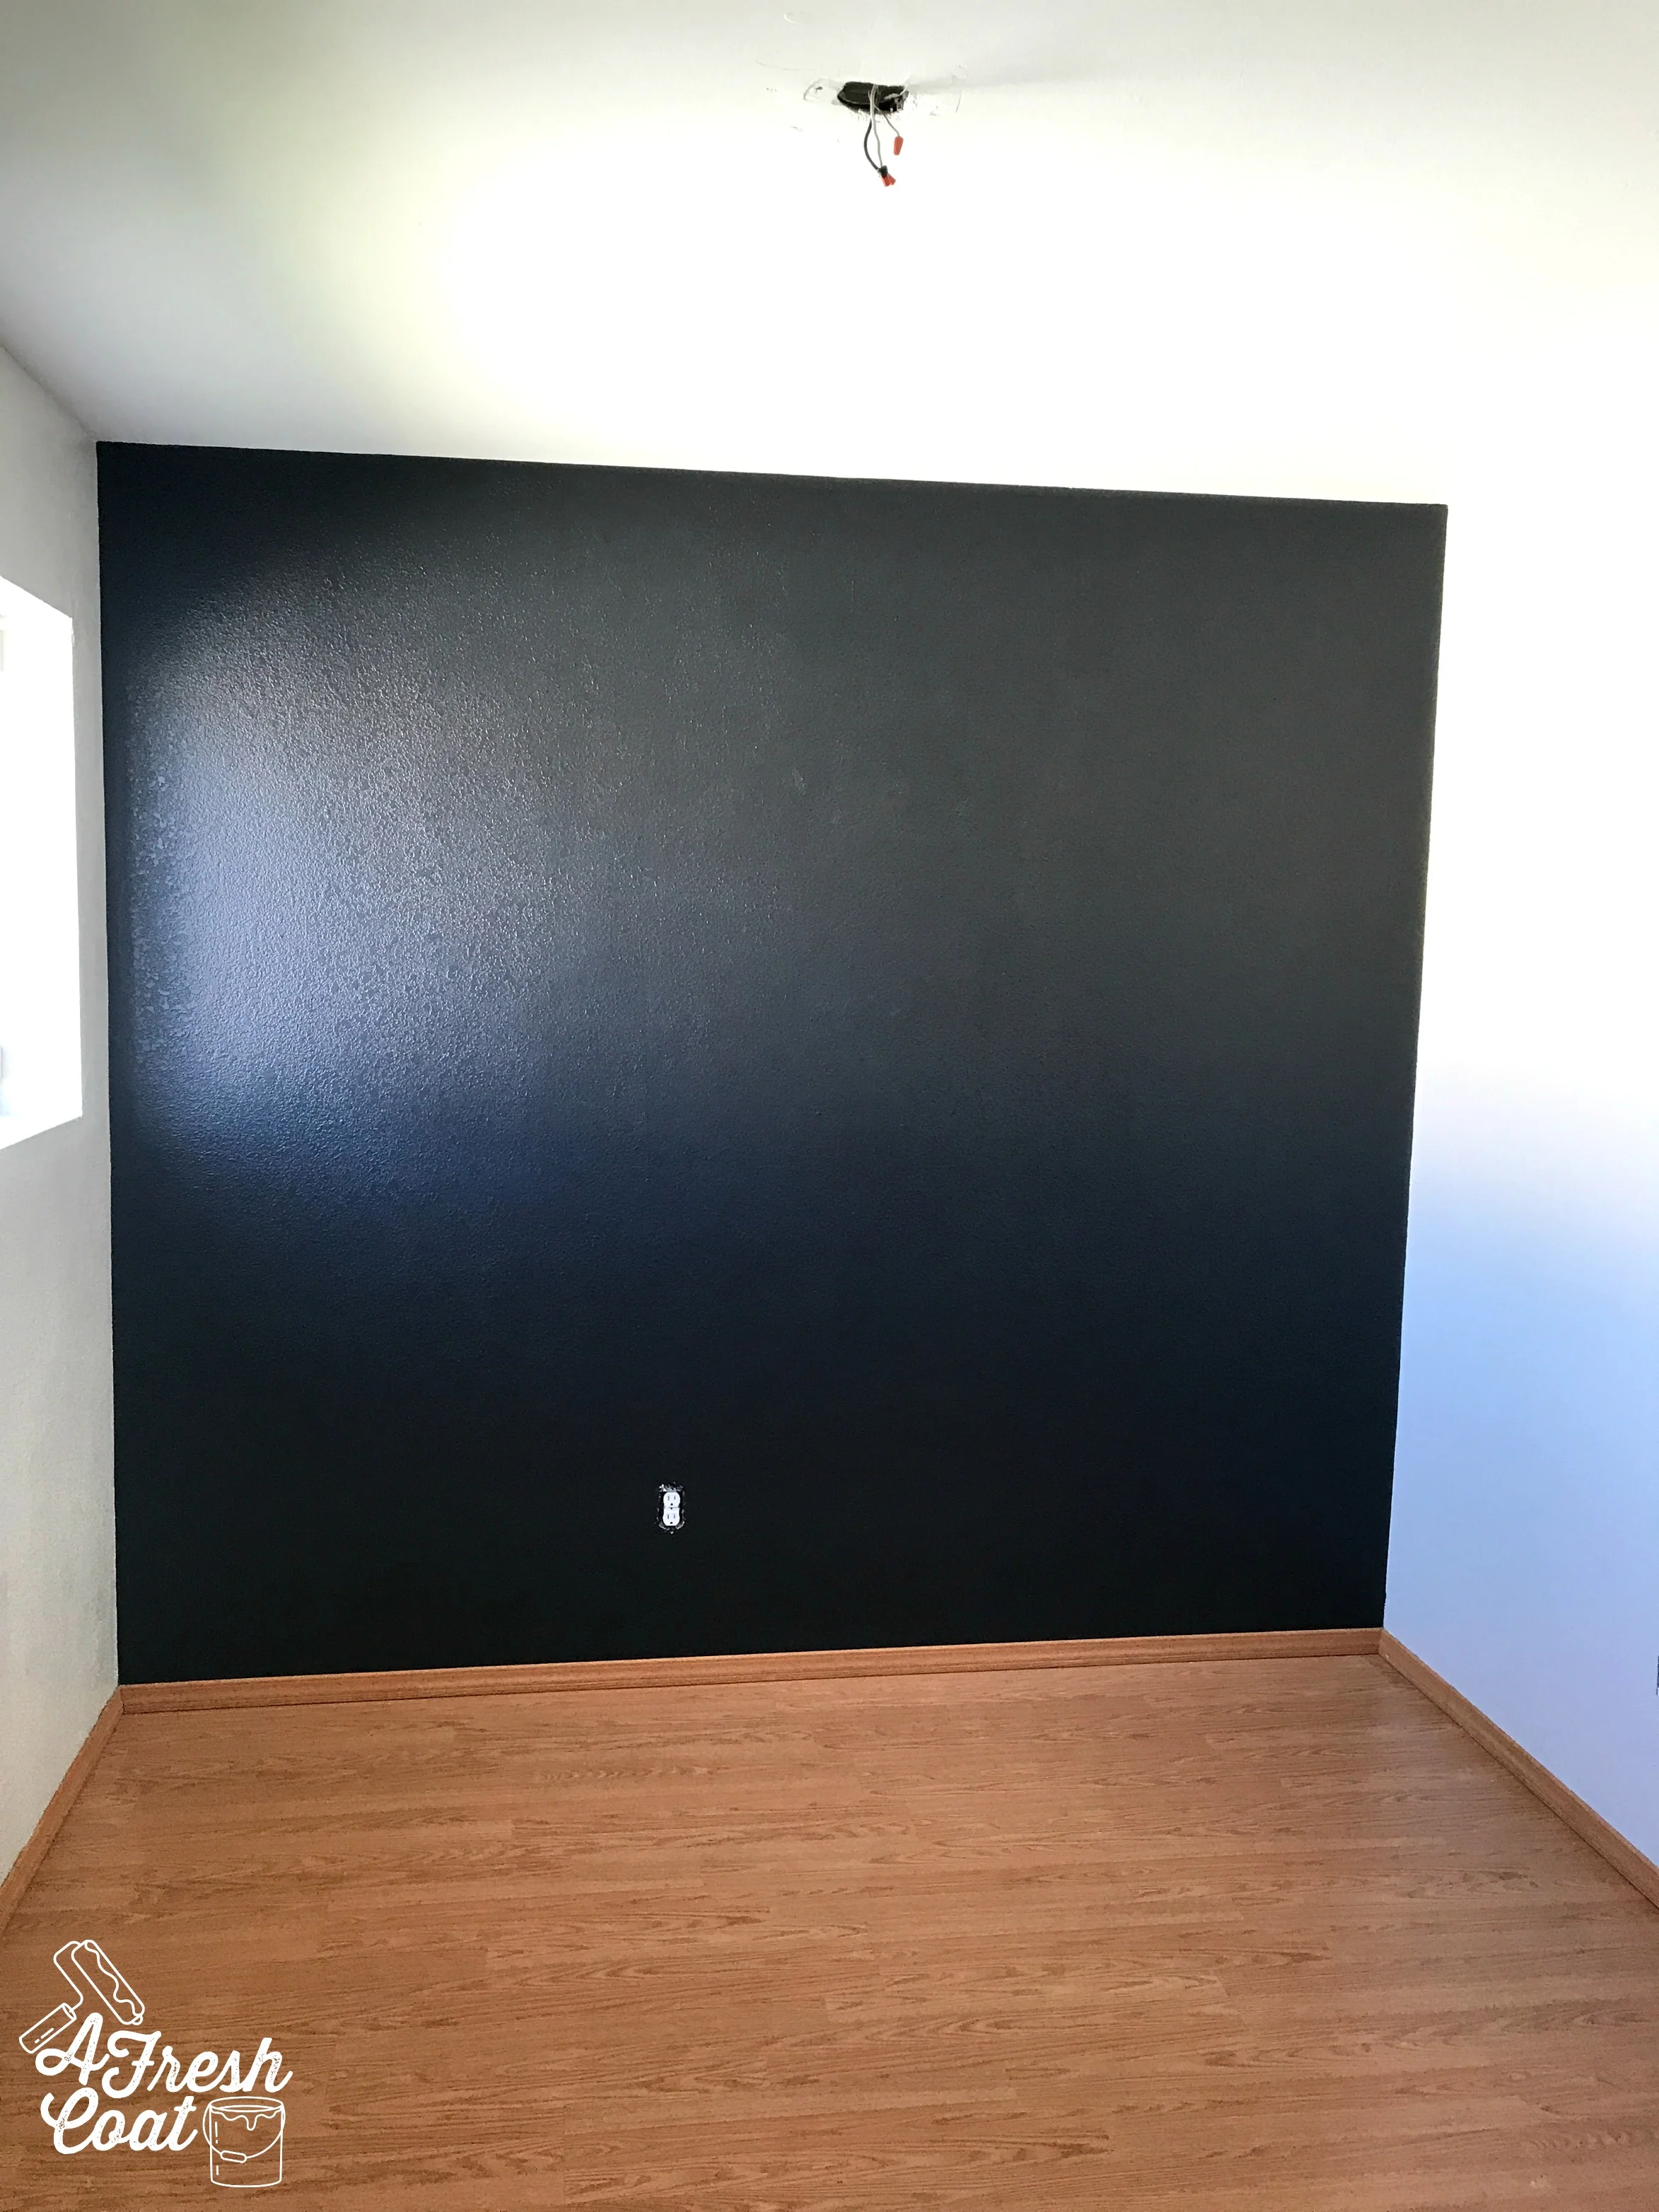
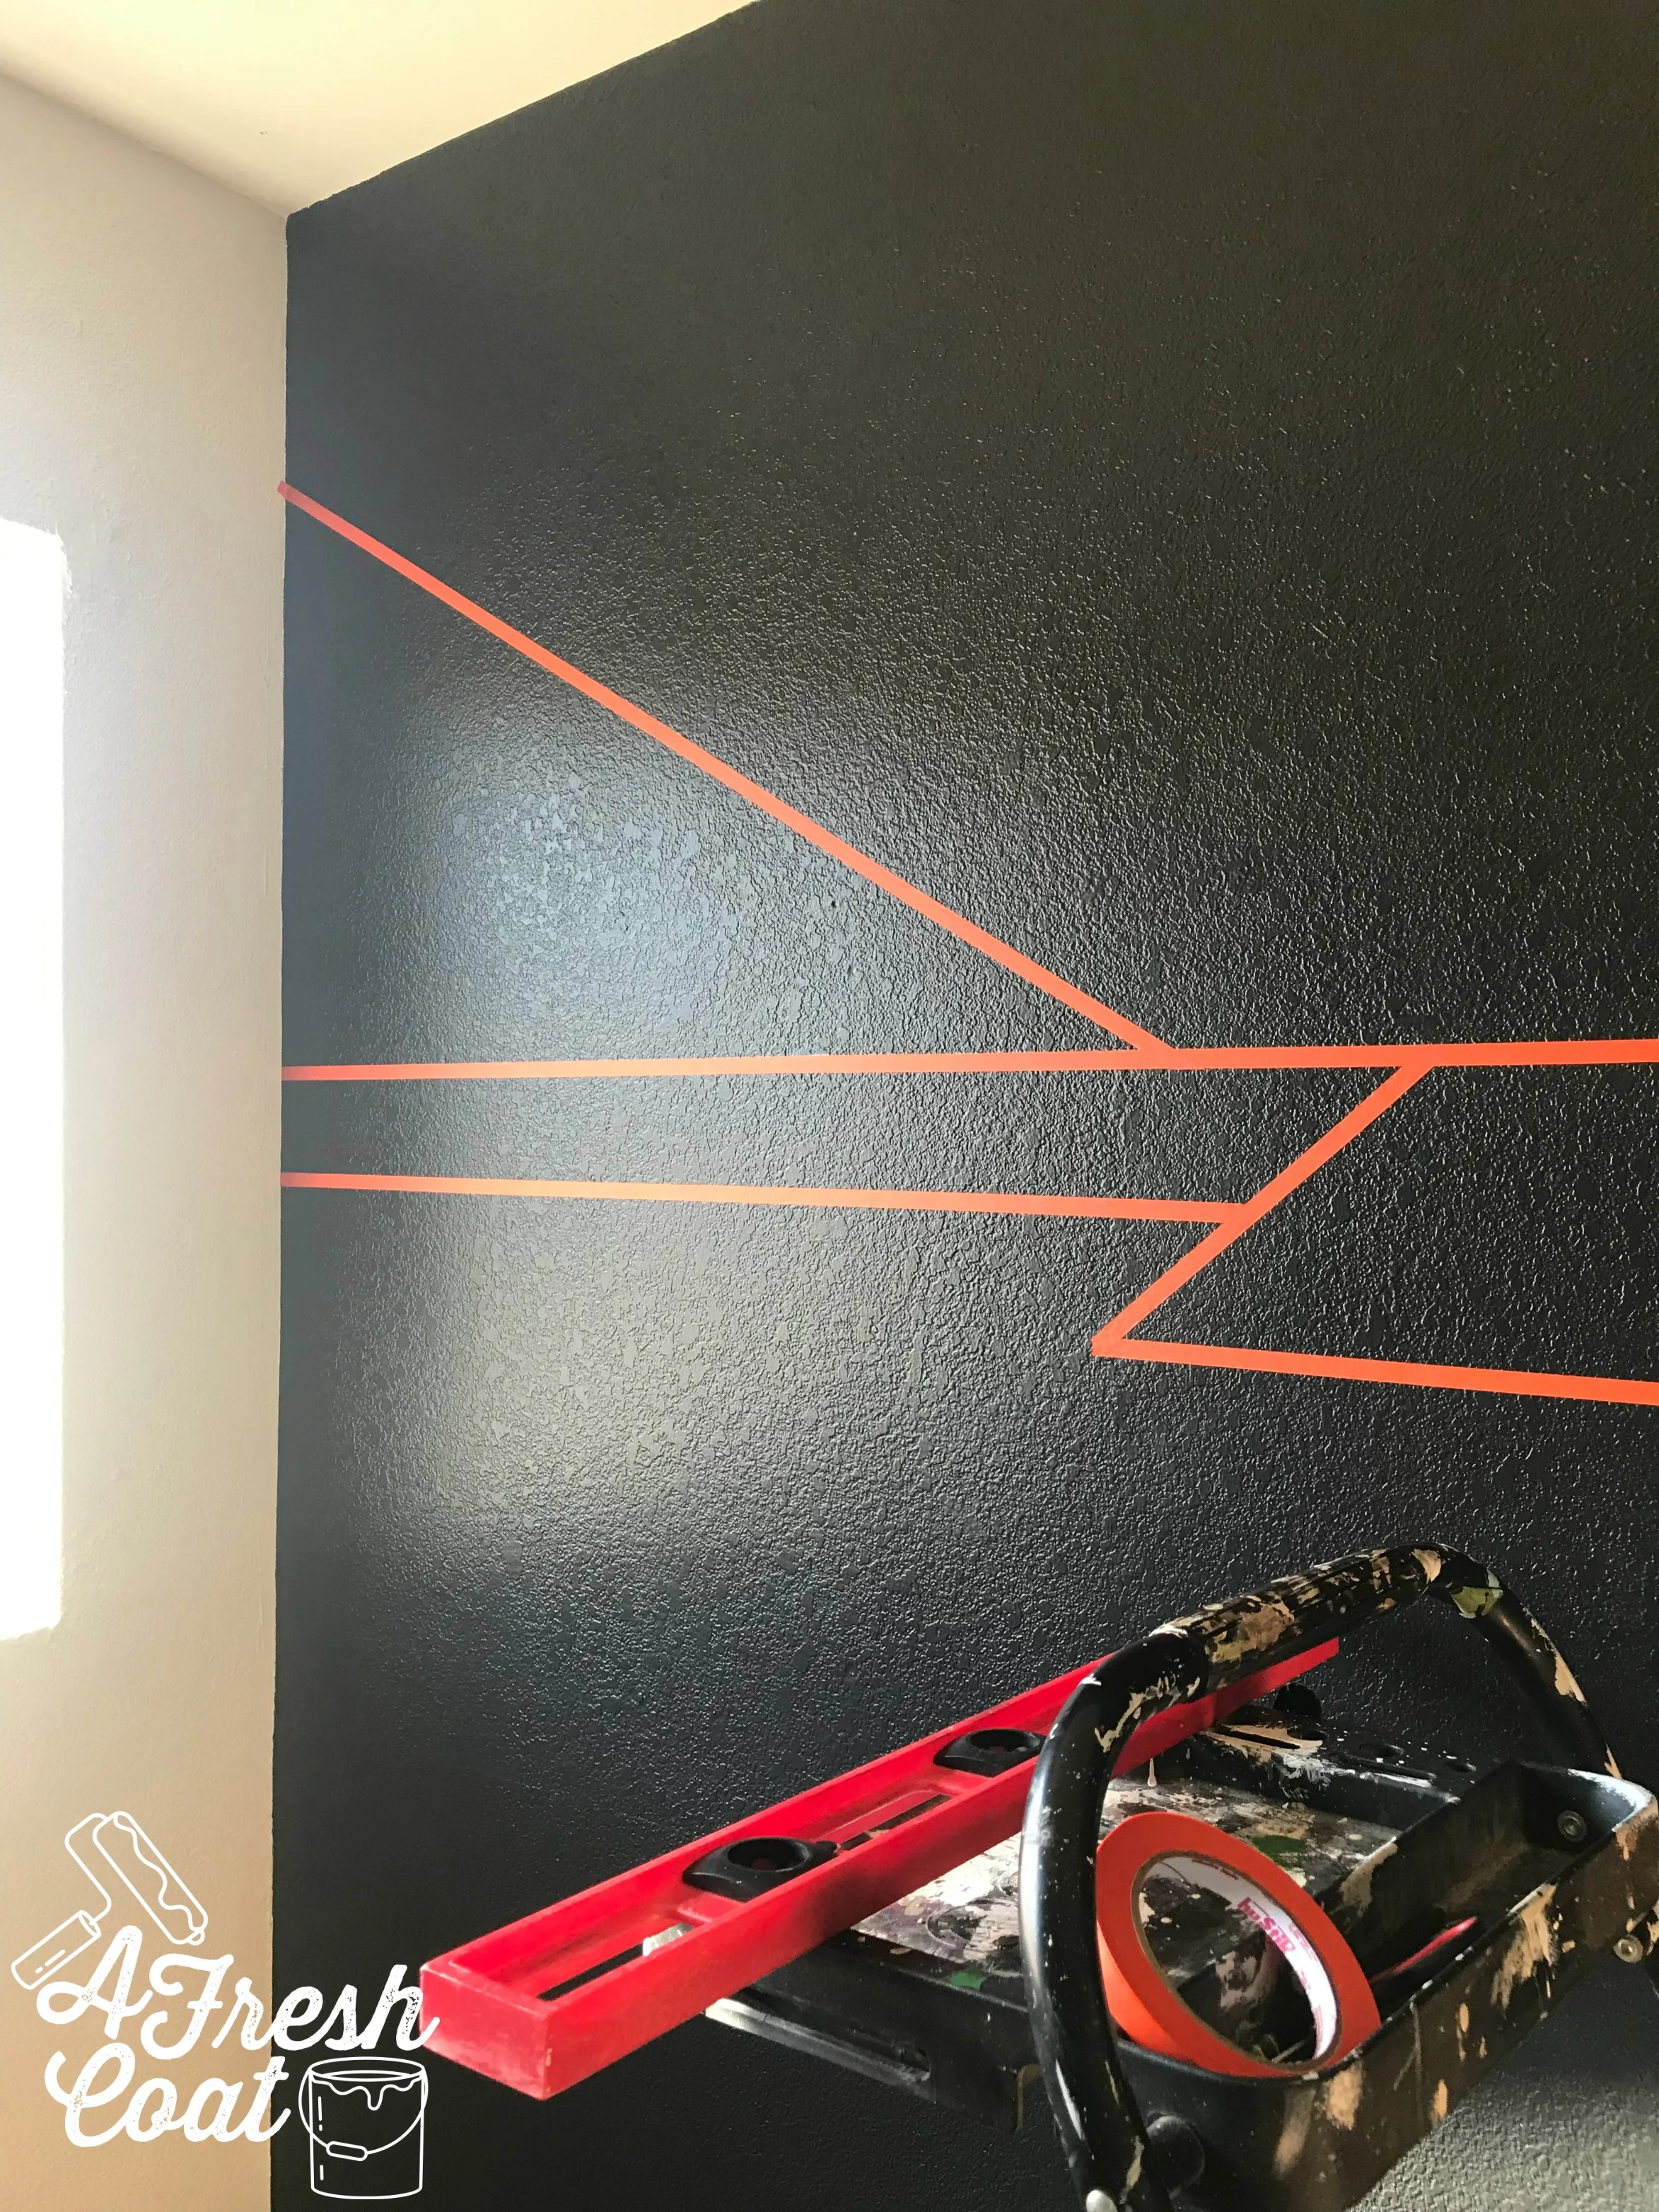
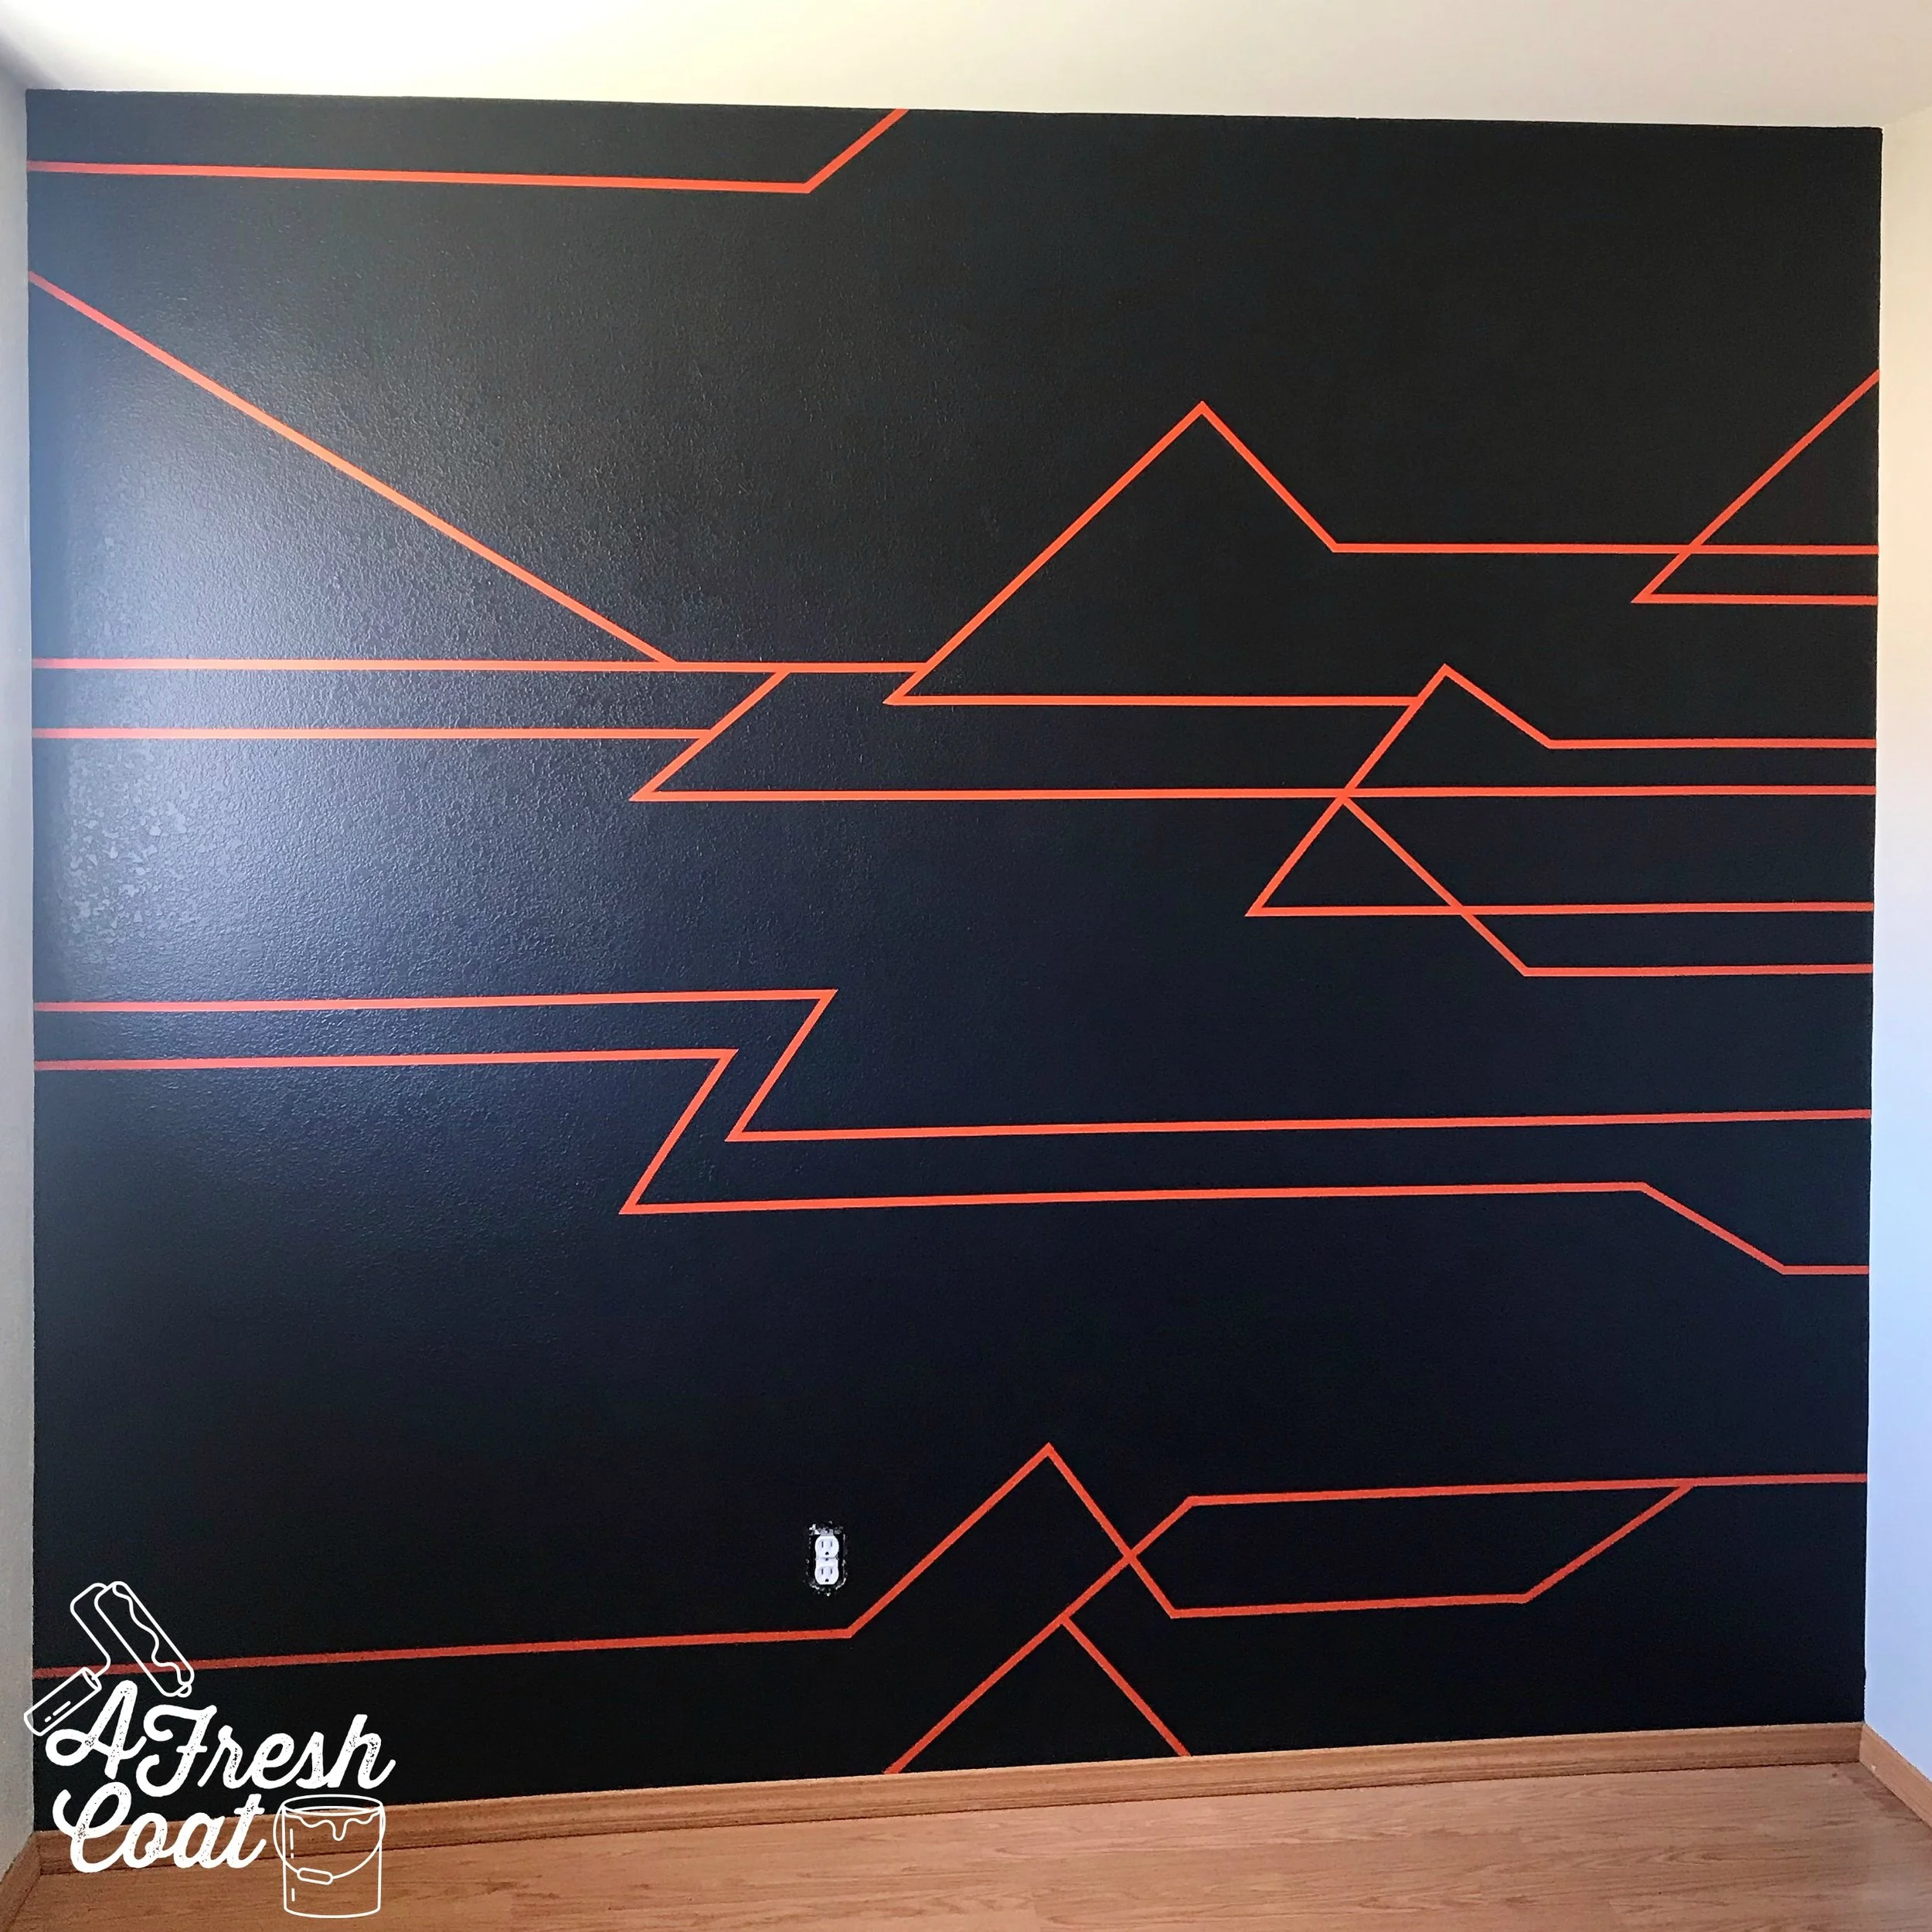
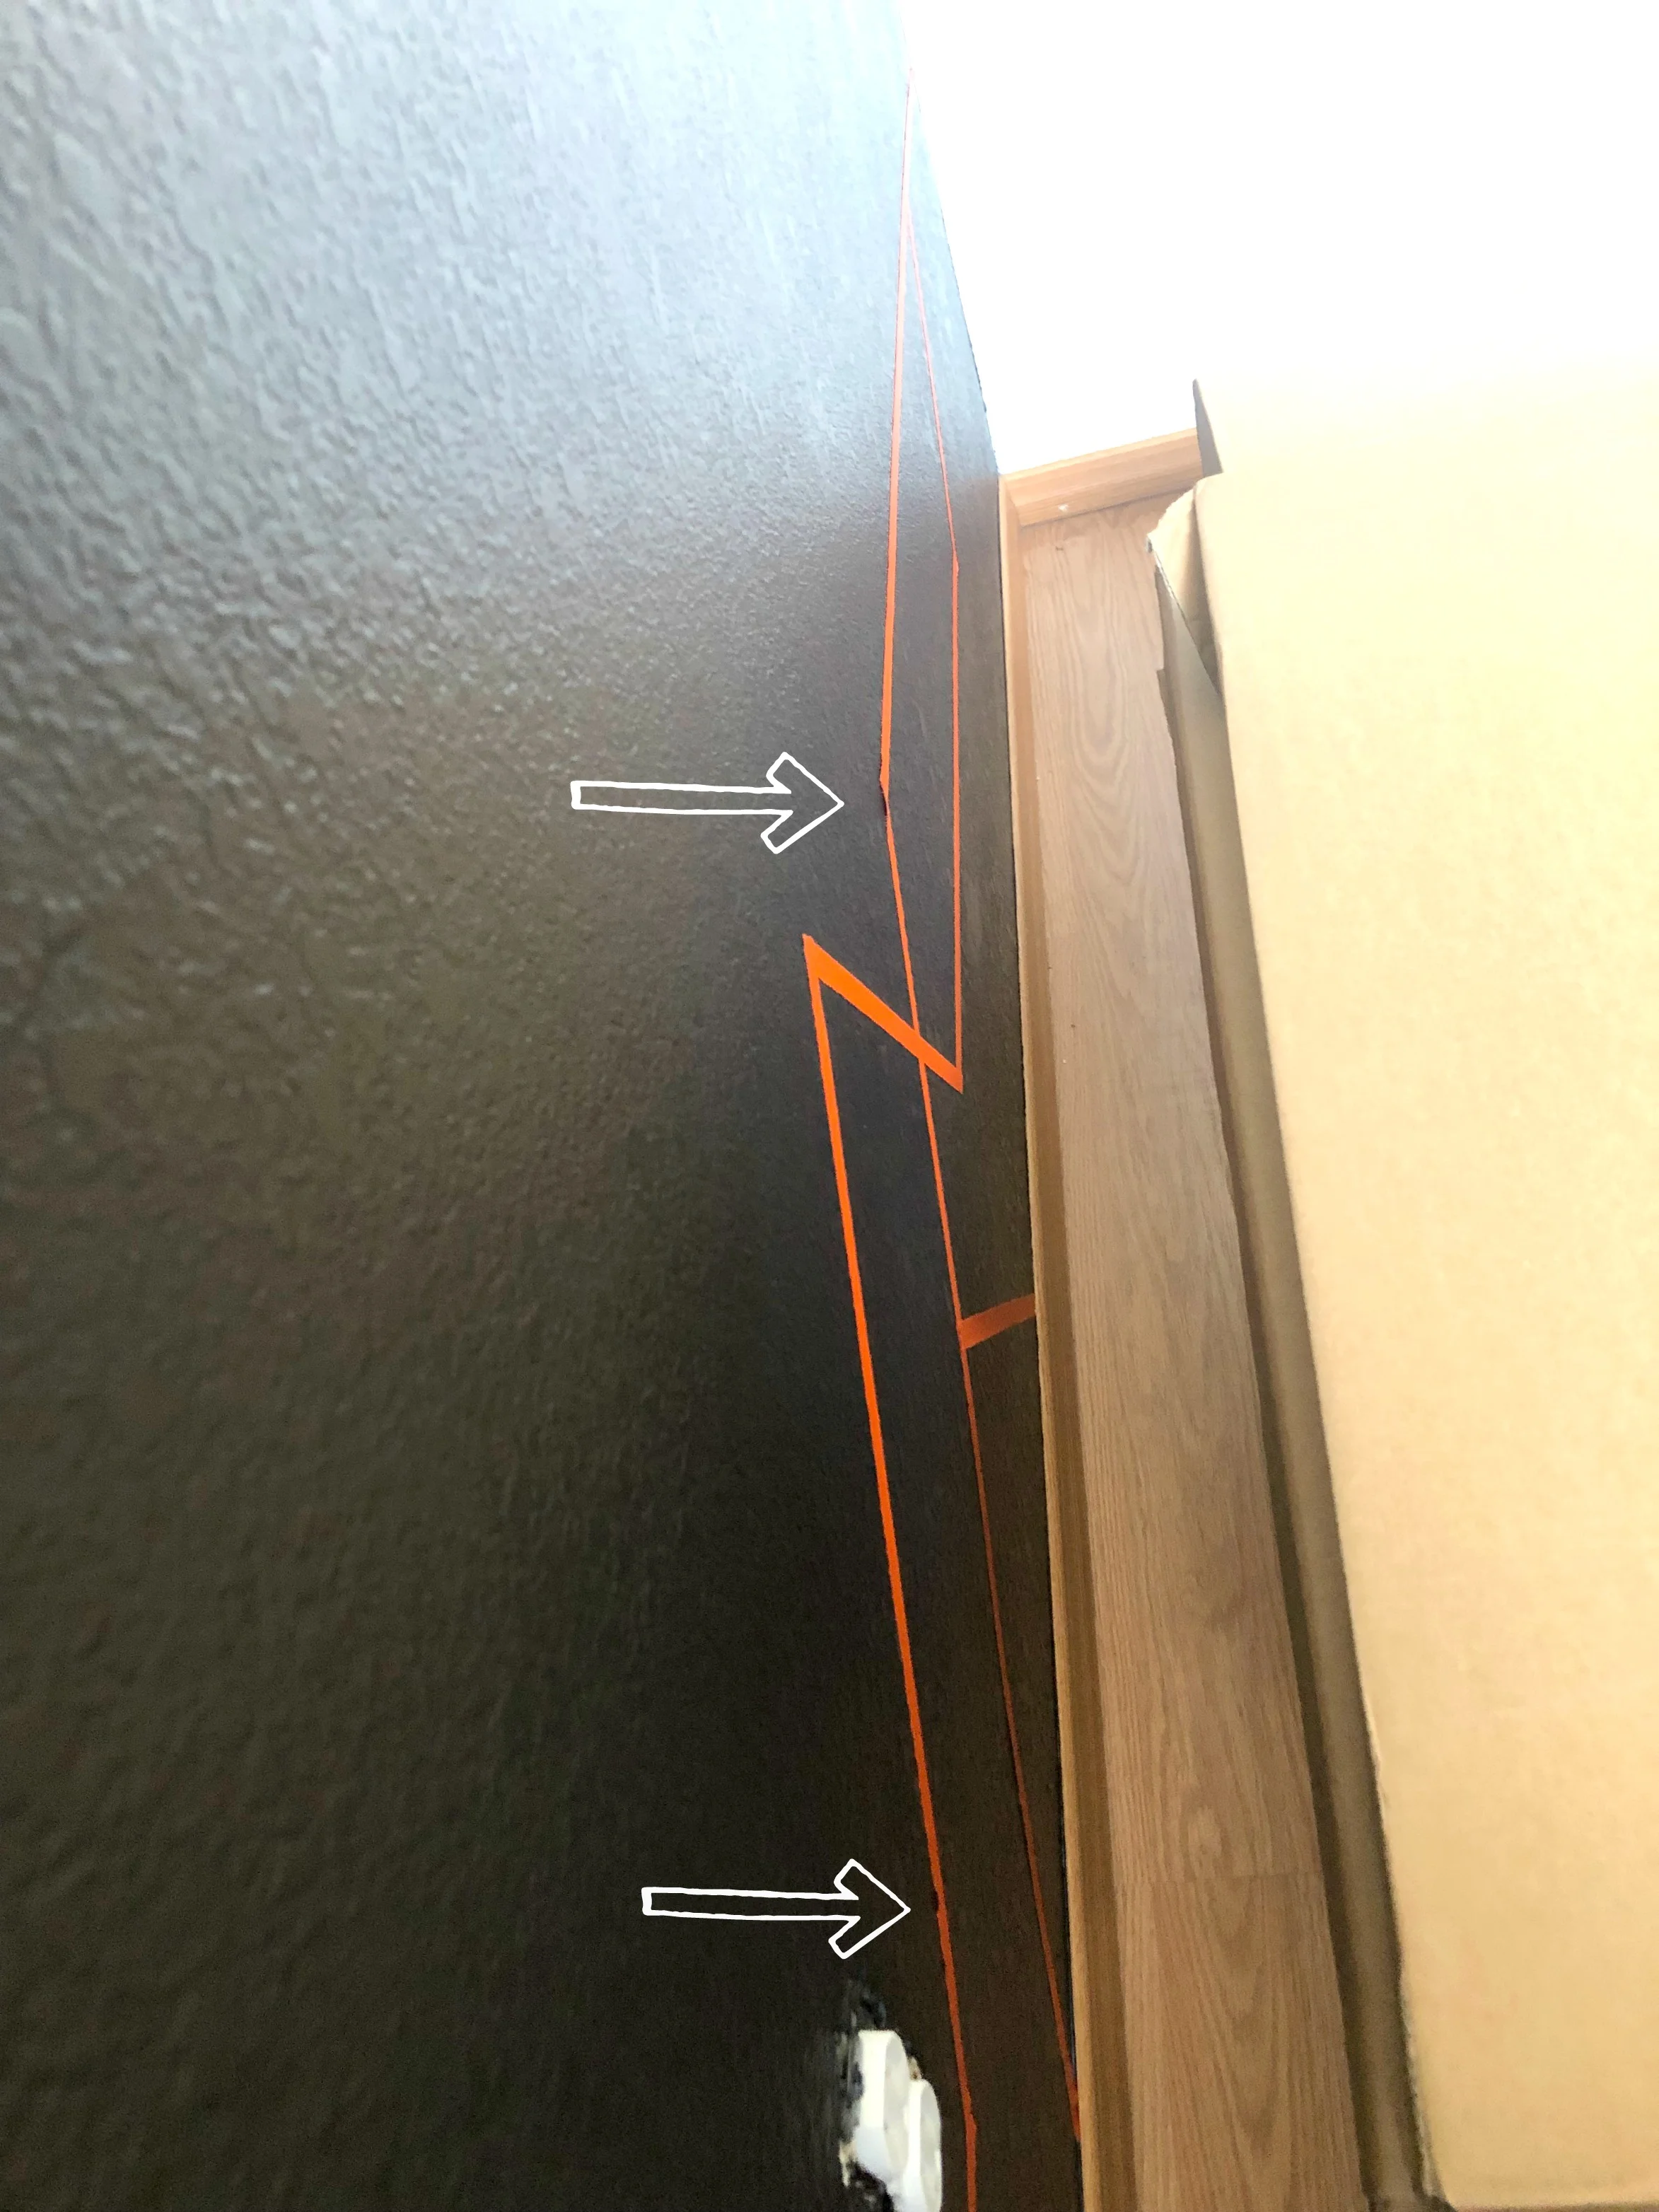
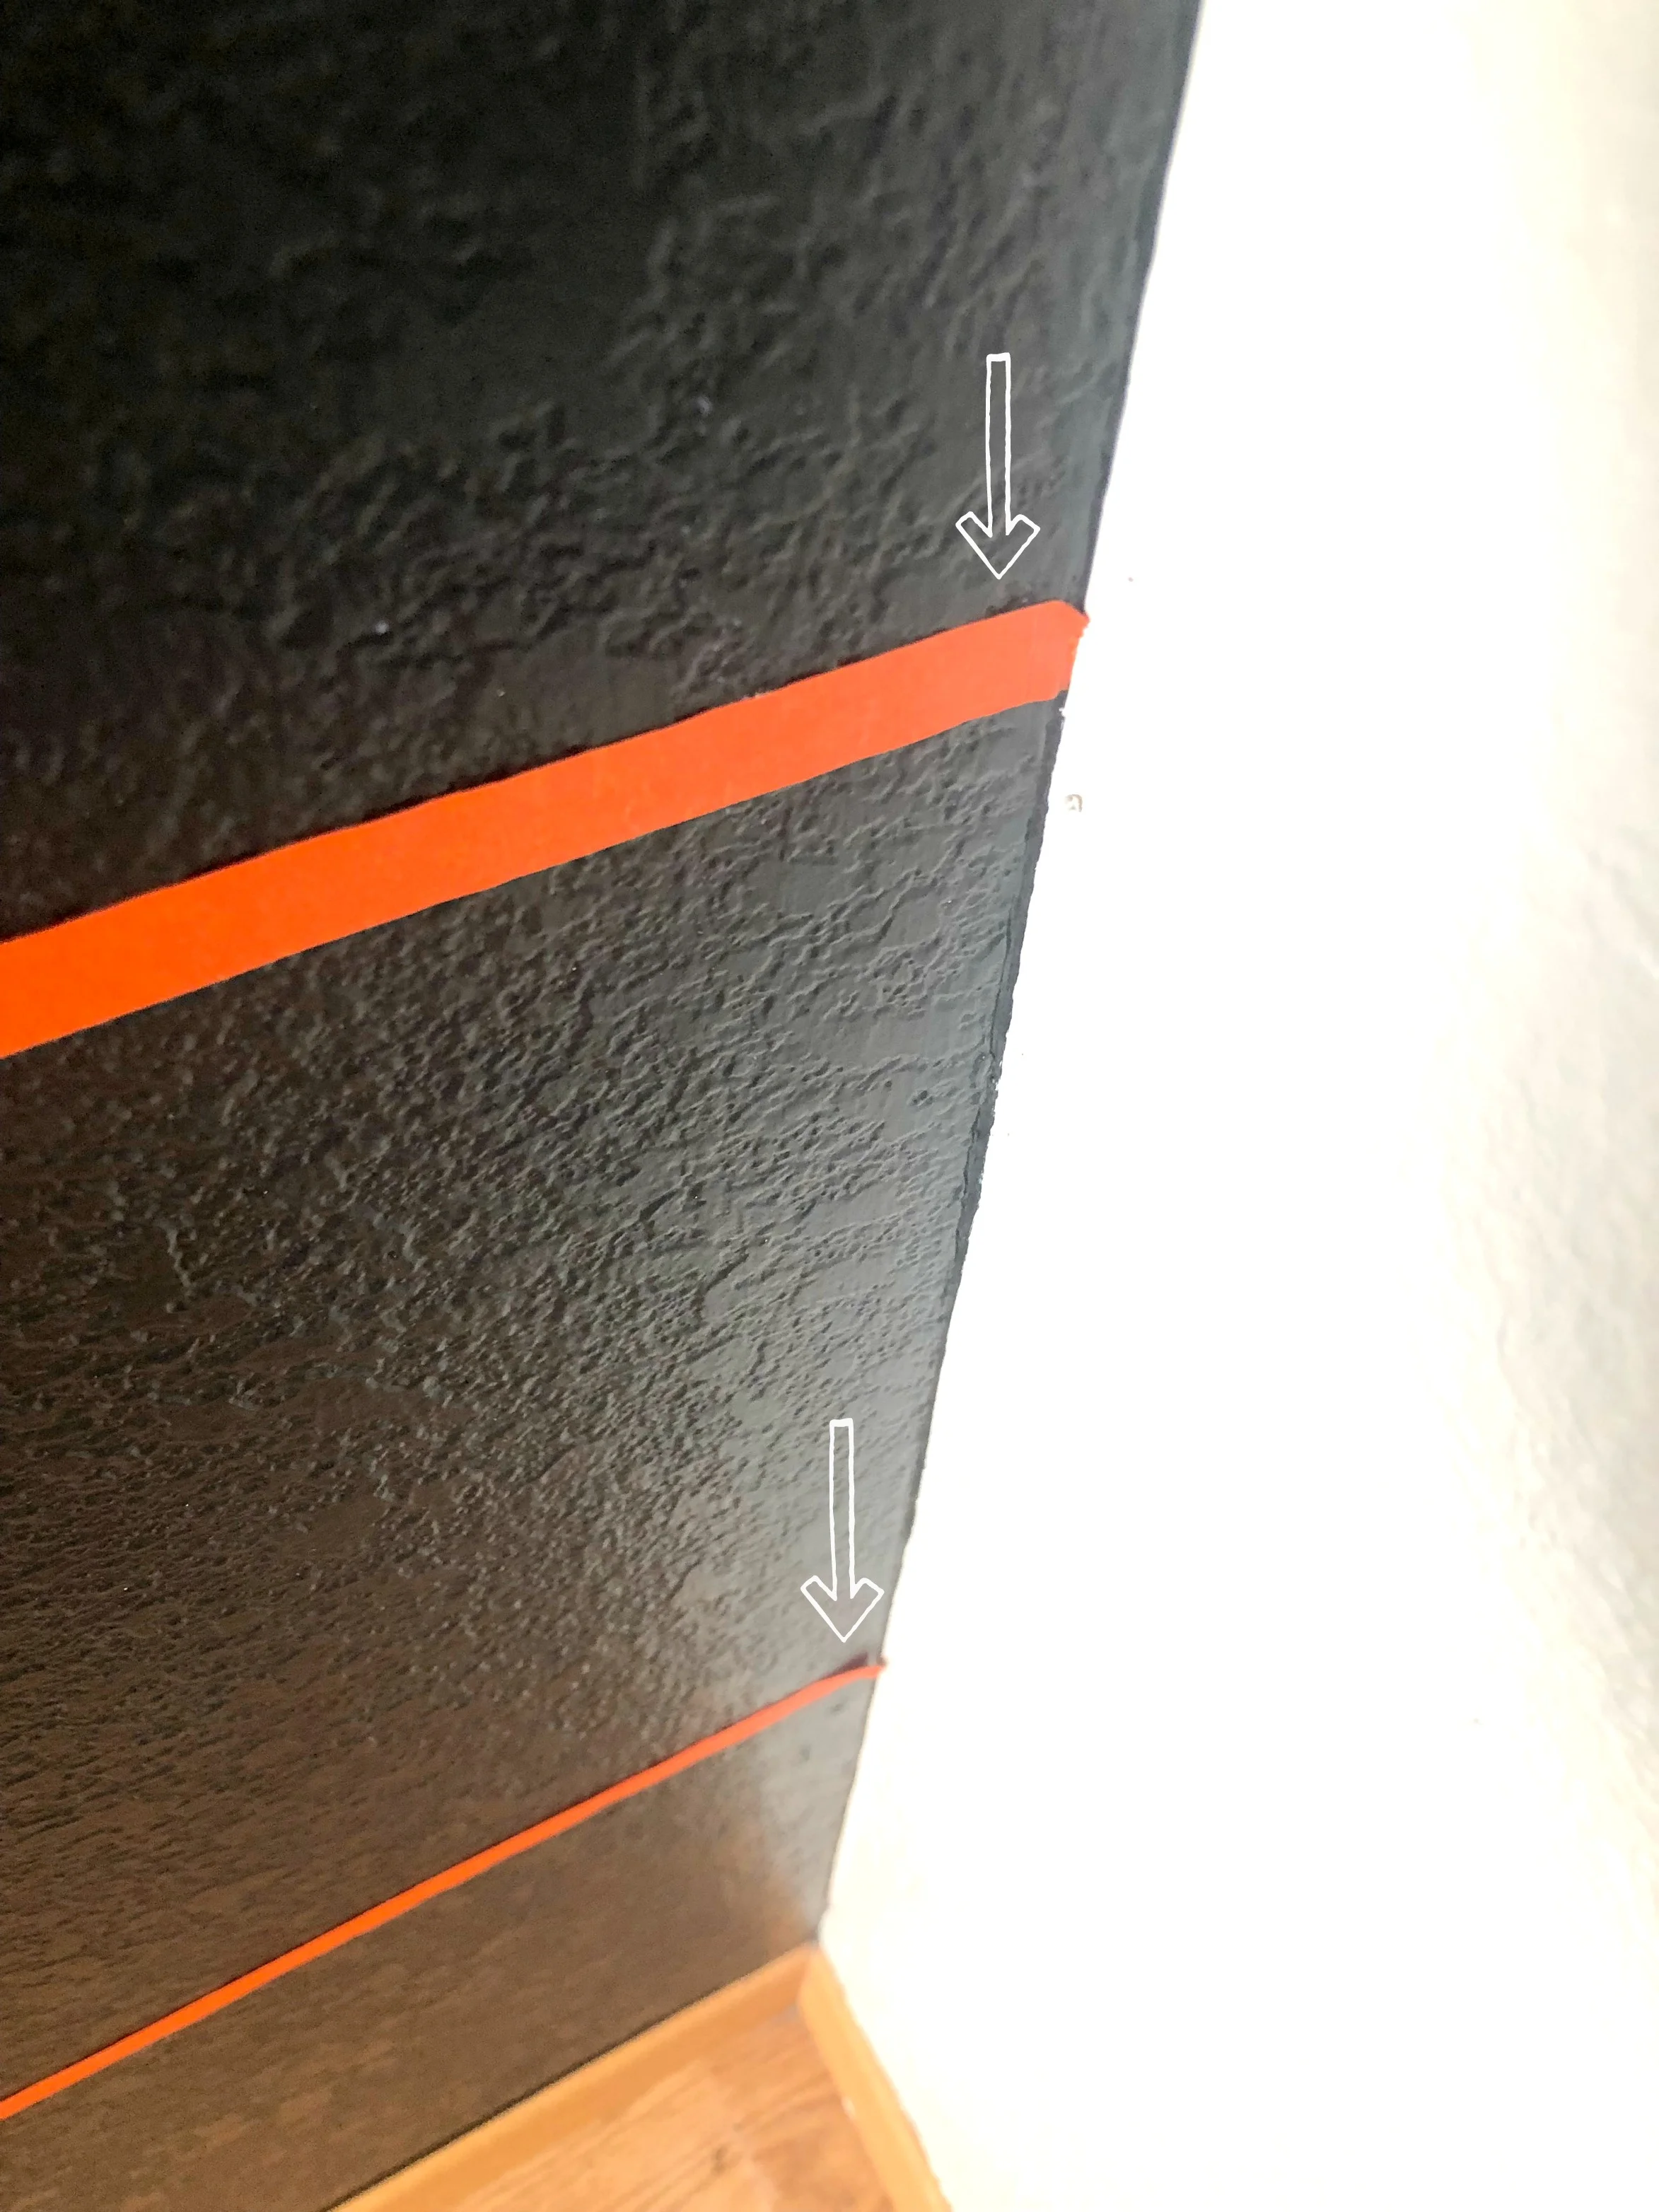
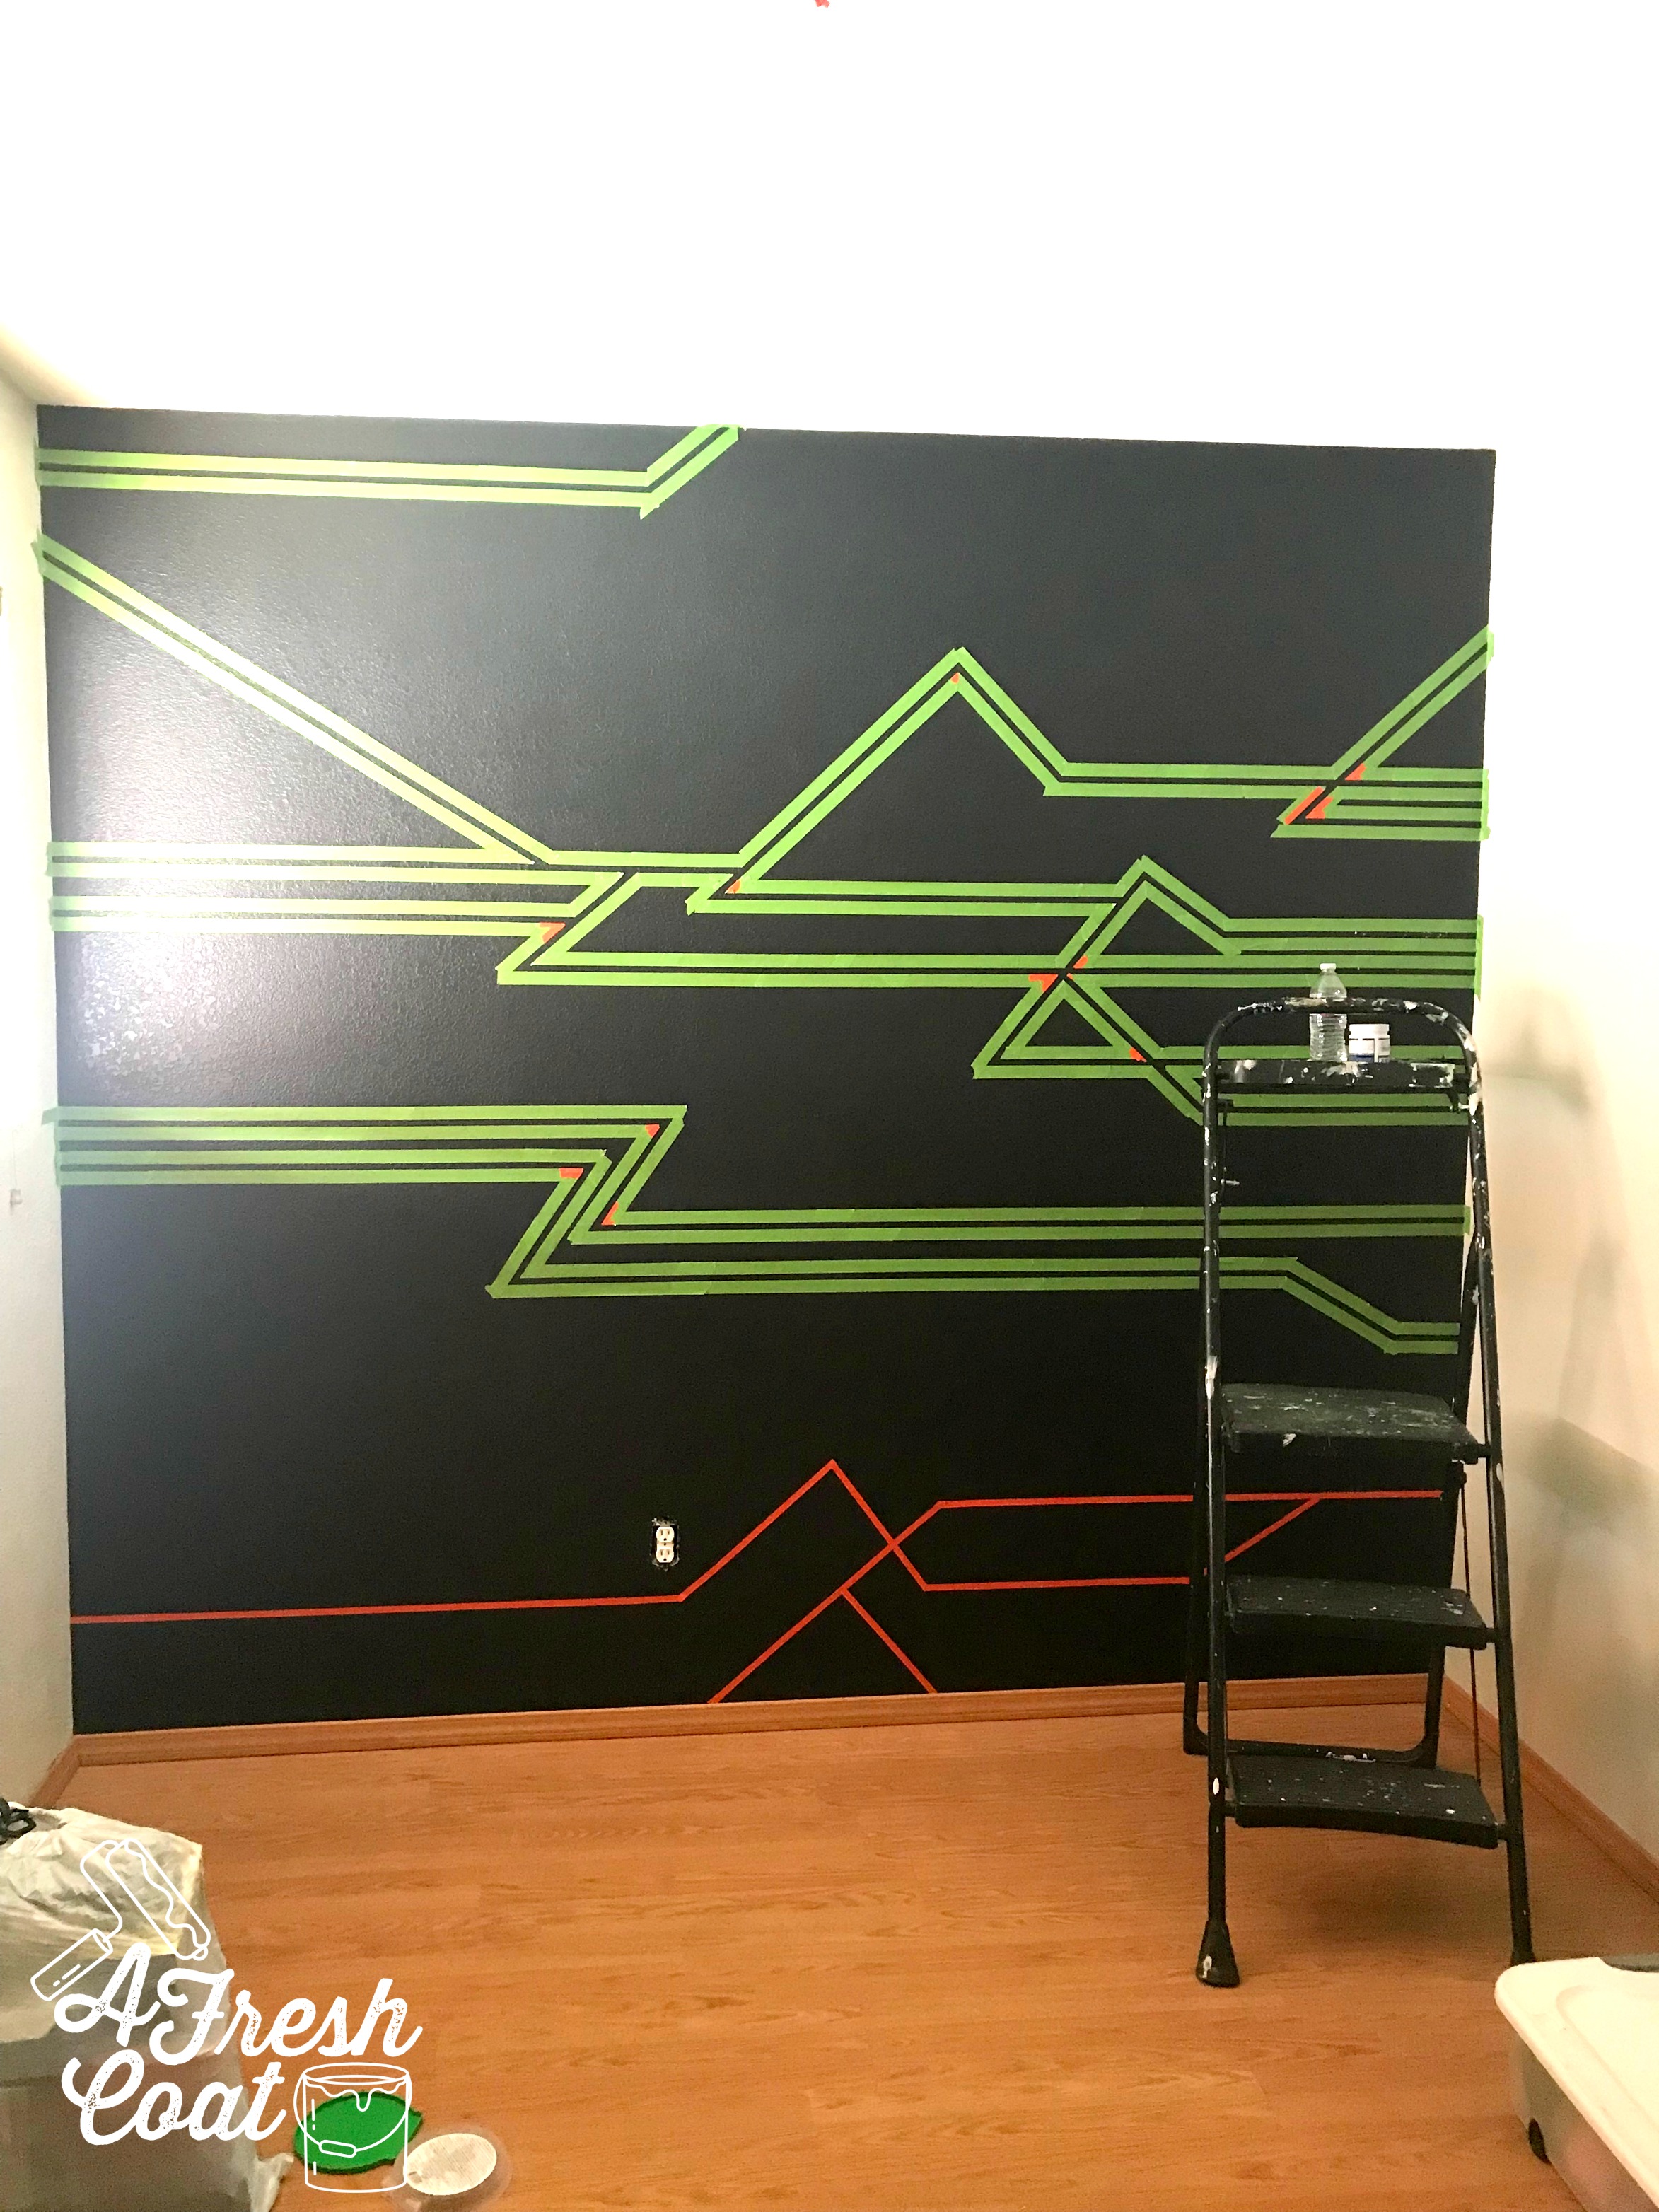
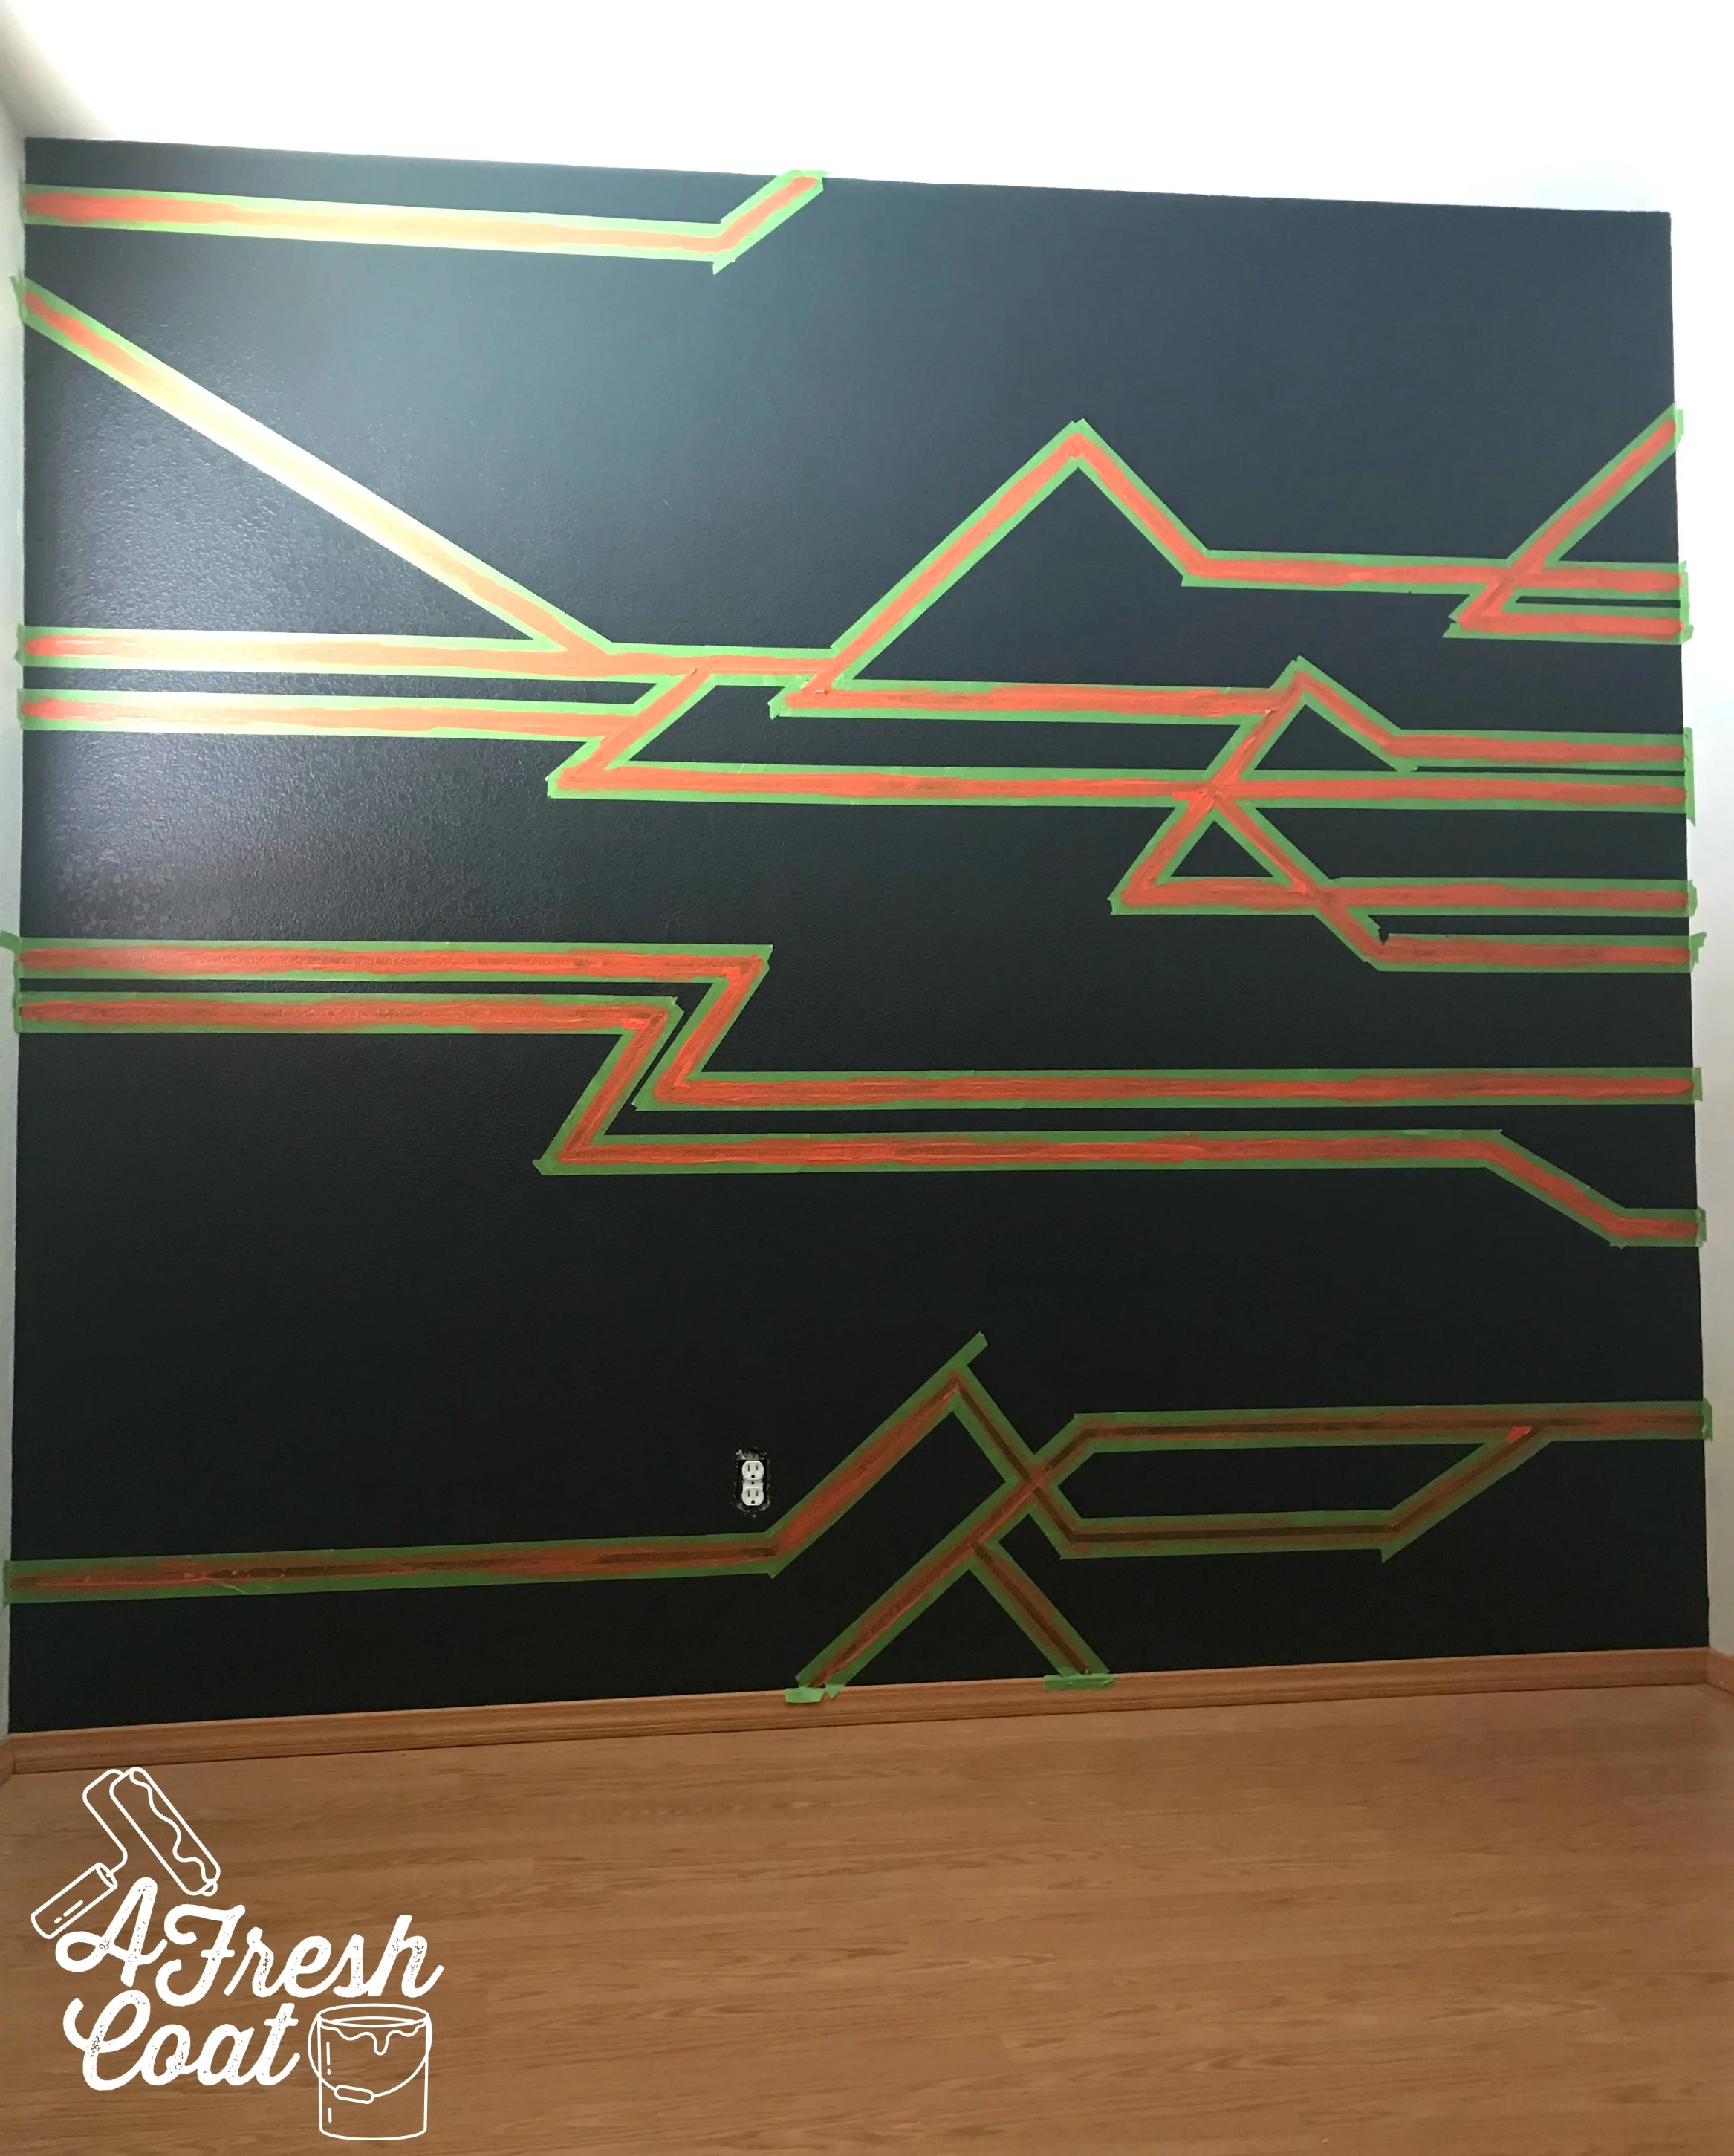
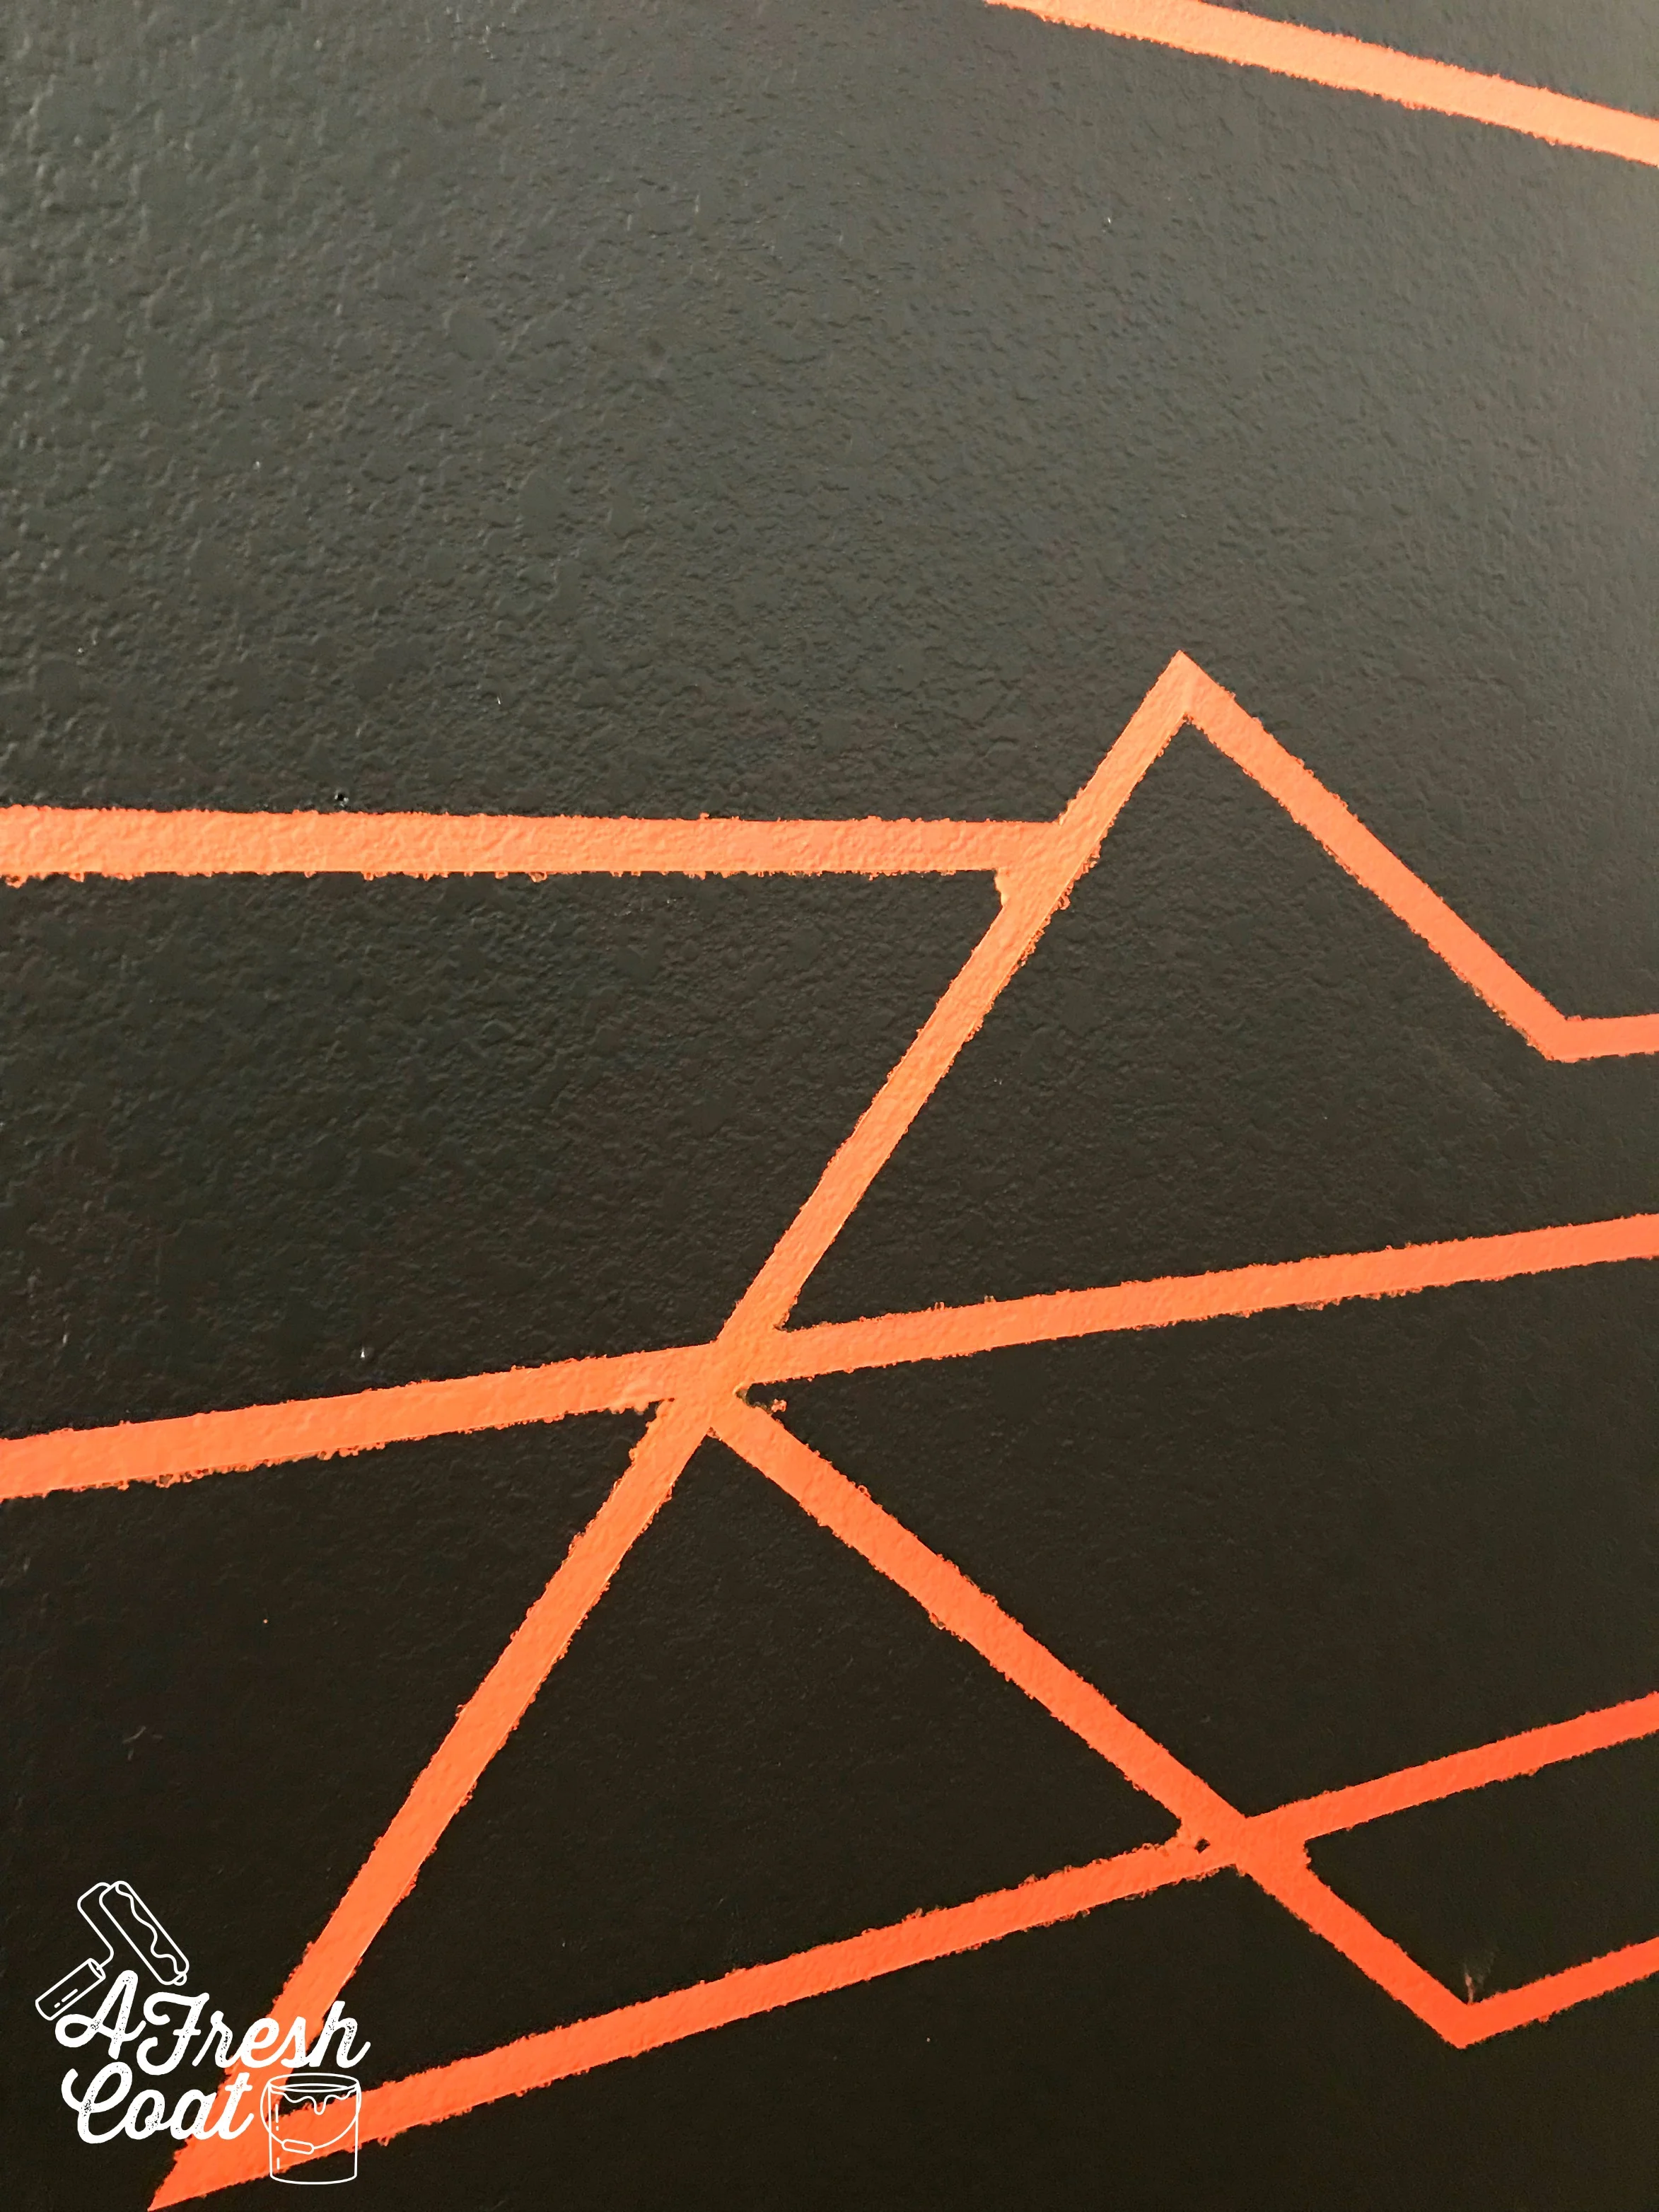
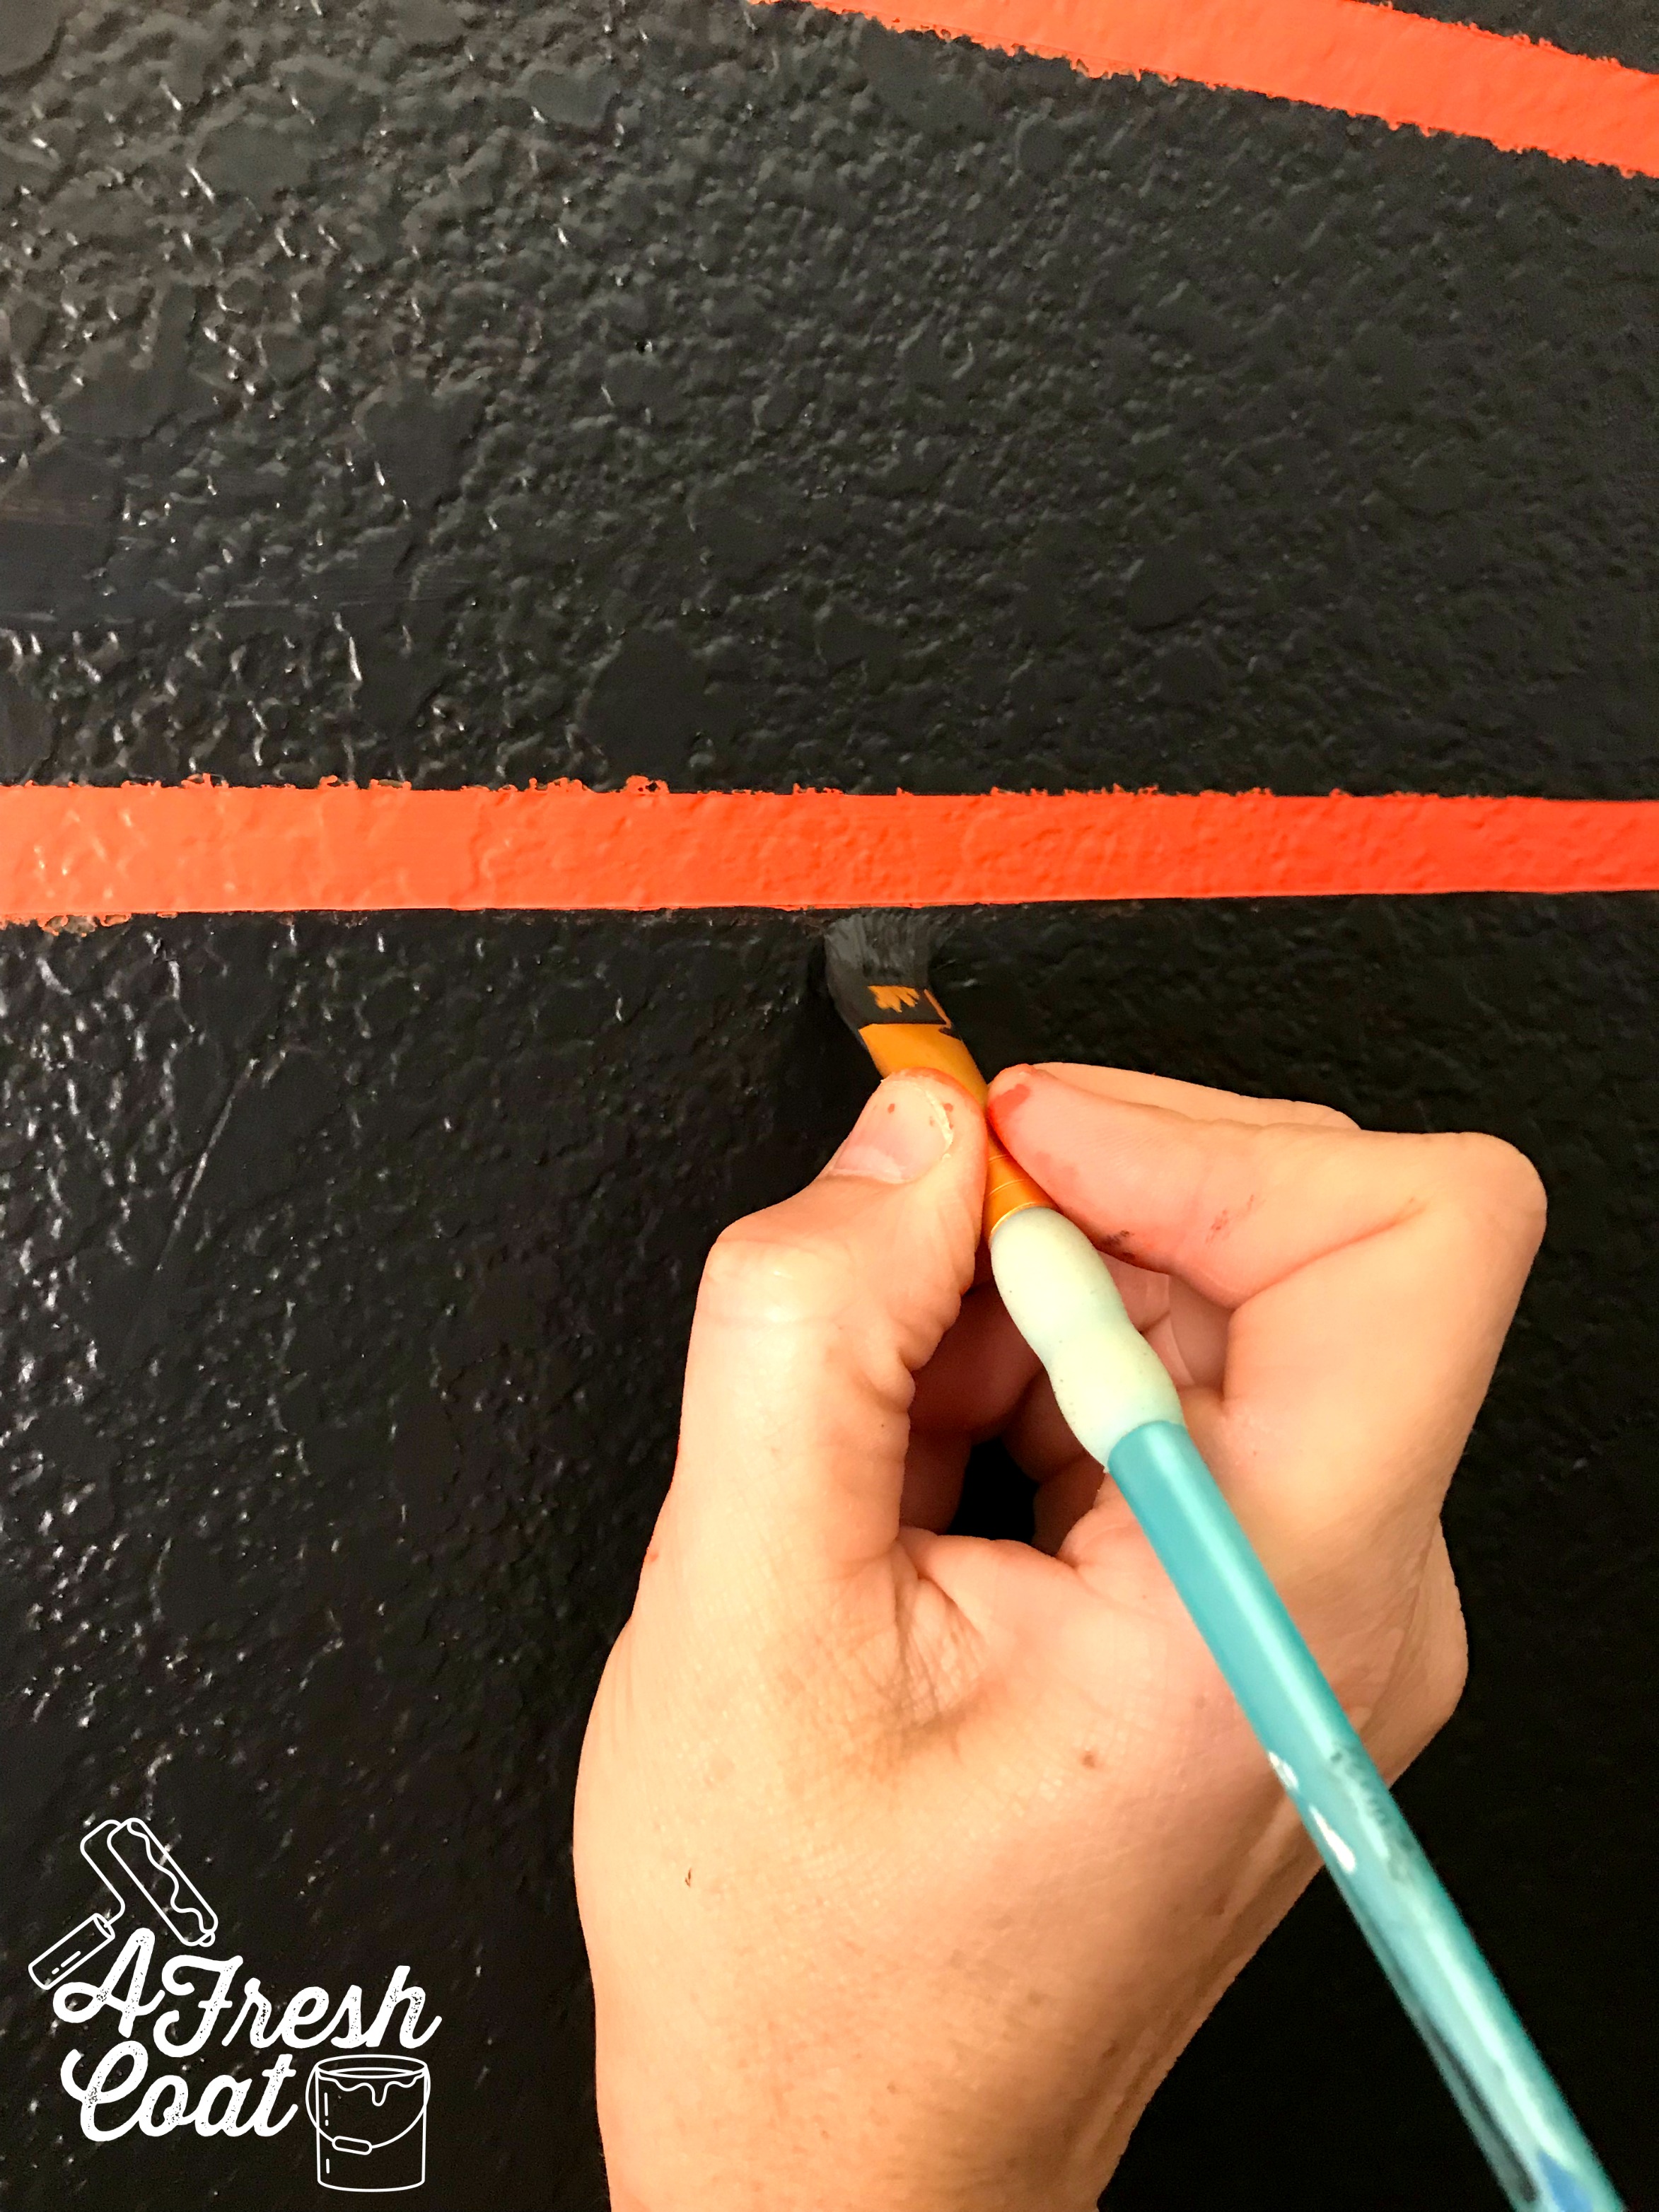
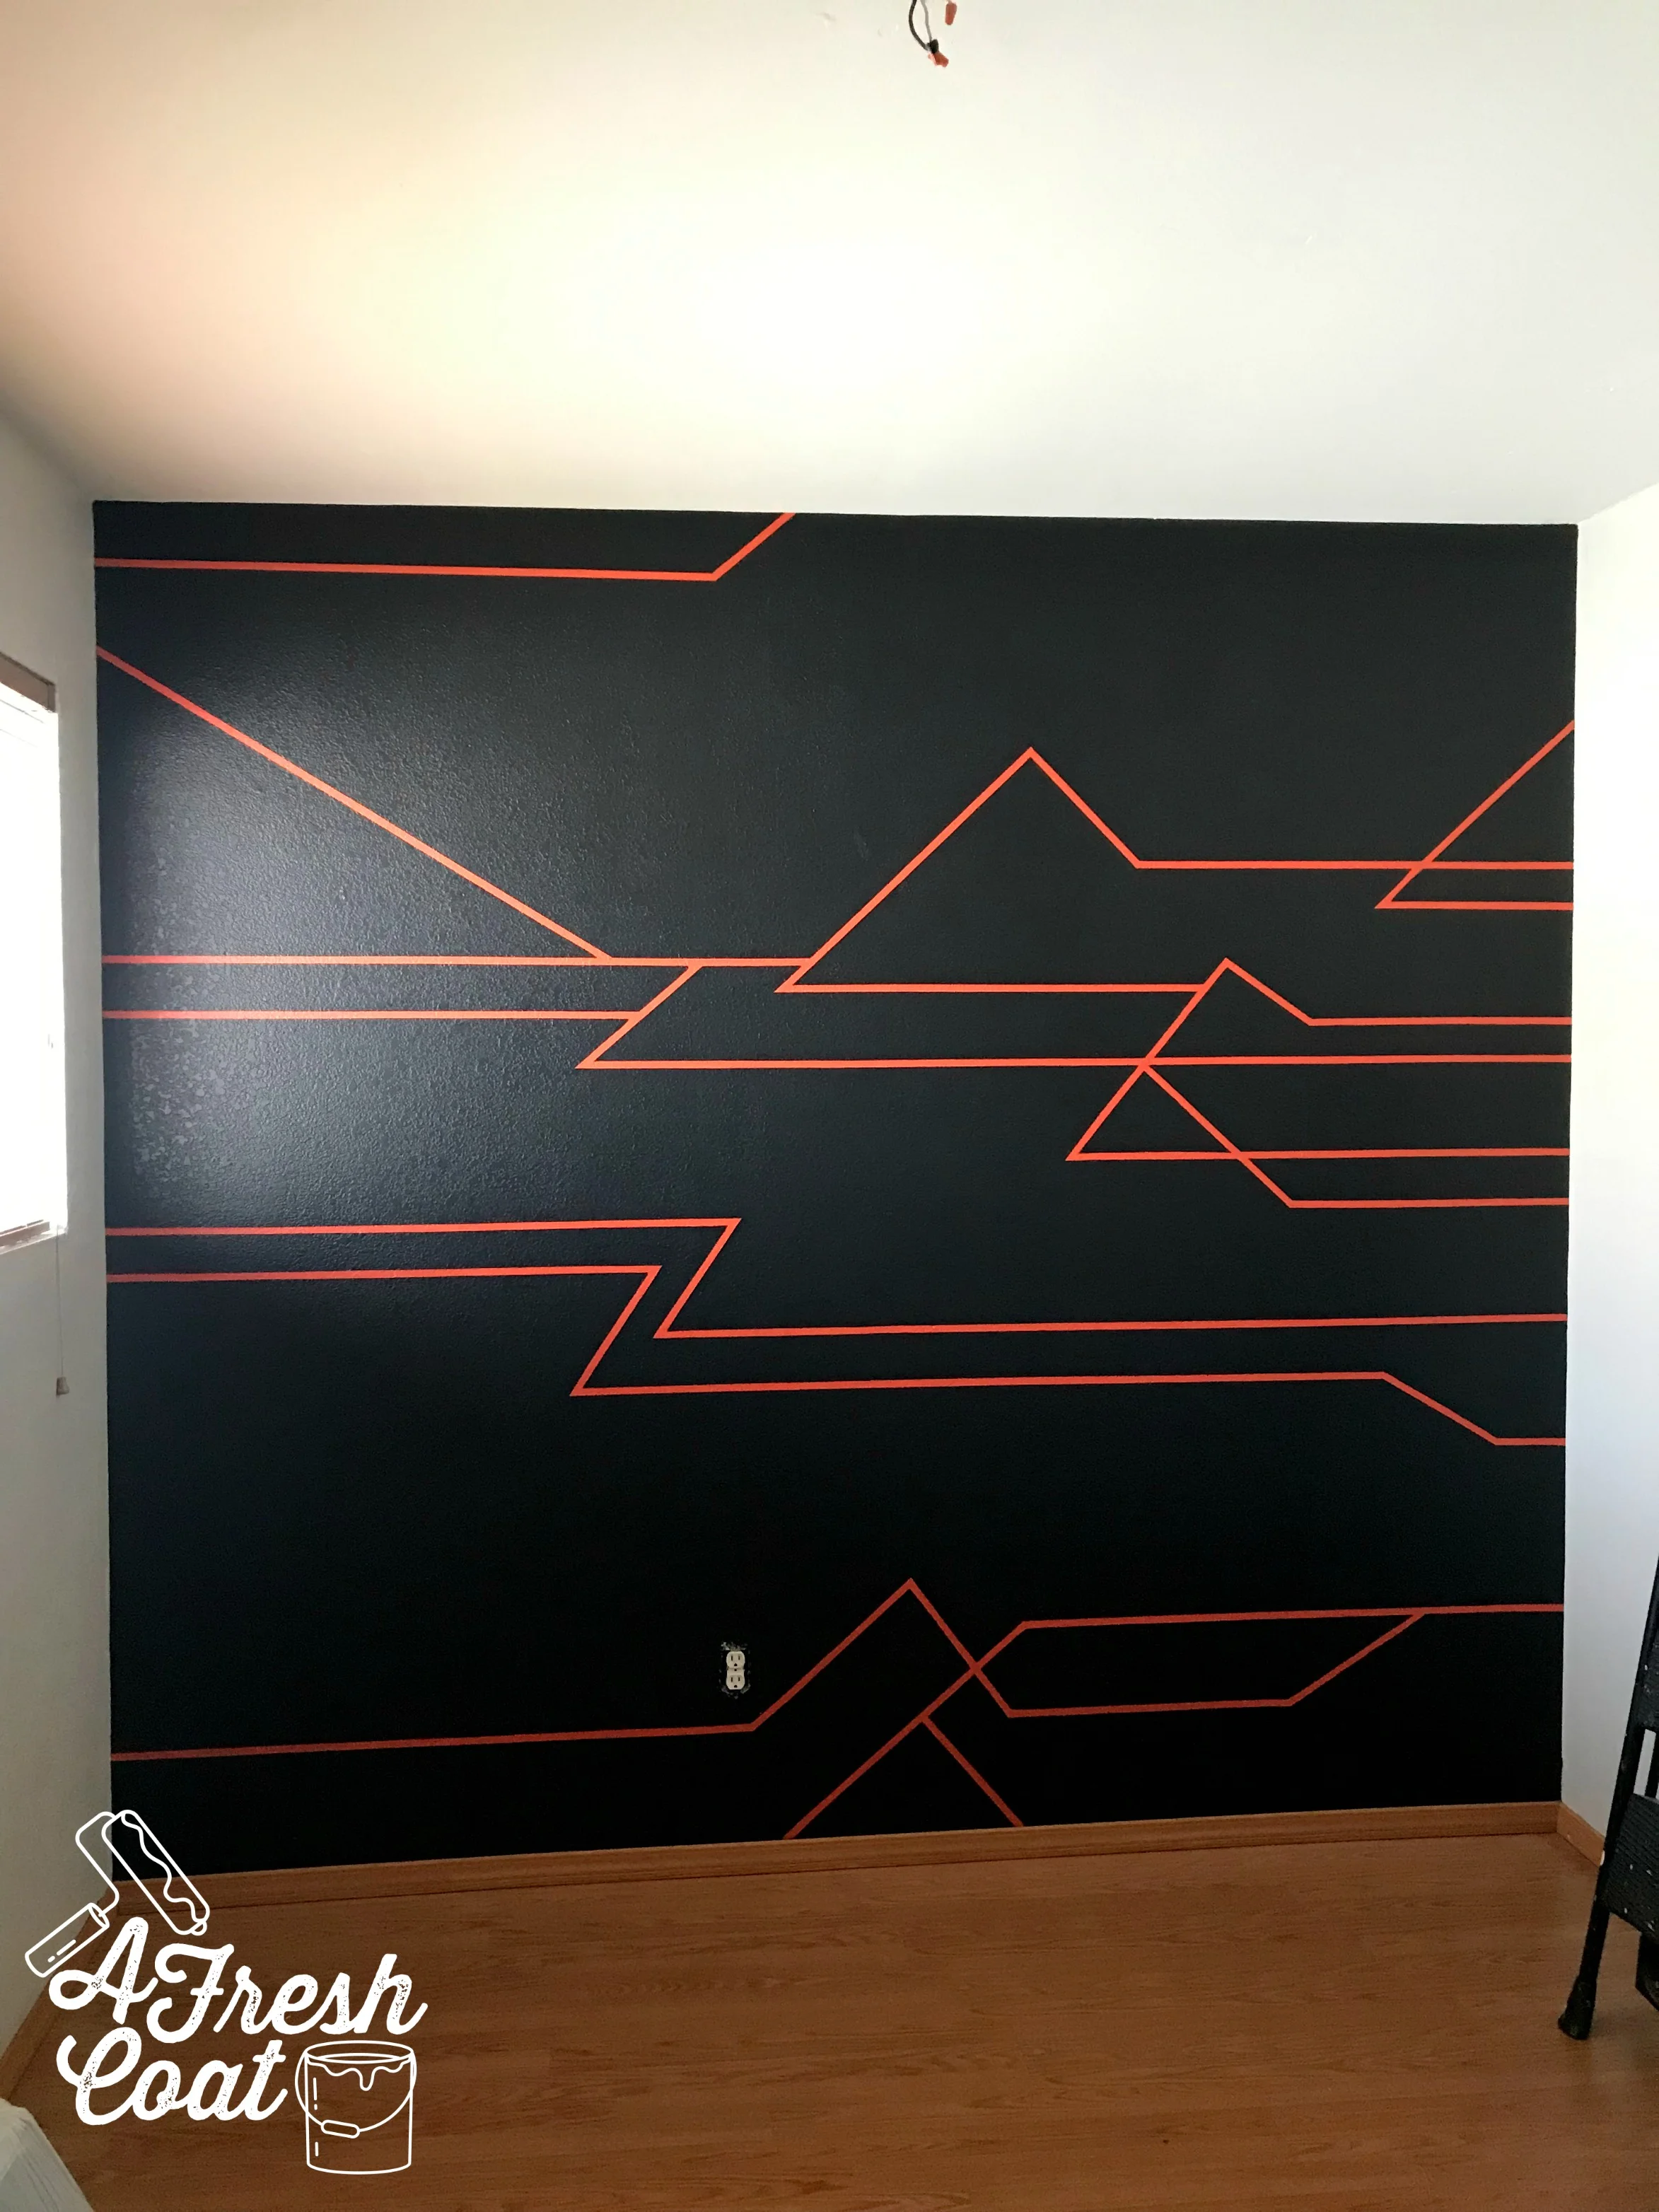
First up in this transformation? The paint. Originally, “B’s” room was painted in one hue of baby blue. After testing out samples, I got to work painting this space using Sherwin Williams First Star for the main walls and Valspar’s Motor City for the accent wall.

COA 4.jpg

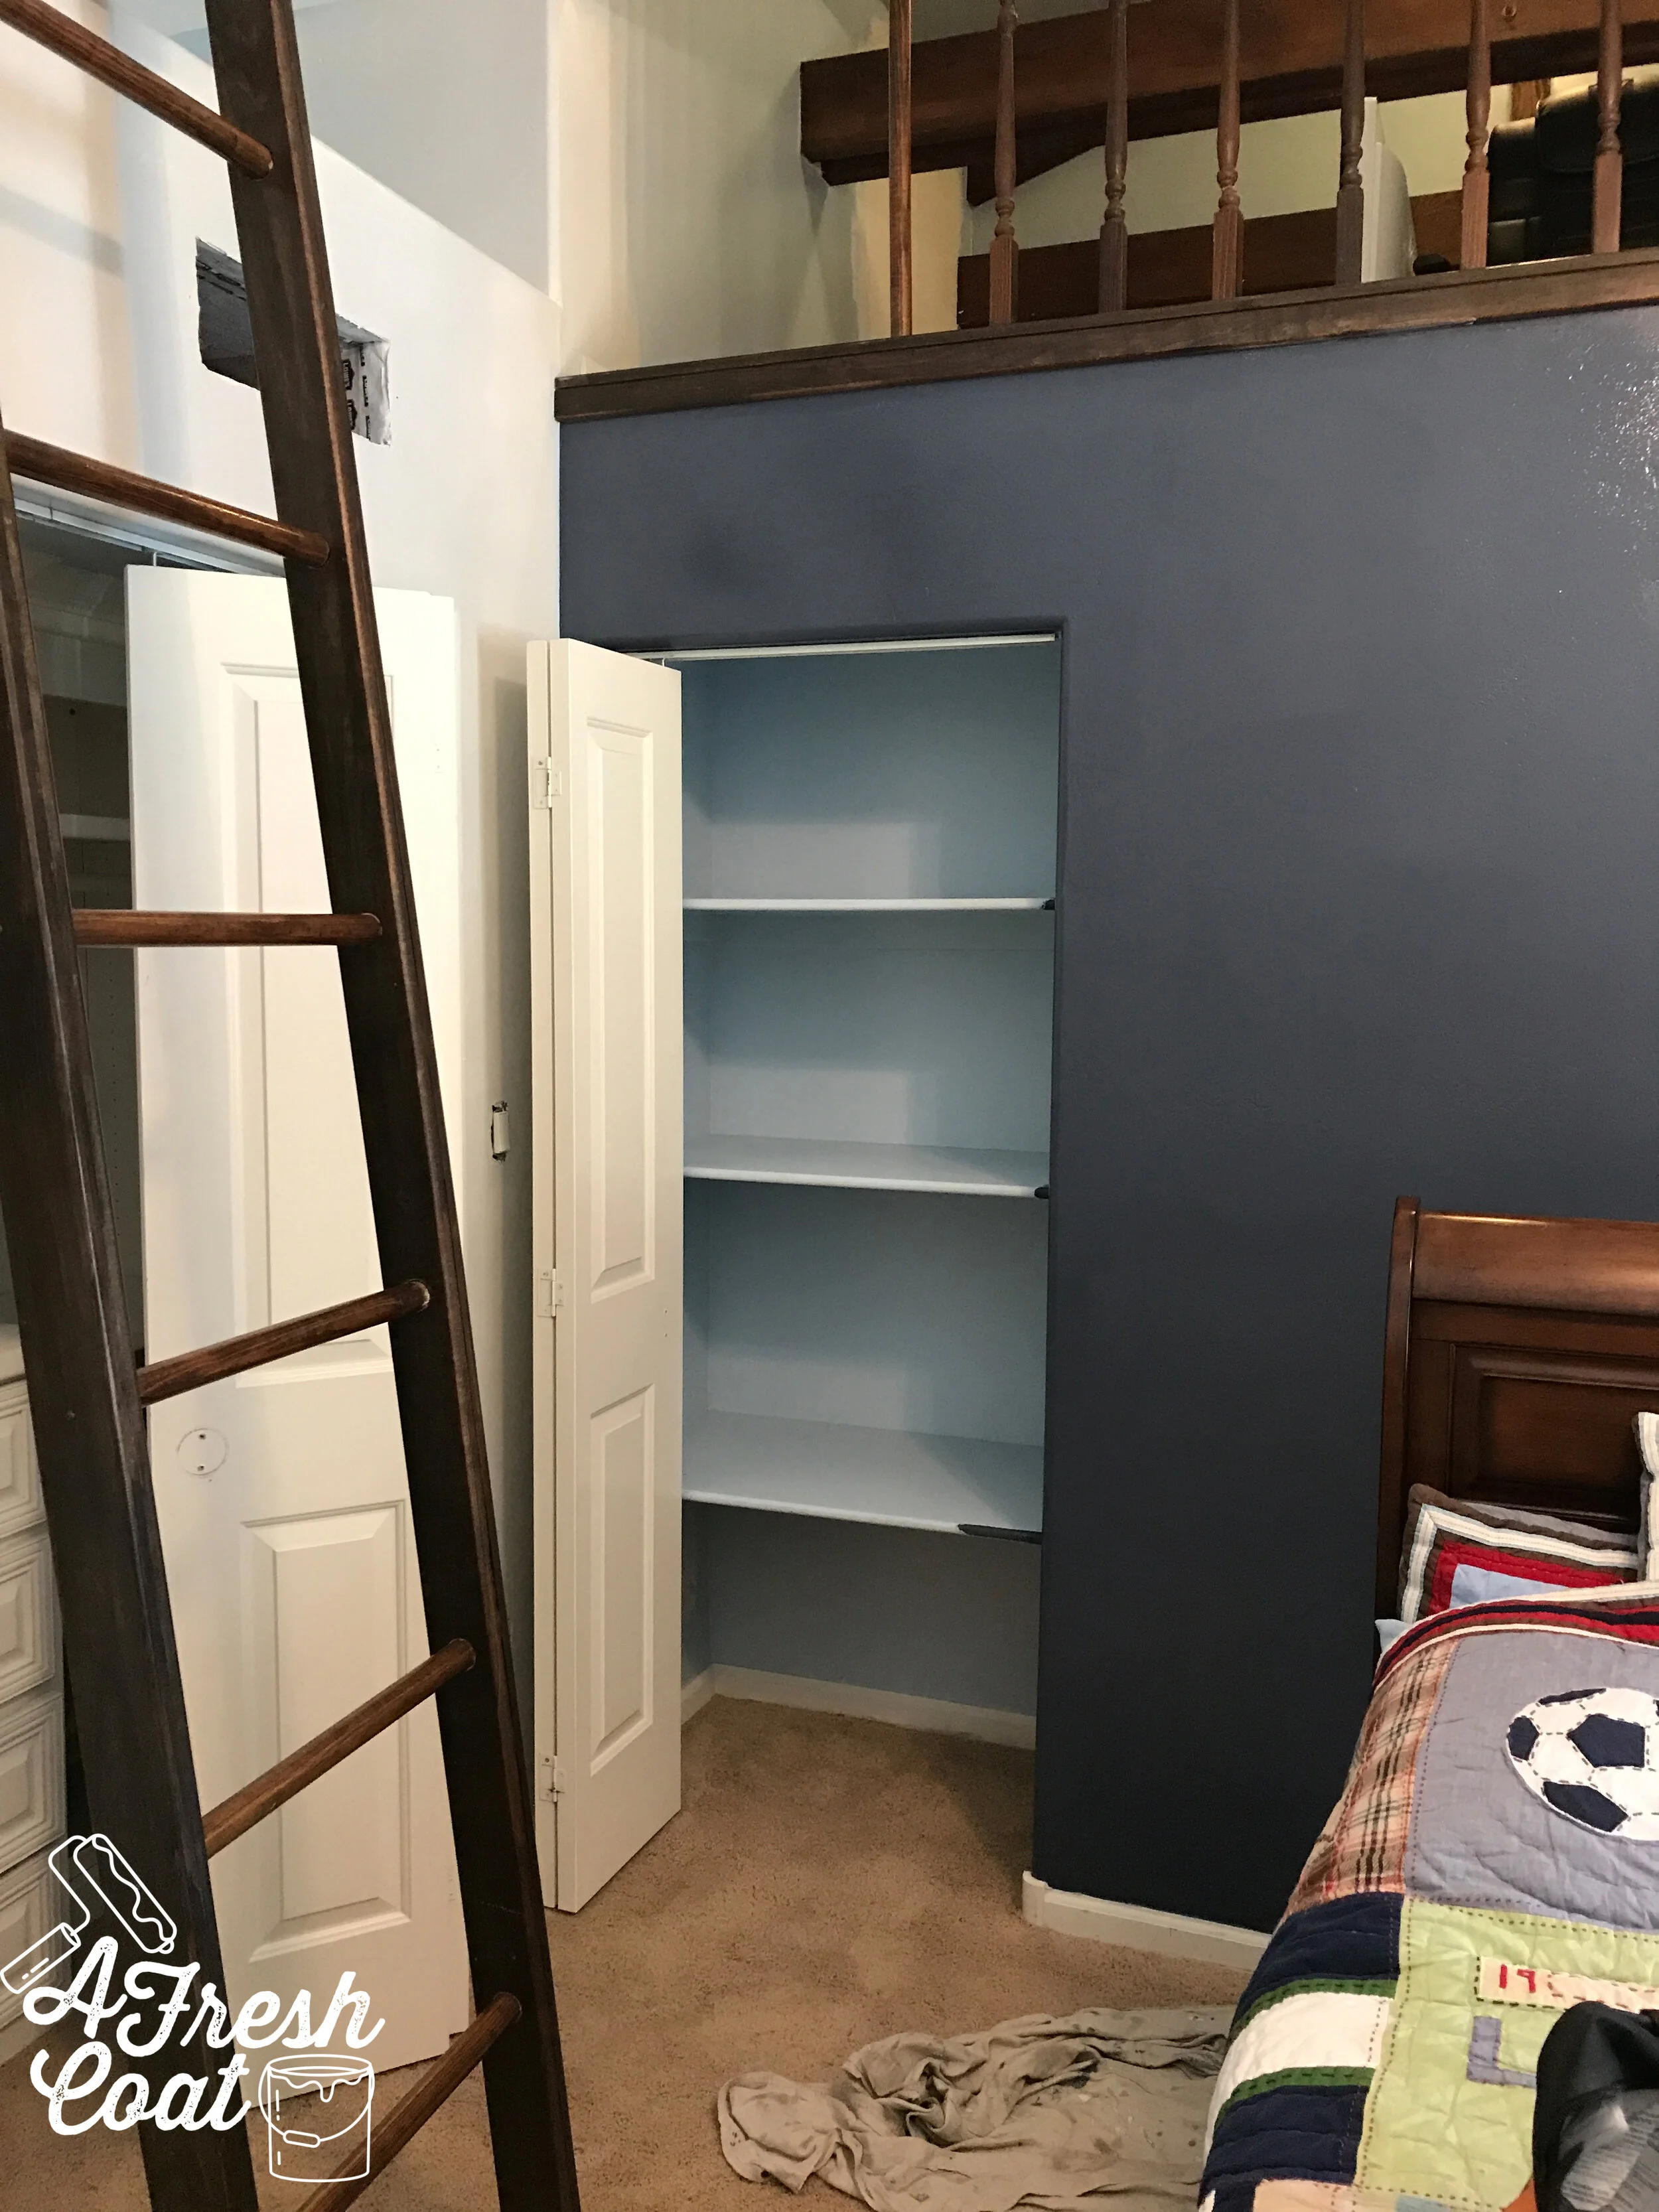
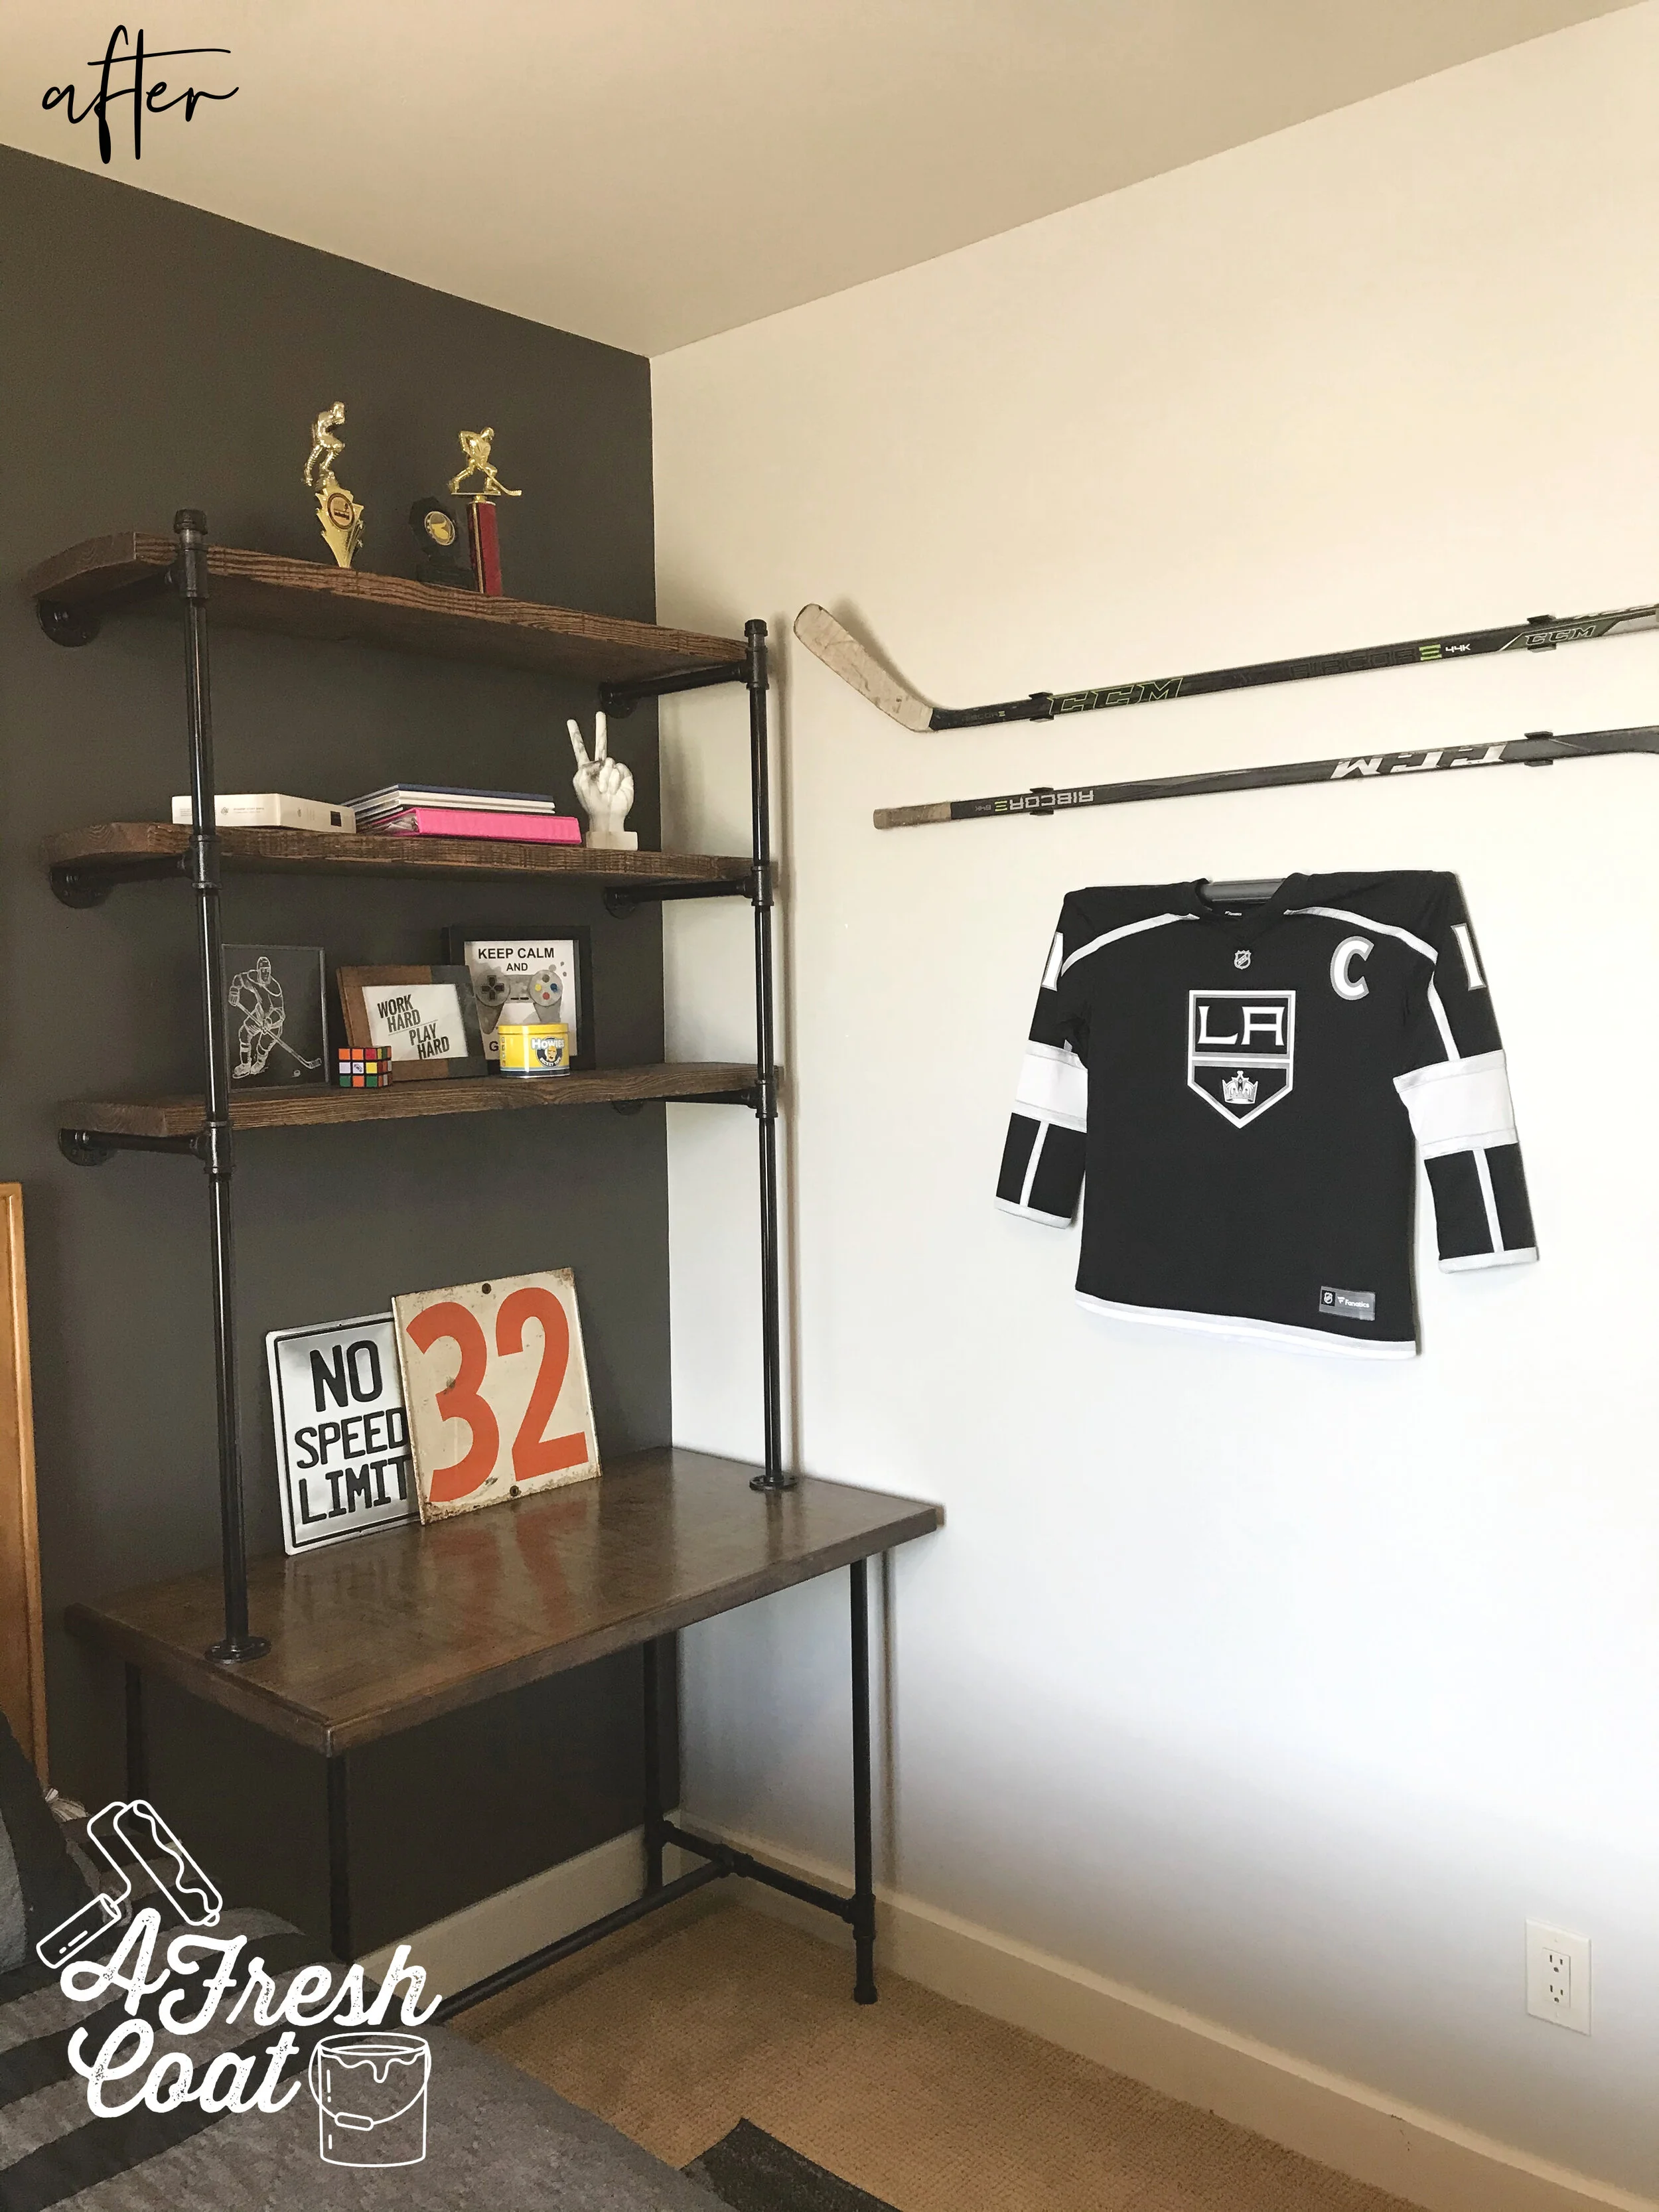
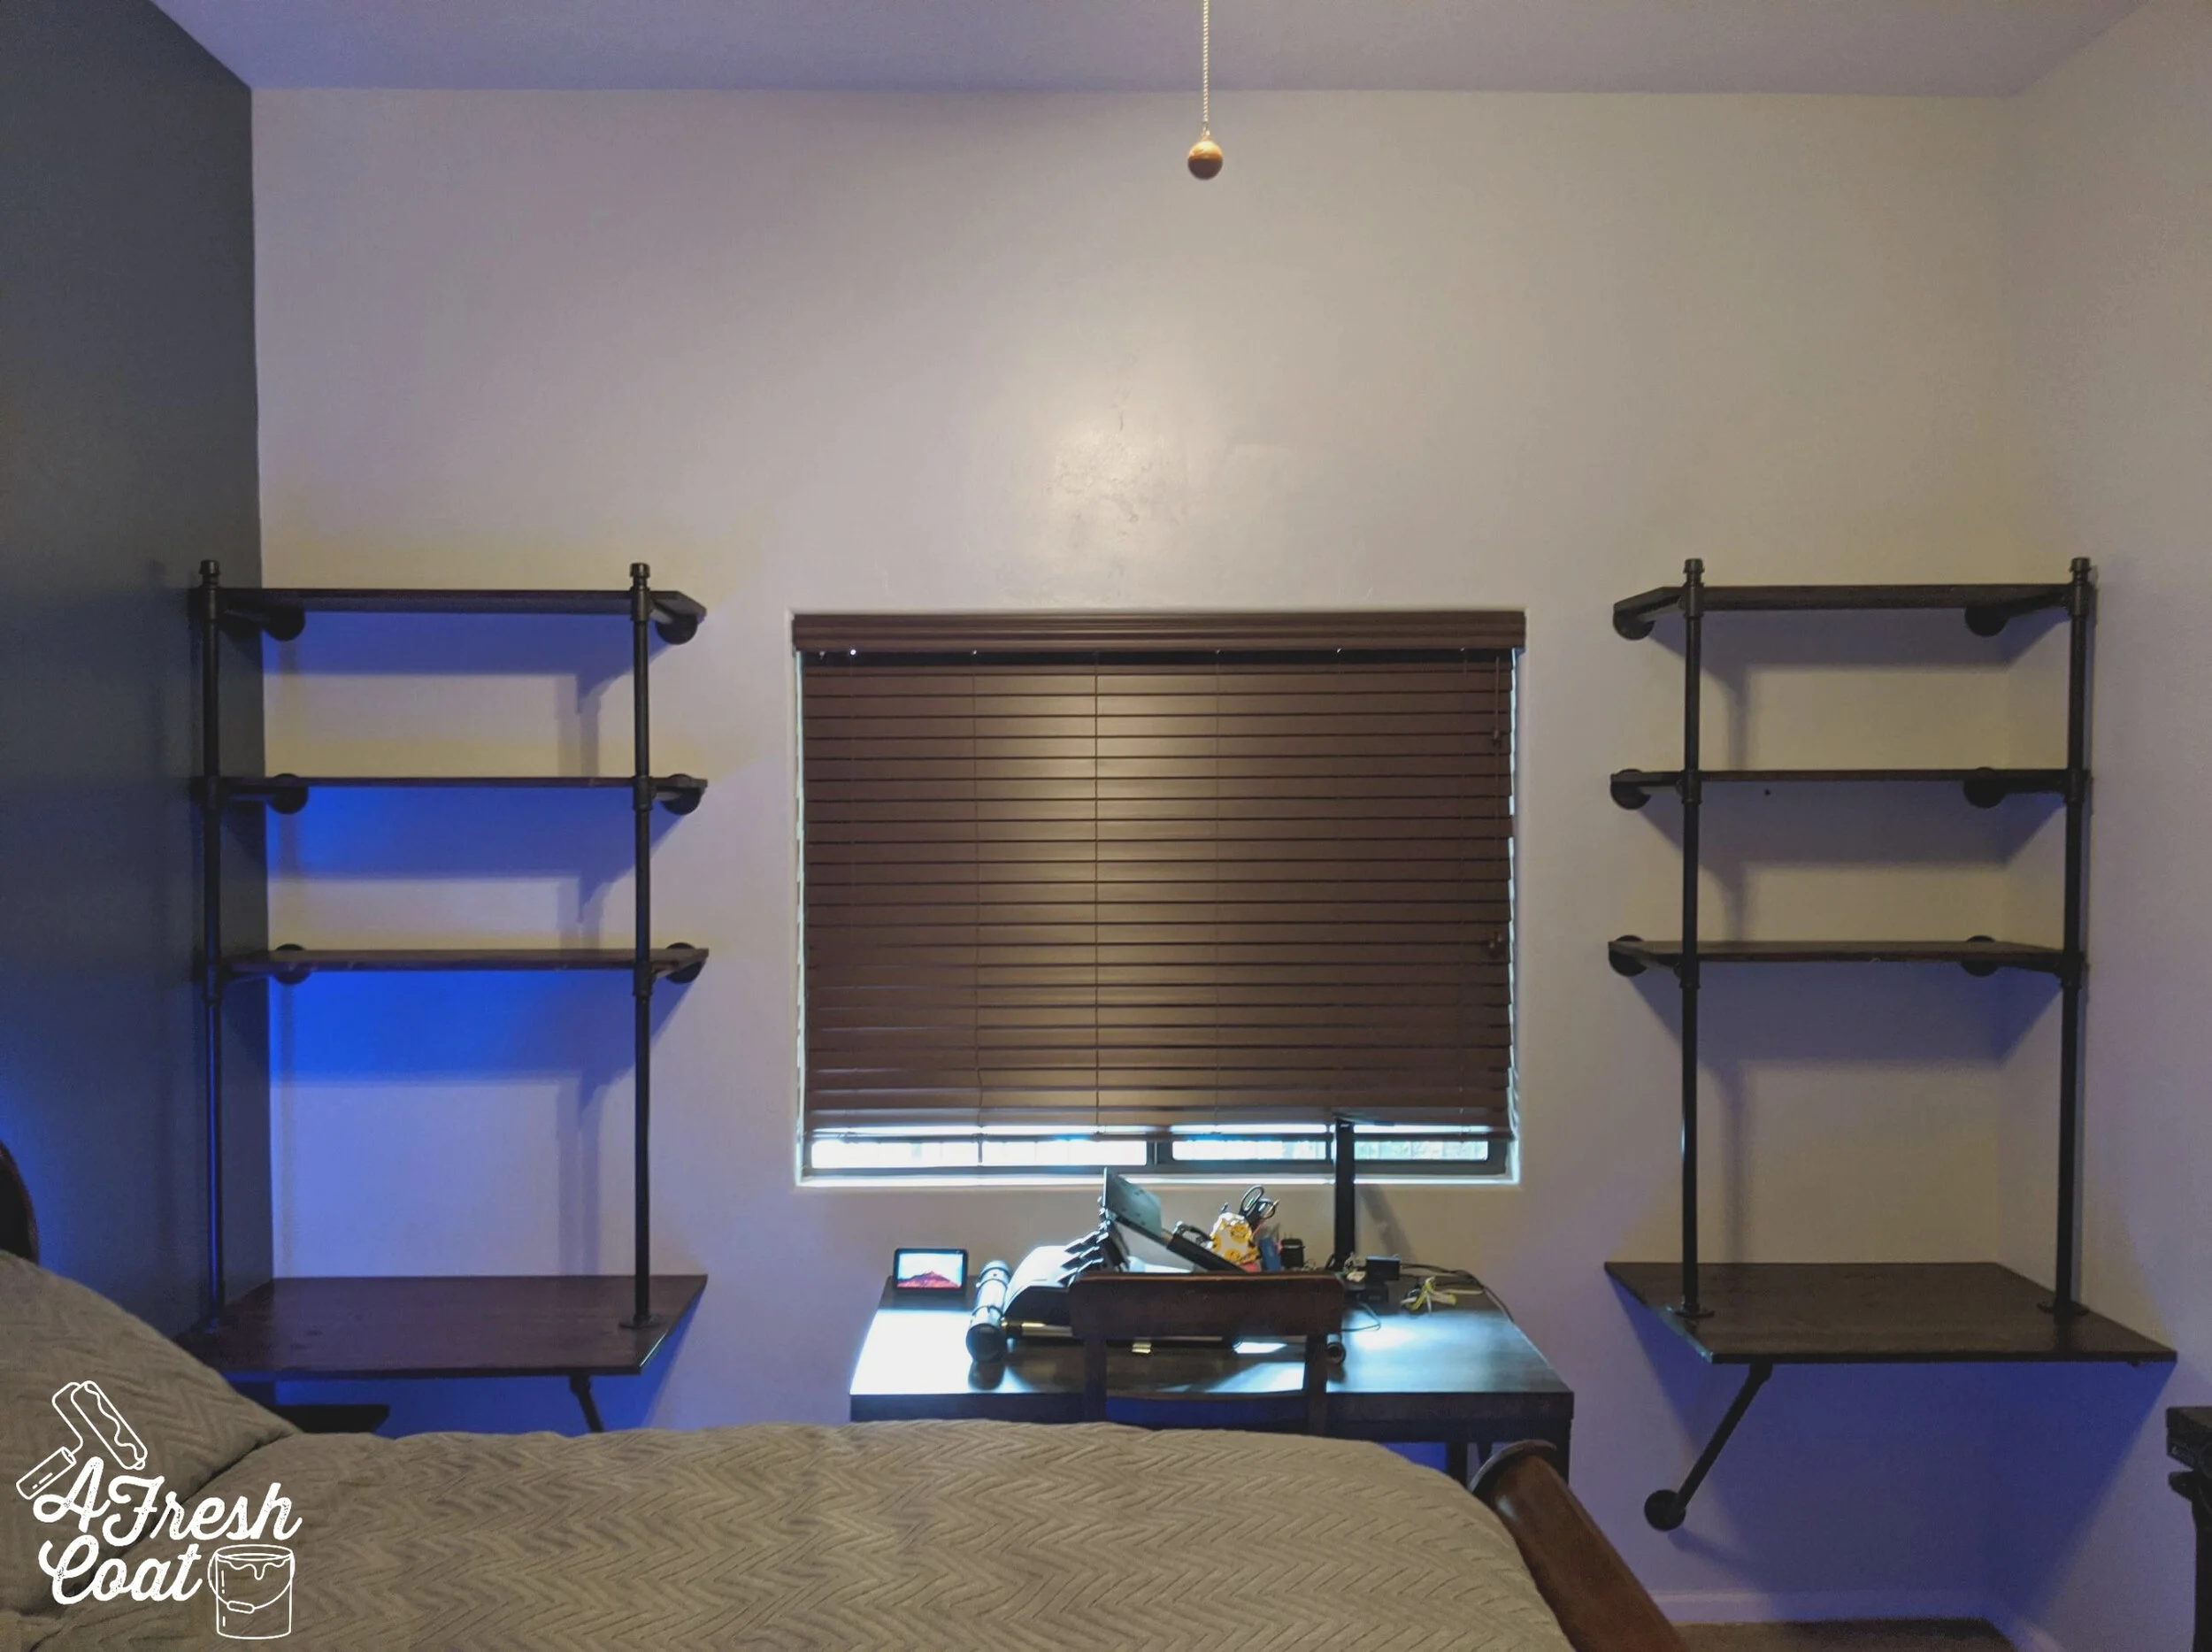
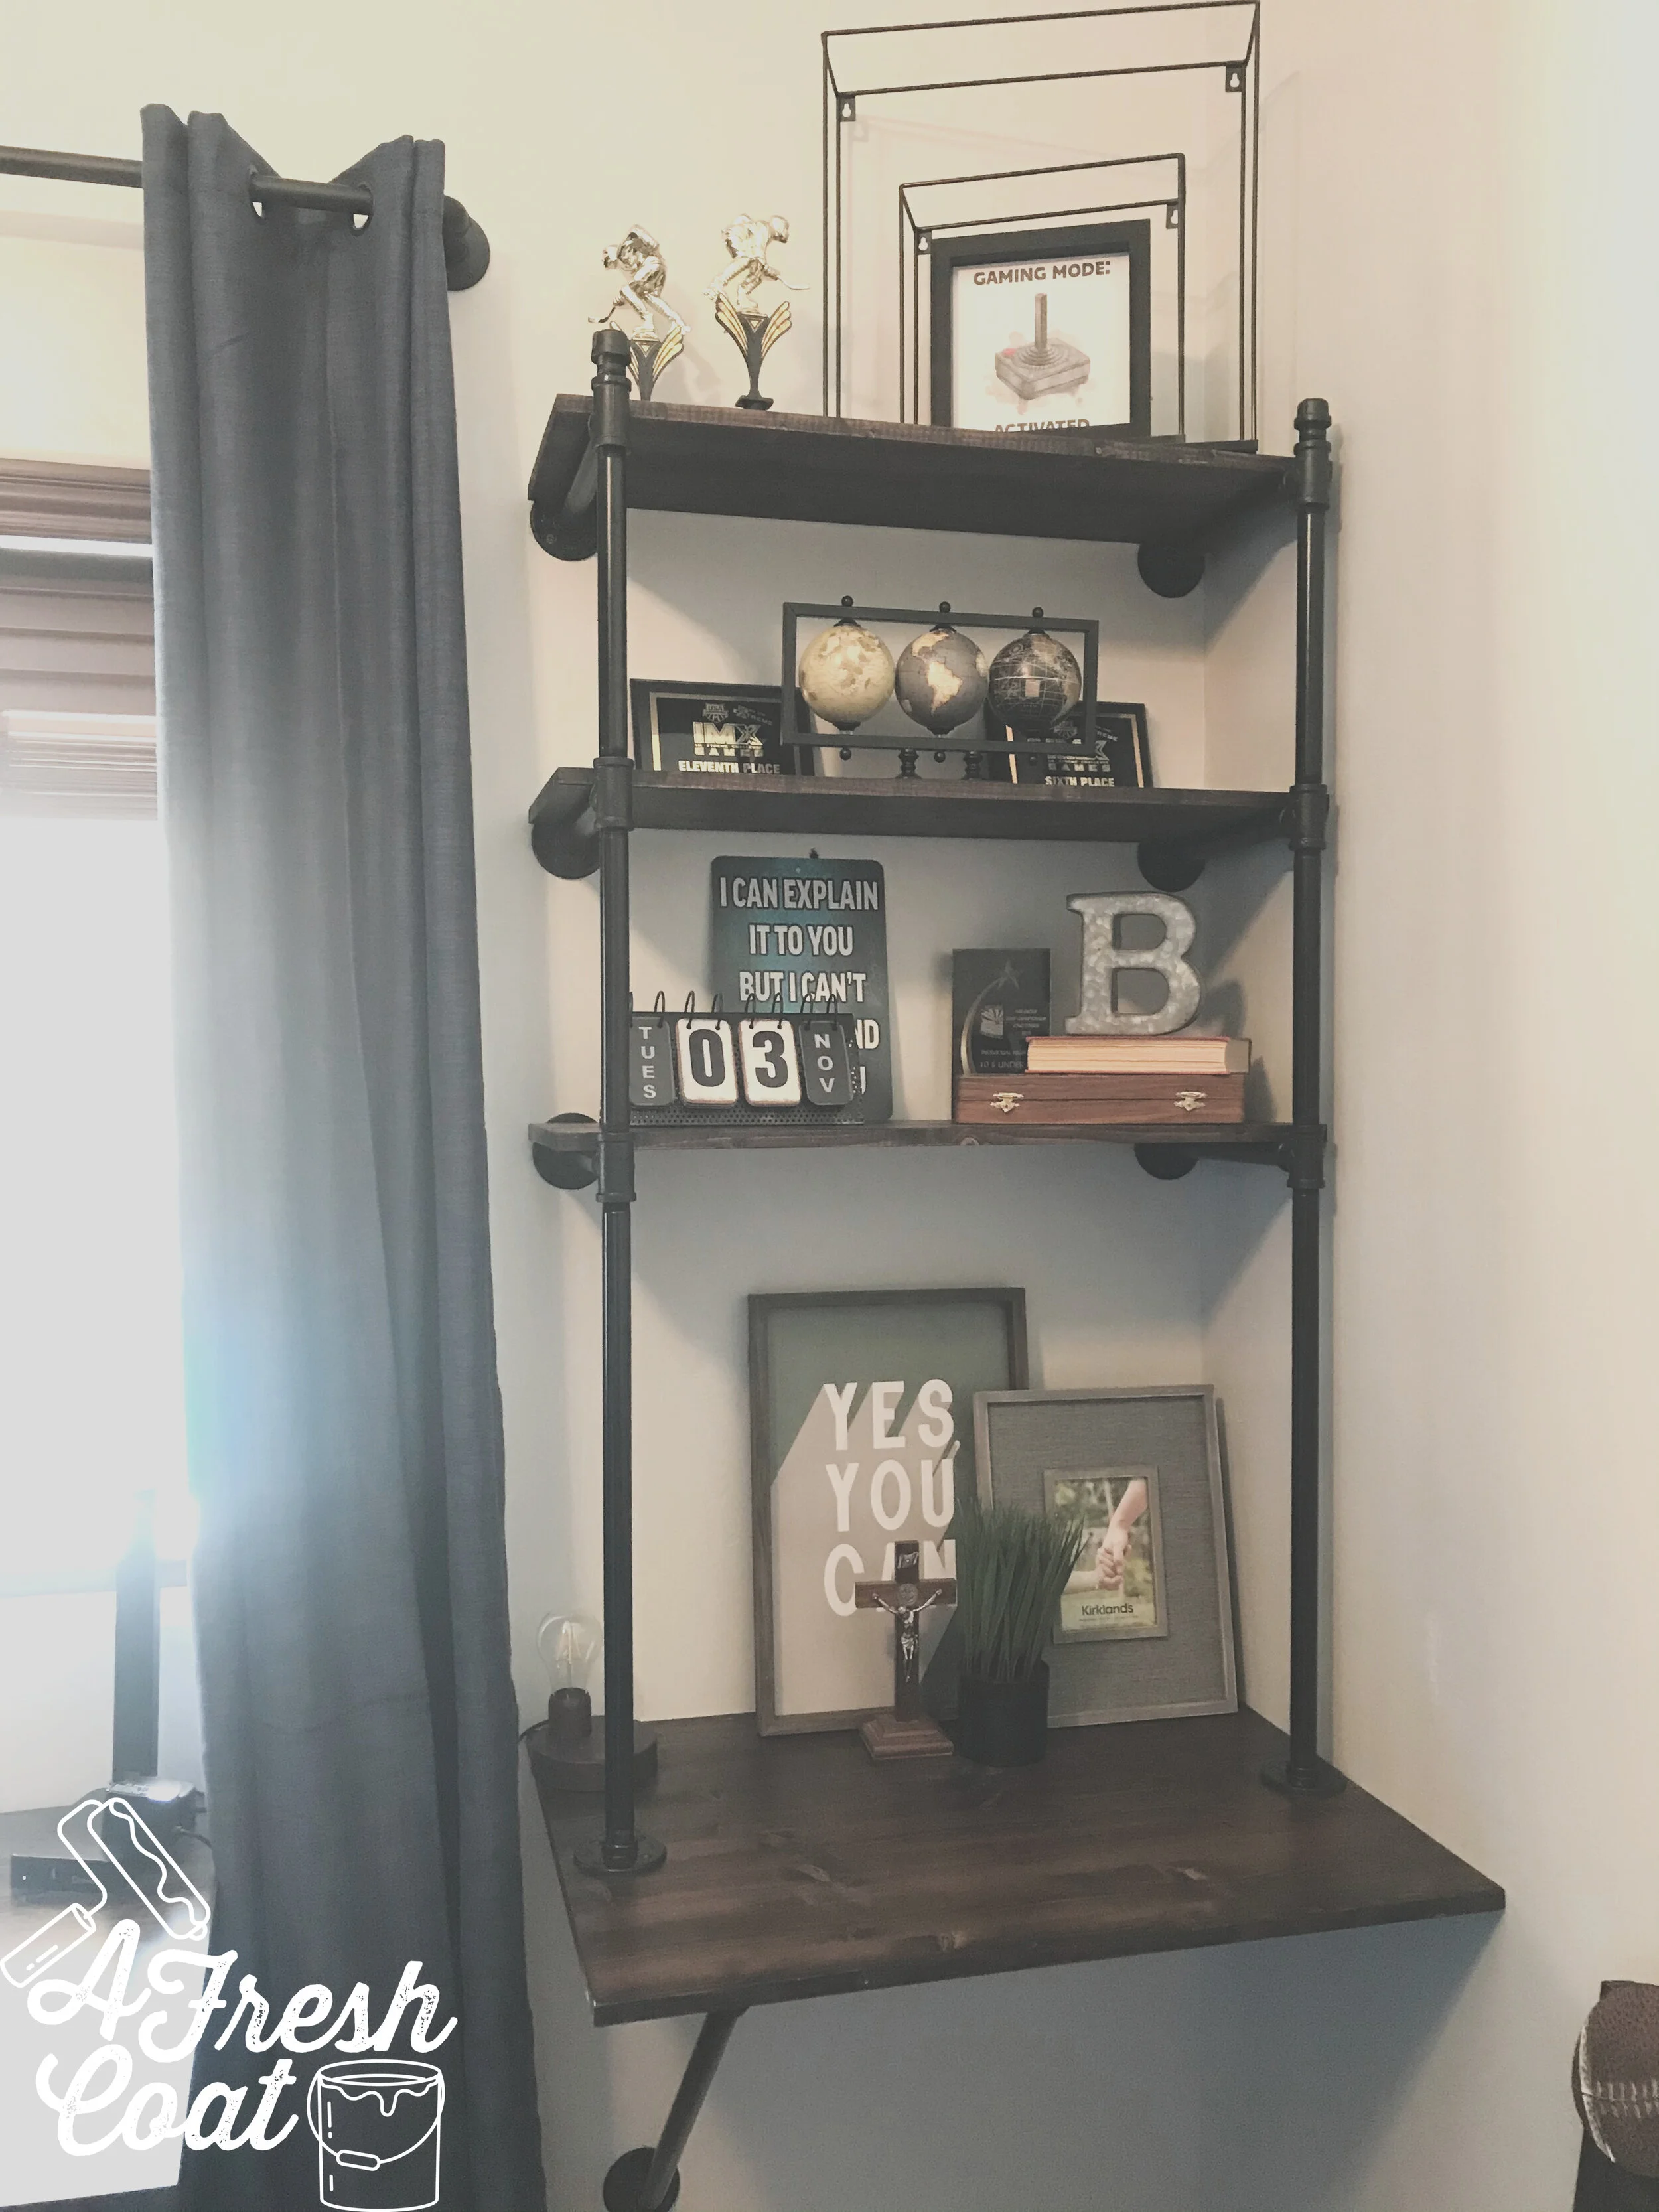
After a fresh coat of paint, it was time for Nate Koogle to do his magic by bringing in the wood desk/shelving units that “B” and his mom requested. Additionally, I asked him to cap the shelving in the storage closet with a wood finish and permanantly remove the bi-fold door. This room was just starting to come together…

COA 1.jpg
COA2.jpg

Next up? S T Y L I N G! And styling up a room is my favorite part.

Ready for the after pics?

Here you go!

COA7.jpg
COA8.jpg

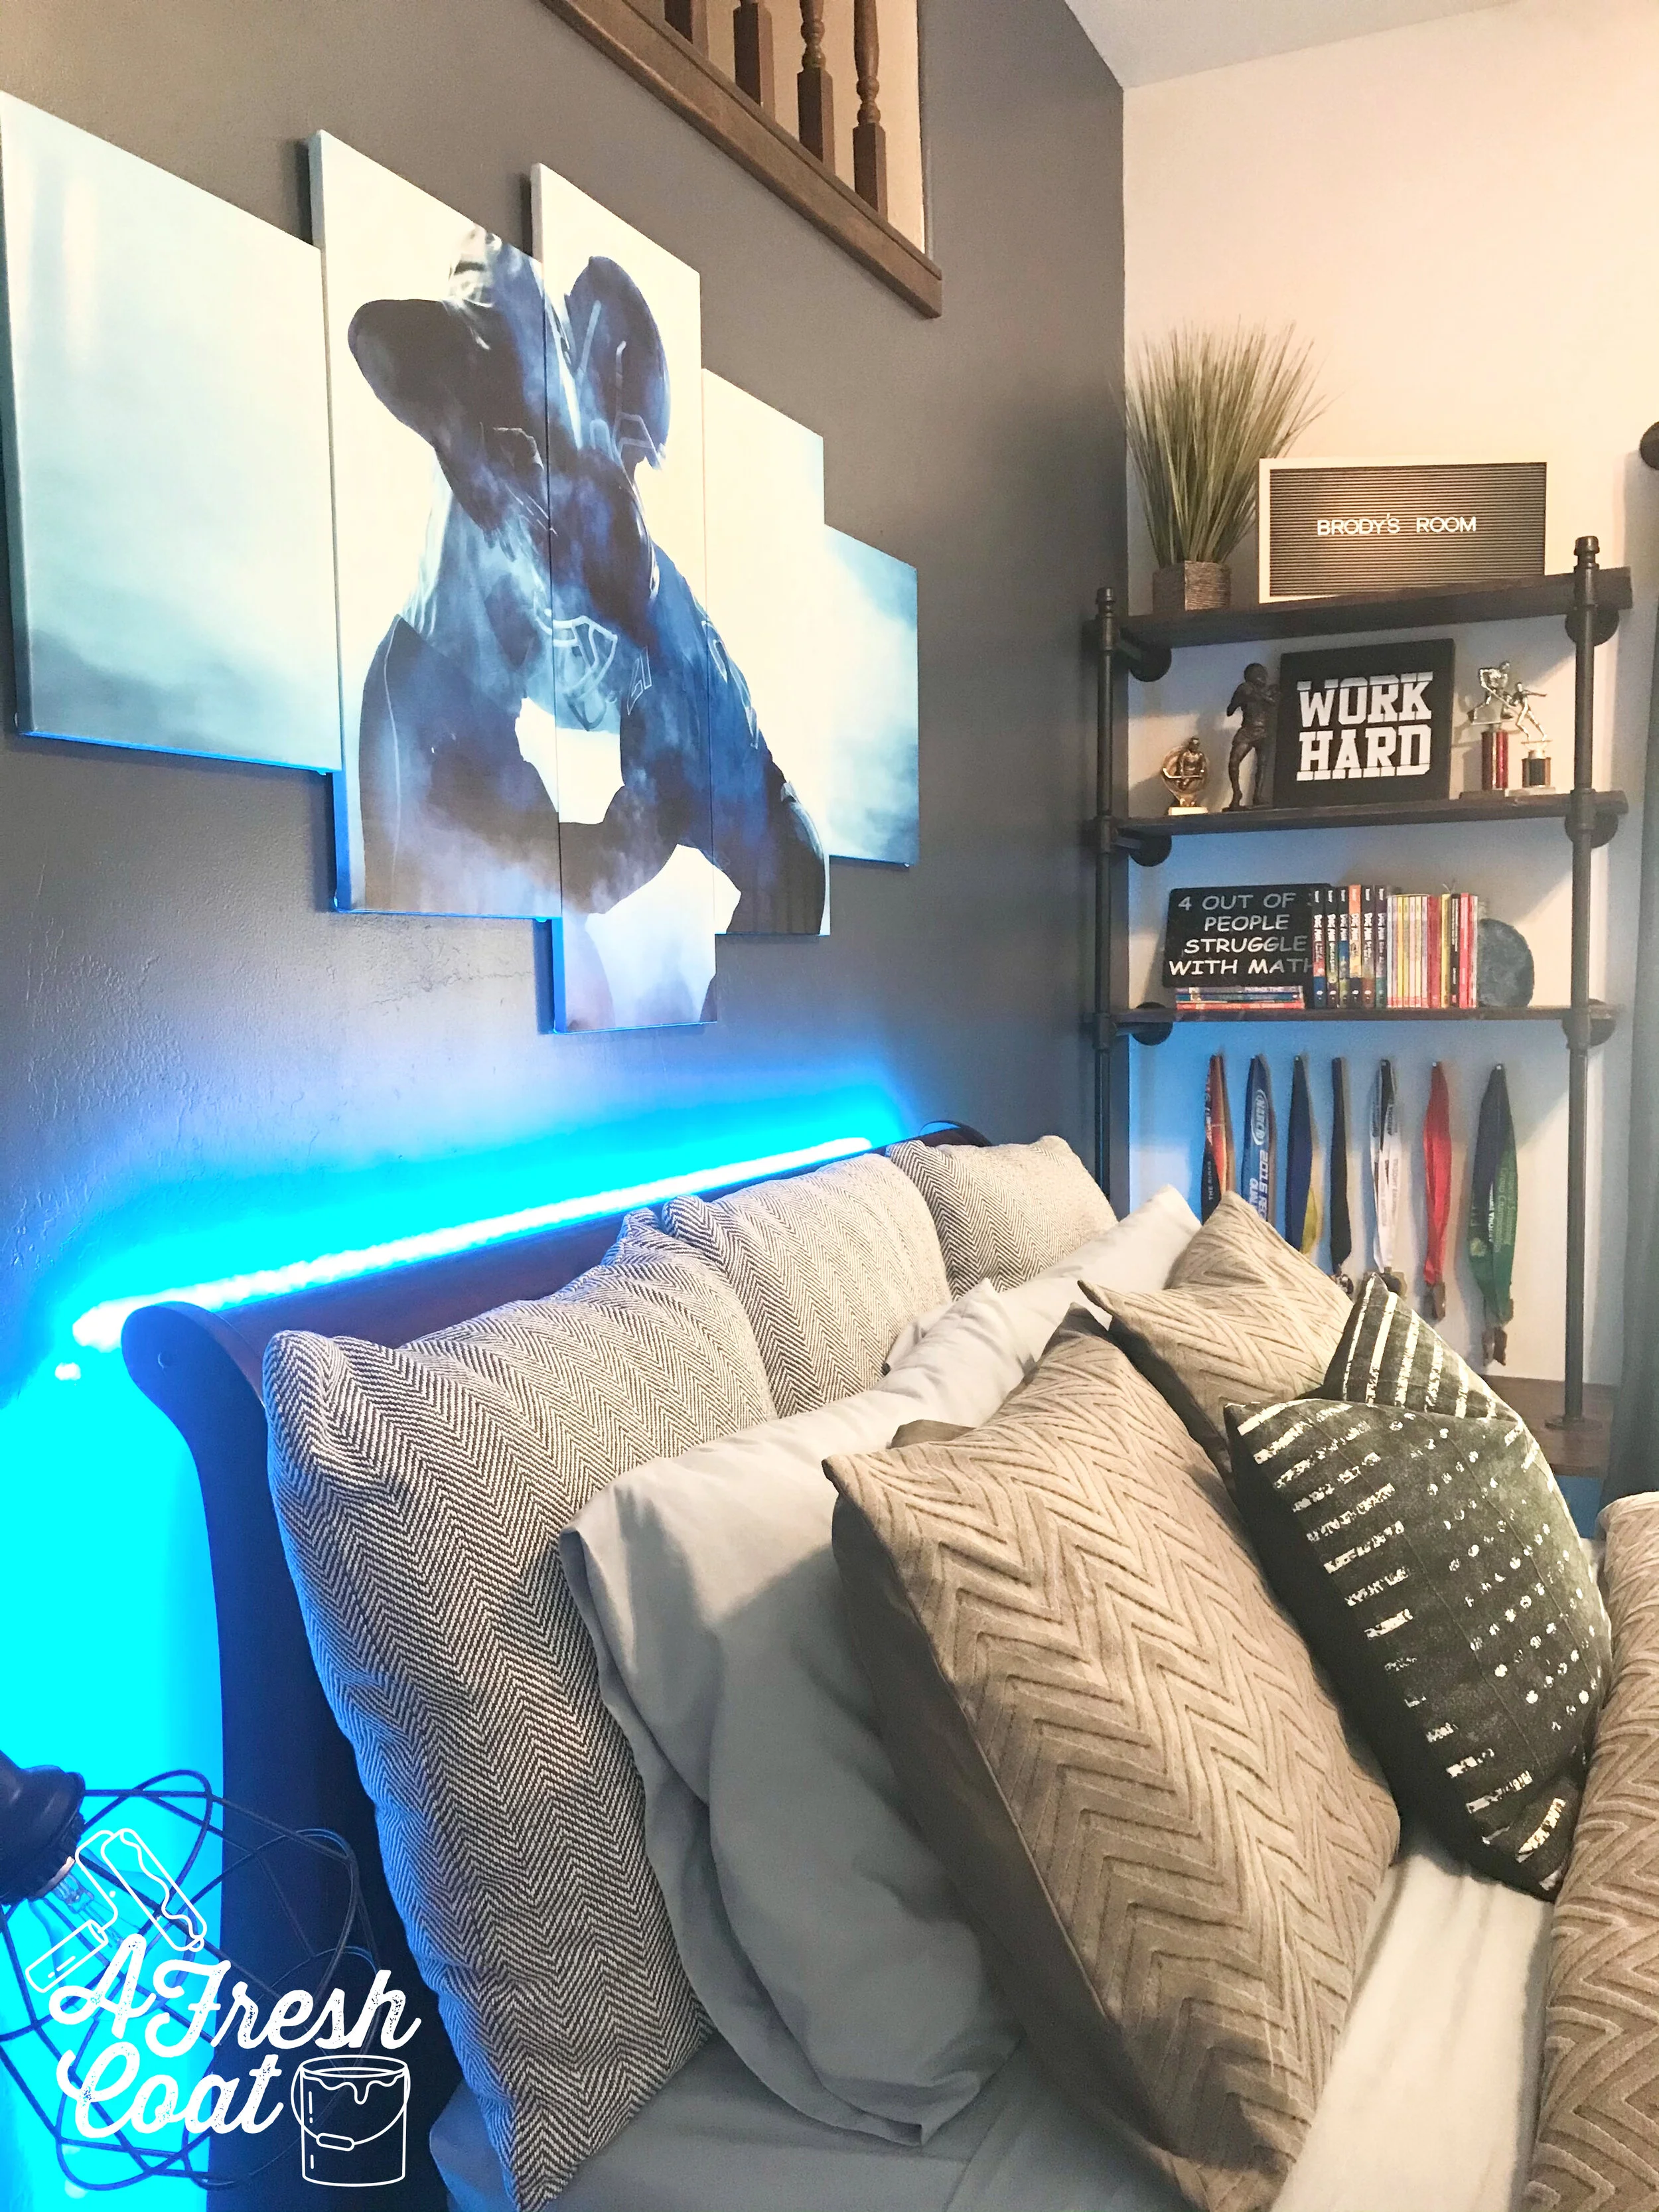
I normally don’t like to give boys a lot of pillows because honestly, they dont care for them, however, when I saw these Euro pillows from Target with a sweet teal herringbone pattern, I couldn’t pass them up…especially after finding that teal throw (placed at the end of the bed) to accompanyit. Win!

Also? How great is that football triptych? Fairly inexpensive and looks perfect with those LED lights.

COA9.jpg

These grommet navy blue drapes from Pottery Barn Teen MADE this space. They have a really great texture and pattern running through them and the quality is unsurpassed.

COA10.jpg
COA12.jpg
COA11.jpg

One more time with the before and after…

COA5.jpg

and AFTER:

IMG_6813.jpg

THE DETAILS:

PAINT: Sherwin William’s First Star/Valspar’s Motor City

PAINT LABOR: A Fresh Coat Yuma

BEDDING: Amazon, Target, Hobby Lobby

TABLE LAMP: Hobby Lobby

CUSTOM WALL UNIT/SHELVING: Nate Koogle

TRIPTYCH: Etsy/Amazon

DECOR: Marshall’s, Etsy, Hobby Lobby, Marshall’s, Kirkland’s

DRAPERY ROD: Amazon

DRAPERIES: Pottery Barn Teen

RUG: Overstock

Love, J


House of Hockey...Room #2

Teen Boys RoomJenny Sulpizio26 Comments

Happy Thanksgiving! I am so greateful for all of my clients, past and present! I plan on consuming copius amounts of food today but in the meantime, here’s the second room makeover in the hockey home. Enjoy!

It’s time for little brother, “T’s” room reveal in the second installment of the House of Hockey dual room makeovers.

“T” is thirteen, a bit more reserved than his older brother, prefers neutral tones over color, loves hockey, and was in need of a room with more storage and a bit more style.

Here is where we started:

House of Hockey Room 2 1.jpg
House of Hockey Room 2 2.jpg

Another great space that just needed a bit more character. Here comes the vision board. Paint, wall decor, hockey accents, a sweet built-in storage unit, and new bedding would take this room to a whole ‘nother level.

Trevor's Bedroom.jpg

Using images from Pinterest to serve as inspiration, bedding from Pottery Barn Teen, and the colors of “T’s” favorite team—The L.A. Kings—this room was about to get redone.

My first thought was to create an accent wall in this room as well, but with a slightly lighter hue of black called Iron Ore. It’s pretty much a charcoal color with a hint of brown added to it. This is quite possibly my new favorite color.

What do you think?

House of Hockey Room 2 3.jpg
House of Hockey Room 2 4.jpg
House of Hockey Room 2 5.jpg

This room really has the “wow factor” now. The amazing industrial wood shelf and pipe units are so striking up against that charcoal wall (thanks, Nate Koogle). The series of canvasd arts offer a bright, yet simple area for the eye to land, and enough contrast so that the room doesn’t look smaller.

You might of noticed (and this was intentional), that each of these rooms only has one throw pillow. When working with teenage boys, one thing is certain: they do NOT have the innate need to express themselves through throw pillows. Girls are another story, and the more pillows the better. But guys? No. One pillow and I’m lucky to get that. LOL

Oh! And did you spot that super cool lamp up above? Here it is up close:

House of Hockey Room 2 6.jpg

“T’s” mom found this on Etsy and I absolutely love it. The little details are what truly make a room and bring it to life. This piece is not only fun, but oh-so-creative. How ‘bout those hockey medals on display too? They pop off of that wall and really stand out.

One more shot…

House of Hockey Room 2 7.jpg

When styling these shelves, we kept it super simple. Trophies, a fave number, and a few decor items and that was all. Simple is (almost always) better.

Here’s the transformation one more time:

House of Hockey Room 2 2.jpg
House of Hockey Room 2 3.jpg

The Details:

Bedding: Pottery Barn Teen

Wall Decor: Etsy, Hobby Lobby

Paint: SW Iron Ore, SW Agreeable Grey

Paint Labor: A Fresh Coat

Rug: Wayfair

Throw Pillow: Etsy

Hockey Triptych: Etsy

Industrial Pipe Units: Nate Koogle

Love, J


House of Hockey...Room #1

Teen Boys RoomJenny SulpizioComment

This is actually a two-part blog post involving two different bedrooms, two teenage brothers, and two serious hockey fans—”B” and “T.”

We’ll start with “B’s” room first. A high school senior, “B” needed a room that reflected his fun personality, hobbies, interests, and likes. He liked the idea of using black in his room but also wanted pops of color throughout. He also needed a new gaming station area, seating, shoe storage and wall decor. Here is where we started:

House%20of%20Hockey%20Room%201%201.jpg
House%20of%20Hockey%20Room%201%202.jpg
House%20of%20Hockey%20Room%201%203.jpg

“B” had a great space to work with—large and capable of so much, including reassigning furniture and adding in elements that would make his room more functional and reflective of him.

It started with the vision board. I immediately felt a fresh coat of paint would give this space an instant makeover. ..followed by some fun hockey pieces, new nightstands, lamps, bedding, and the likes. “B’s” mom was on board and the revamp got underway!

Benji's Room Makeover.jpg

Ready for the reveal?

House%20of%20Hockey%20Room%201%205.jpg
House%20of%20Hockey%20Room%201%207.jpg

This is one of my favorite reveals to date because of the major changes that took place, those bold pops of color against a black backdrop, the the super fun elements we added in to make this room into the finished product it is today.

House%20of%20Hockey%20Room%201%208.jpg

Remember the built-in desk unit? Gone! In its place is this sweet couch, side tables, industrial lighting with Edison bulbs, and great record collection on display.

Oh, and remember the shoe collection that needed a little bit of help? How ‘bout this?

House%20of%20Hockey%20Room%201%2010.jpg

These LACK units from IKEA are perfect!

Last but definitely not least was the gaming station that needed a little “umph.” Nate Koogle came in and constructed this awesome structure! Look at the pipe he sprayed black! Looks so good and is perfect for this little nook of “B’s” room.

House%20of%20Hockey%20Room%201%209.jpg

Want to see the before and after pics one more time? I seriously love this room makeover.

House%20of%20Hockey%20Room%201%202.jpg
House%20of%20Hockey%20Room%201%205.jpg

The Details:

YUMA Airport Terminal Pillow: Etsy

Throw Pillows: Etsy/Zazzle

Paint Colors: SW Tricorn/SW Agreeable Grey

Paint Labor: A Fresh Coat

Hockey Artwork: Etsy

Bedding: Wayfair

Table Lamps: Wayfair

Nightstands: Wayfair

Couch: Wayfair

Shoe Displays: IKEA

Rug: Wayfair

Gaming Station: Nate Koogle

Love, J


Taking Flight

Teen Boys RoomJenny SulpizioComment

In the past few months I’ve had a number of teenage boys in need of teenage rooms. You know—a space that ditches the toys of old to make room for something new—their present interests and likes. Honestly, these are some of my most favorite rooms to do because as much as boys say they don’t care when it comes to what adorns their walls and goes on their beds—they really do. They have likes and dislikes, color preferences, and definite opinions when it comes to specific decor. And I love it! I love when they get a new space that’s fully customized to them.

“D’s” room was no different. A World War II and all-things-avaiation-fanatic, “D” was actually switching to another room within his home. On the cusp of high school, he was ready for a whole new area to call his.

Here is where we started:

Taking Flight 1.jpg
Taking Flight 2.jpg

During our consultation, we discussed a number of ideas including a gaming station, loft bed, futon area, TV space, and the overall theme I discussed earlier: aviation. Now, I love me a good theme but I’ve found the most important rule one can abide by is to not go overboard (this can be hard). When it comes to themes, you can make a big impact with just a few key items.

If you’ve read my blog before then you all know, it starts with the vision board:

54255913_948972085305745_3736721100566953984_n.jpg

The goal was to create a loft bed with seating underneath for gaming and gaming with friends, a media area for the niche in his room, a large, oversized black and white aviation poster, industrial and rustic elements in furniture and decor, along with a deep green accent wall.

First step? The paint!

After sampling, the accent wall color selected was Sherwin William’s Dried Thyme, followed by Sherwin William’s Agreeable Grey for the three remaining walls.

Taking Flight 3.jpg

After a few hours, the room was completely painted and ready for the next stage: decor.

Taking Flight 13.jpg

Ready for the “after” pics?

Taking Flight 10.jpg

Ignore the bed—I didn’t even realize while taking the pics that I needed to straighten the bottom of the comforter. Oy! Anyways, “D” opted for a loft bunk with a black metal futon below. He selected all of his own WWII inspired artwork (super cool), along with his new rug.

How cool is this? A brand new dresser and matching console in a weathered gray finish along with that SWEET(!) black and white oversized plane. Big impact. Huge!

Taking Flight 9.jpg

How ‘bout this for a gaming area? This space is functional, fun, industrial, rustic, and just plain cool.

This room is officially flipped and I love how it turned out. Even better? I love that “D” loves how it turned out.

The Details:

Oversized Plane Photo: Etsy

Paint: SW Agreeable Gray/SW Dried Thyme

Paint Labor: A Fresh Coat Yuma

Clock: Amazon

Furniture: N/A

Rug: Amazon

Smaller Plane Photo and Frame: Hobby Lobby

Cactus Plant: Dream Gift Shop-Yuma, AZ

“D” Initial: Michael’s

Futon: Amazon

Love, J


Inspiration: Ragnarok

Teen Boys RoomJenny SulpizioComment

I’ve completed a slew of teenage boys rooms lately…four to be exact! Cool thing though? Two of these boys have wanted black walls. But we’re not talking about just one black wall. No, these guys desired every wall in their room(s) painted black.

Whoa.

Usually such a request causes a raised eyebrow (or two) from mom and dad, and is also met with some major disgust and a whole lot of resistance to say the very least. It’s as if you can see my clients calculating in their heads how much money they’re going to lose at resale.

Believe me, I get it. I do. But black paint gets a bad rap because as I’ve said time and time again—done right, a black wall (or walls) can look all sorts of awesome!

Take “V’s” room for instance. At his consult, he was adamant that he wanted four black walls. No way around it. However, mom and dad weren’t too keen on the idea. Considering the size of his room and the amount of natural light coming into the space (this is a huge factor to consider), I felt the same way. I advised he do one feature wall only, paired with adjacent grey walls, and a punch of color, too.

It took a bit of selling but compromise is key. Especially with teenagers…and husbands…and, well—you get the point.

“V” was totally transforming his room from his days as a tike to that of a teenager. Here is where we started:

Inspiration_ Ragnarok 1.jpg
Inspiration_ Ragnarok 2.jpg

He was ready to move on from the two-tone walls and border into something more mature and reflective of his personality and interests. In fact, the main inspiration for this room and the accent/feature wall that was about to go down was none other than Thor’s sword from Ragnarok.

I love that. And after chatting at our consult about likes/dislikes, here is the vision board I constructed:

Ragnarok detail: COARTandProps—Etsy, loft images courtesy of Pinterest

Ragnarok detail: COARTandProps—Etsy, loft images courtesy of Pinterest

“V” wanted a loft bed, media unit, new gaming chair, space under his bed for a desk, a Ragnarok-inspired accent wall, and pops of orange everywhere. With this bold color palette, I also wanted to infuse some cool storage options as well as geometric patterns throughout.

Fun, right?

First step? Paint! For this room especially, the paint was going to be the major transforming factor. Using three different paint colors, in addition to ceiling paint, this room took seven hours to transform. Three coats of SW Alabaster inside the closet and on one wall, two coats of SW Agreeable Grey on two more walls, followed by three coats of Valspar’s Dark Kettle Black on the main feature wall. Oh, and two coats of ceiling paint to cover up those clouds and start anew.

Look at the difference:

Inspiration_ Ragnarok 3.jpg
Inspiration_ Ragnarok 4.jpg

Once the paint had a few days to cure, it was time to hit up that accent wall and deck it out, Ragnarok-style.

You’re probably wondering what Ragnarok-style is because I was wondering the same thing when asked to create this wall. However, I learned that the sword used by Thor in the movie (it is by Thor, right?), there is a specific pattern etched within it. This exact pattern is what “V” wanted on his freshly painted accent wall…but in orange.

Photo courtesy of BonesPlace on Etsy

Photo courtesy of BonesPlace on Etsy

Initially, I thought about using painted thin wood strips in order to achieve this pattern, but I didn’t necessarily want to make this a permanent feature with tons of holes in the wall. I also didn’t want to add an additional expense to the budget either. So after randomly viewing a video tutorial on washi tape, I decided this would be the best option. Plus, it’s totally inexpensive.

All I needed was the tape, a pencil, and a level to make this feature wall happen. Nice!

Ragnarok 5.jpg

Once started, it really began to take shape.

Three hours later, the wall was complete.

Ragnarok 6.jpg

Buuuuuut hiccups happen. Especially when you’re working with textured walls—because even though I used TWO layers of tape to ensure these pieces wouldn’t peel, some of them started to.

Photo courtesy of G. Grosse

Photo courtesy of G. Grosse

Photo courtesy of G. Grosse

Photo courtesy of G. Grosse

This meant the washi tape was a no-go. It just wasn’t going to last (enter sad face).

But paint would.

I headed back to “V’s” house, with a sample size of bright orange paint (sorry, the color choice totally escapes me at the moment), my level, and some Frog Tape.

Using the lines I created with the washi tape, I then outlined them with Frog tape. Next, the unruly washi tape was removed.

Ragnarok 4.jpg

The next step to finishing this feature wall was the paint. I added three coats of the “orange-color-that-I-can’t-think-of-the-name-of.”

Ragnarok 10.jpg

Now, there are a few tricks out there to get you nice, clean lines when creating stripes such as these. But they seriously haven’t worked for me. Ever! I’ve always had to clean up my lines—free-handed—and honestly, I’m okay with that. It is what it is.

Ragnarok 11.jpg

Once I peeled off all the Frog Tape, I used a flat, angled brush for the detail work.

Ragnarok 12.jpg

A few hours later and the wall was finished…finally. ;)

Ragnarok 13.jpg

Phew!

“V’s” parents wanted to put the room together and finish up all the detail work themselves. However, they did send me an “after” pic of what they accomplished and I think “V” will be one happy camper.

Mission: Complete.

Photo courtesy of G. Grosse

Photo courtesy of G. Grosse

The Details:

Orange Gaming Chair: American Furniture Warehouse

Bedding: Wayfair

Bed: Furniture Row

Ceiling Fan: Wayfair

Washi Tape: Amazon

Paint: Valspar’s Drak Kettle Black, Sherwin William’s Agreeable Grey, Sherwin William’s Alabaster, and the orange color I don’t know the name of anymore…sorry!

Paint Labor: AFC

Feature Wall: AFC

Rug (not pictured): Home Depot

Decorative Pillow: Etsy

Love, J