
I’ve completed a slew of teenage boys rooms lately…four to be exact! Cool thing though? Two of these boys have wanted black walls. But we’re not talking about just one black wall. No, these guys desired every wall in their room(s) painted black.
Whoa.
Usually such a request causes a raised eyebrow (or two) from mom and dad, and is also met with some major disgust and a whole lot of resistance to say the very least. It’s as if you can see my clients calculating in their heads how much money they’re going to lose at resale.
Believe me, I get it. I do. But black paint gets a bad rap because as I’ve said time and time again—done right, a black wall (or walls) can look all sorts of awesome!
Take “V’s” room for instance. At his consult, he was adamant that he wanted four black walls. No way around it. However, mom and dad weren’t too keen on the idea. Considering the size of his room and the amount of natural light coming into the space (this is a huge factor to consider), I felt the same way. I advised he do one feature wall only, paired with adjacent grey walls, and a punch of color, too.
It took a bit of selling but compromise is key. Especially with teenagers…and husbands…and, well—you get the point.
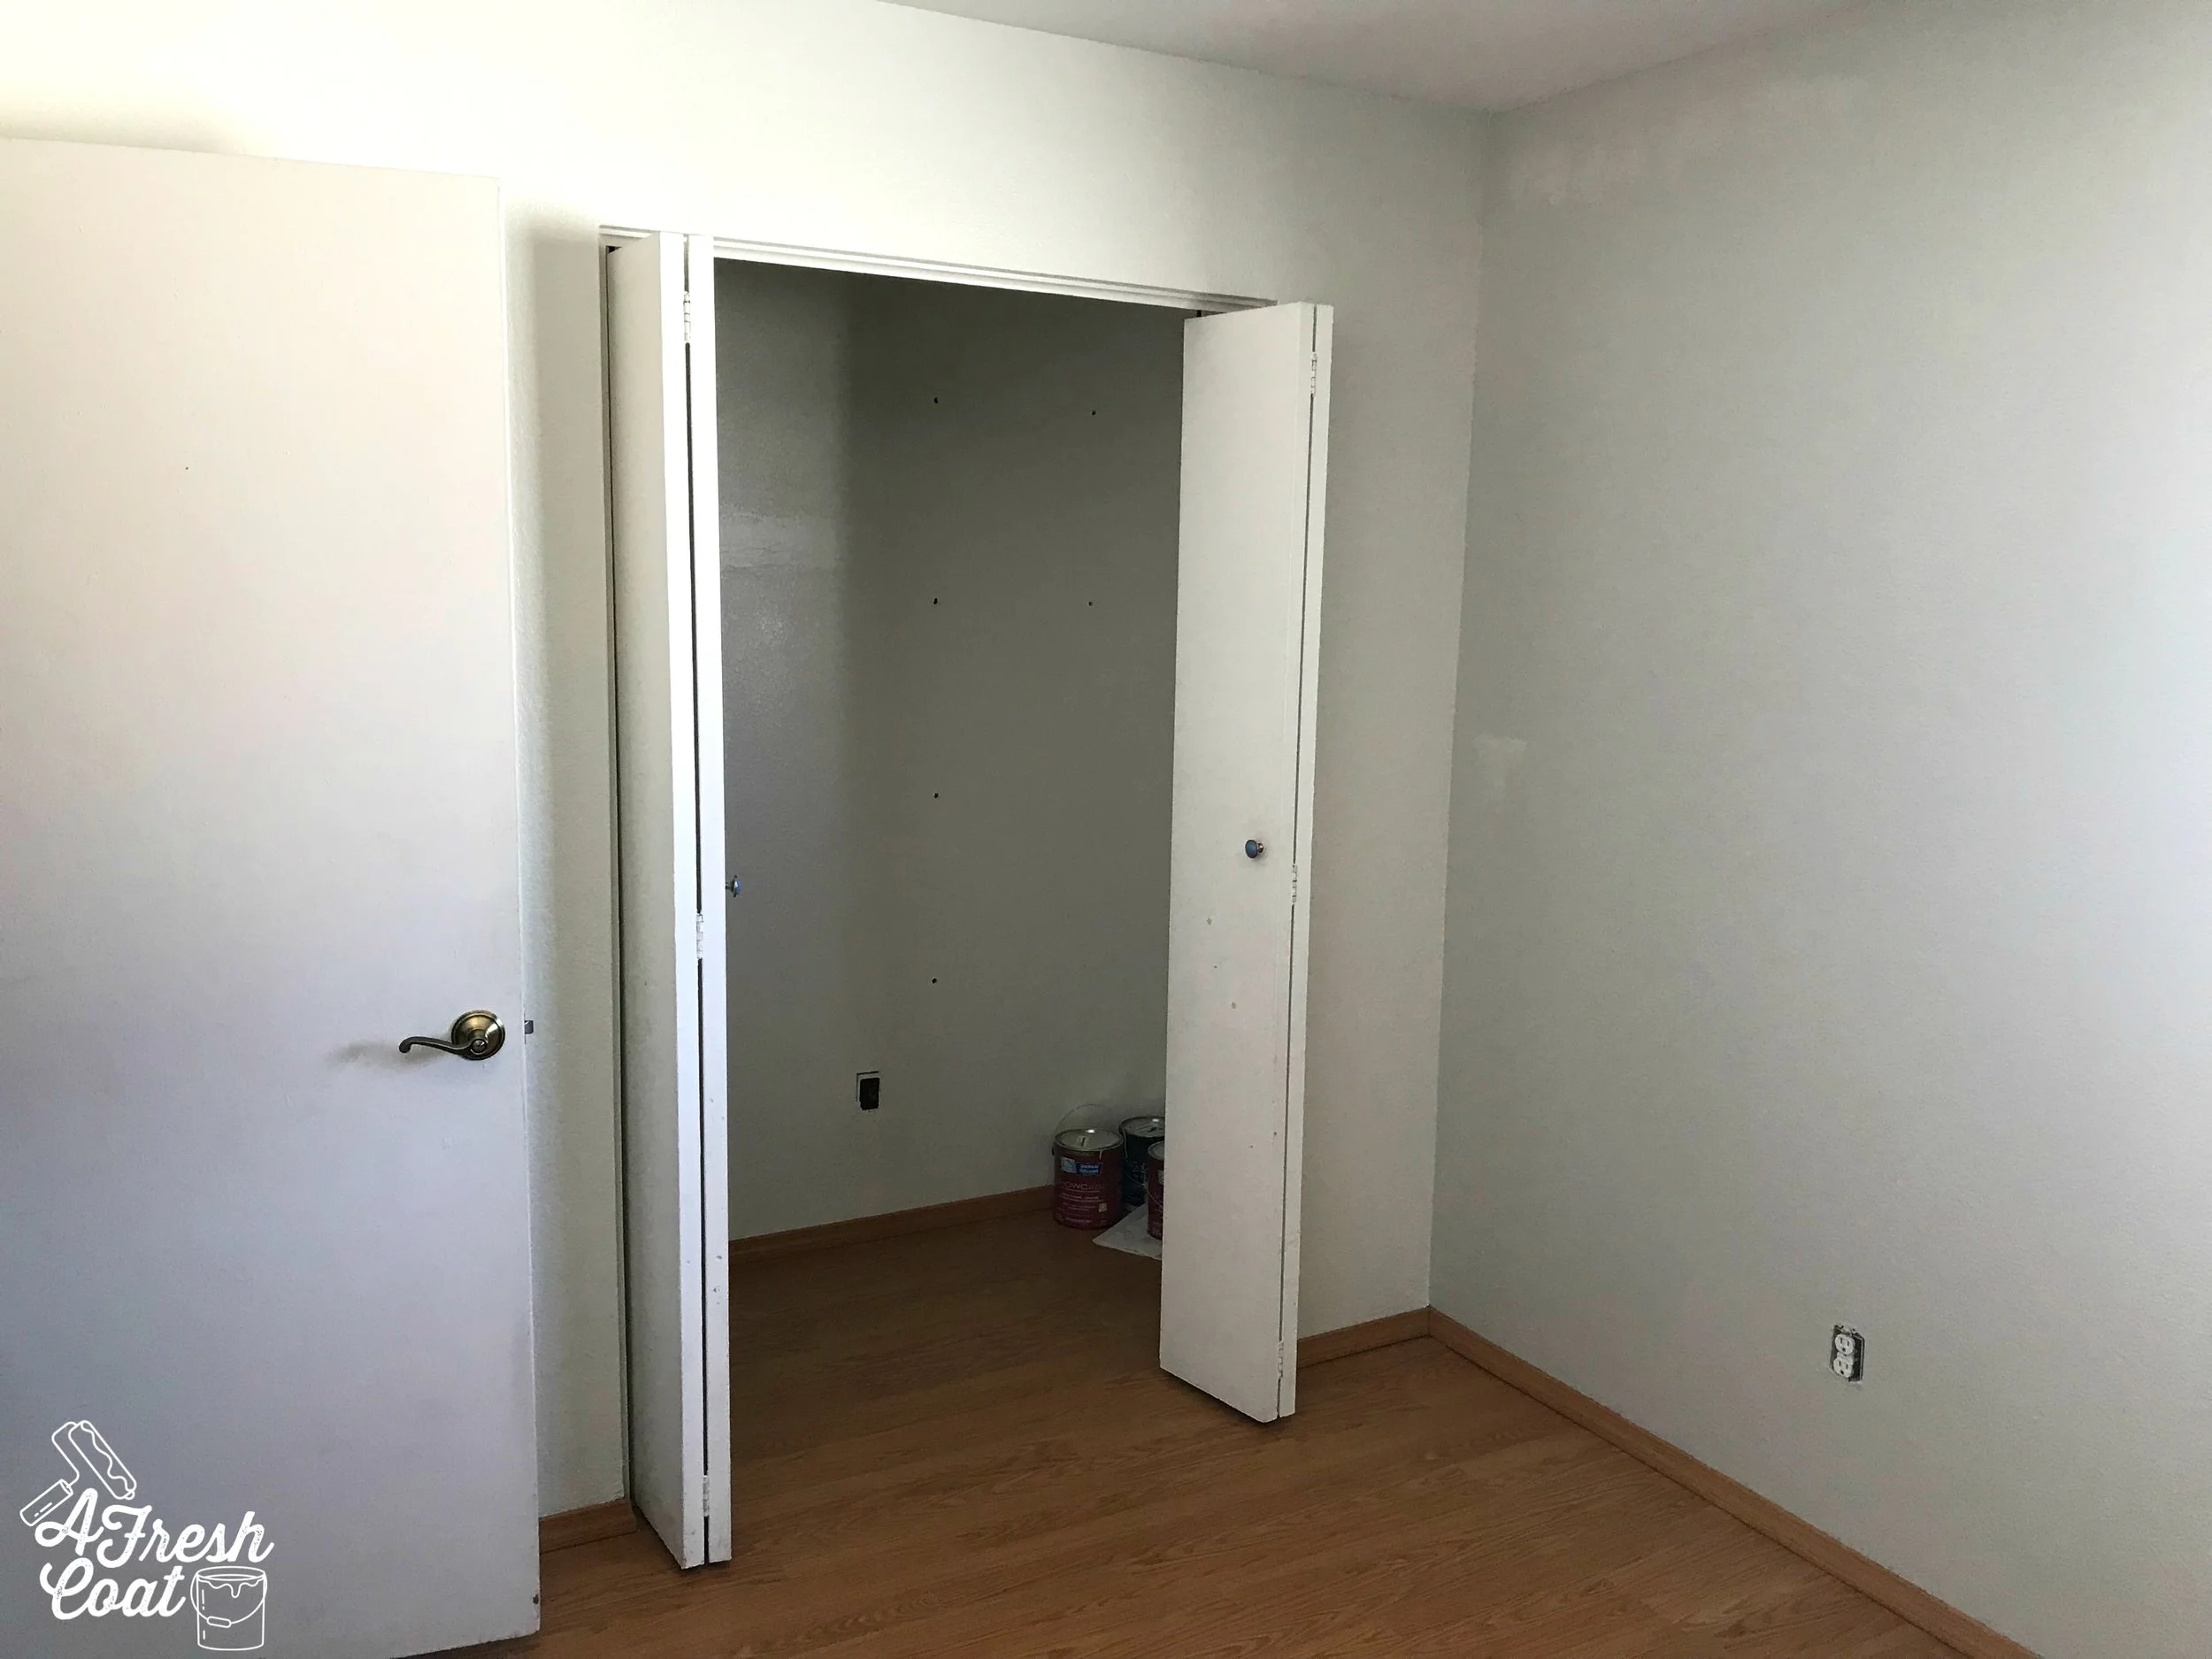
“V” was totally transforming his room from his days as a tike to that of a teenager. Here is where we started:
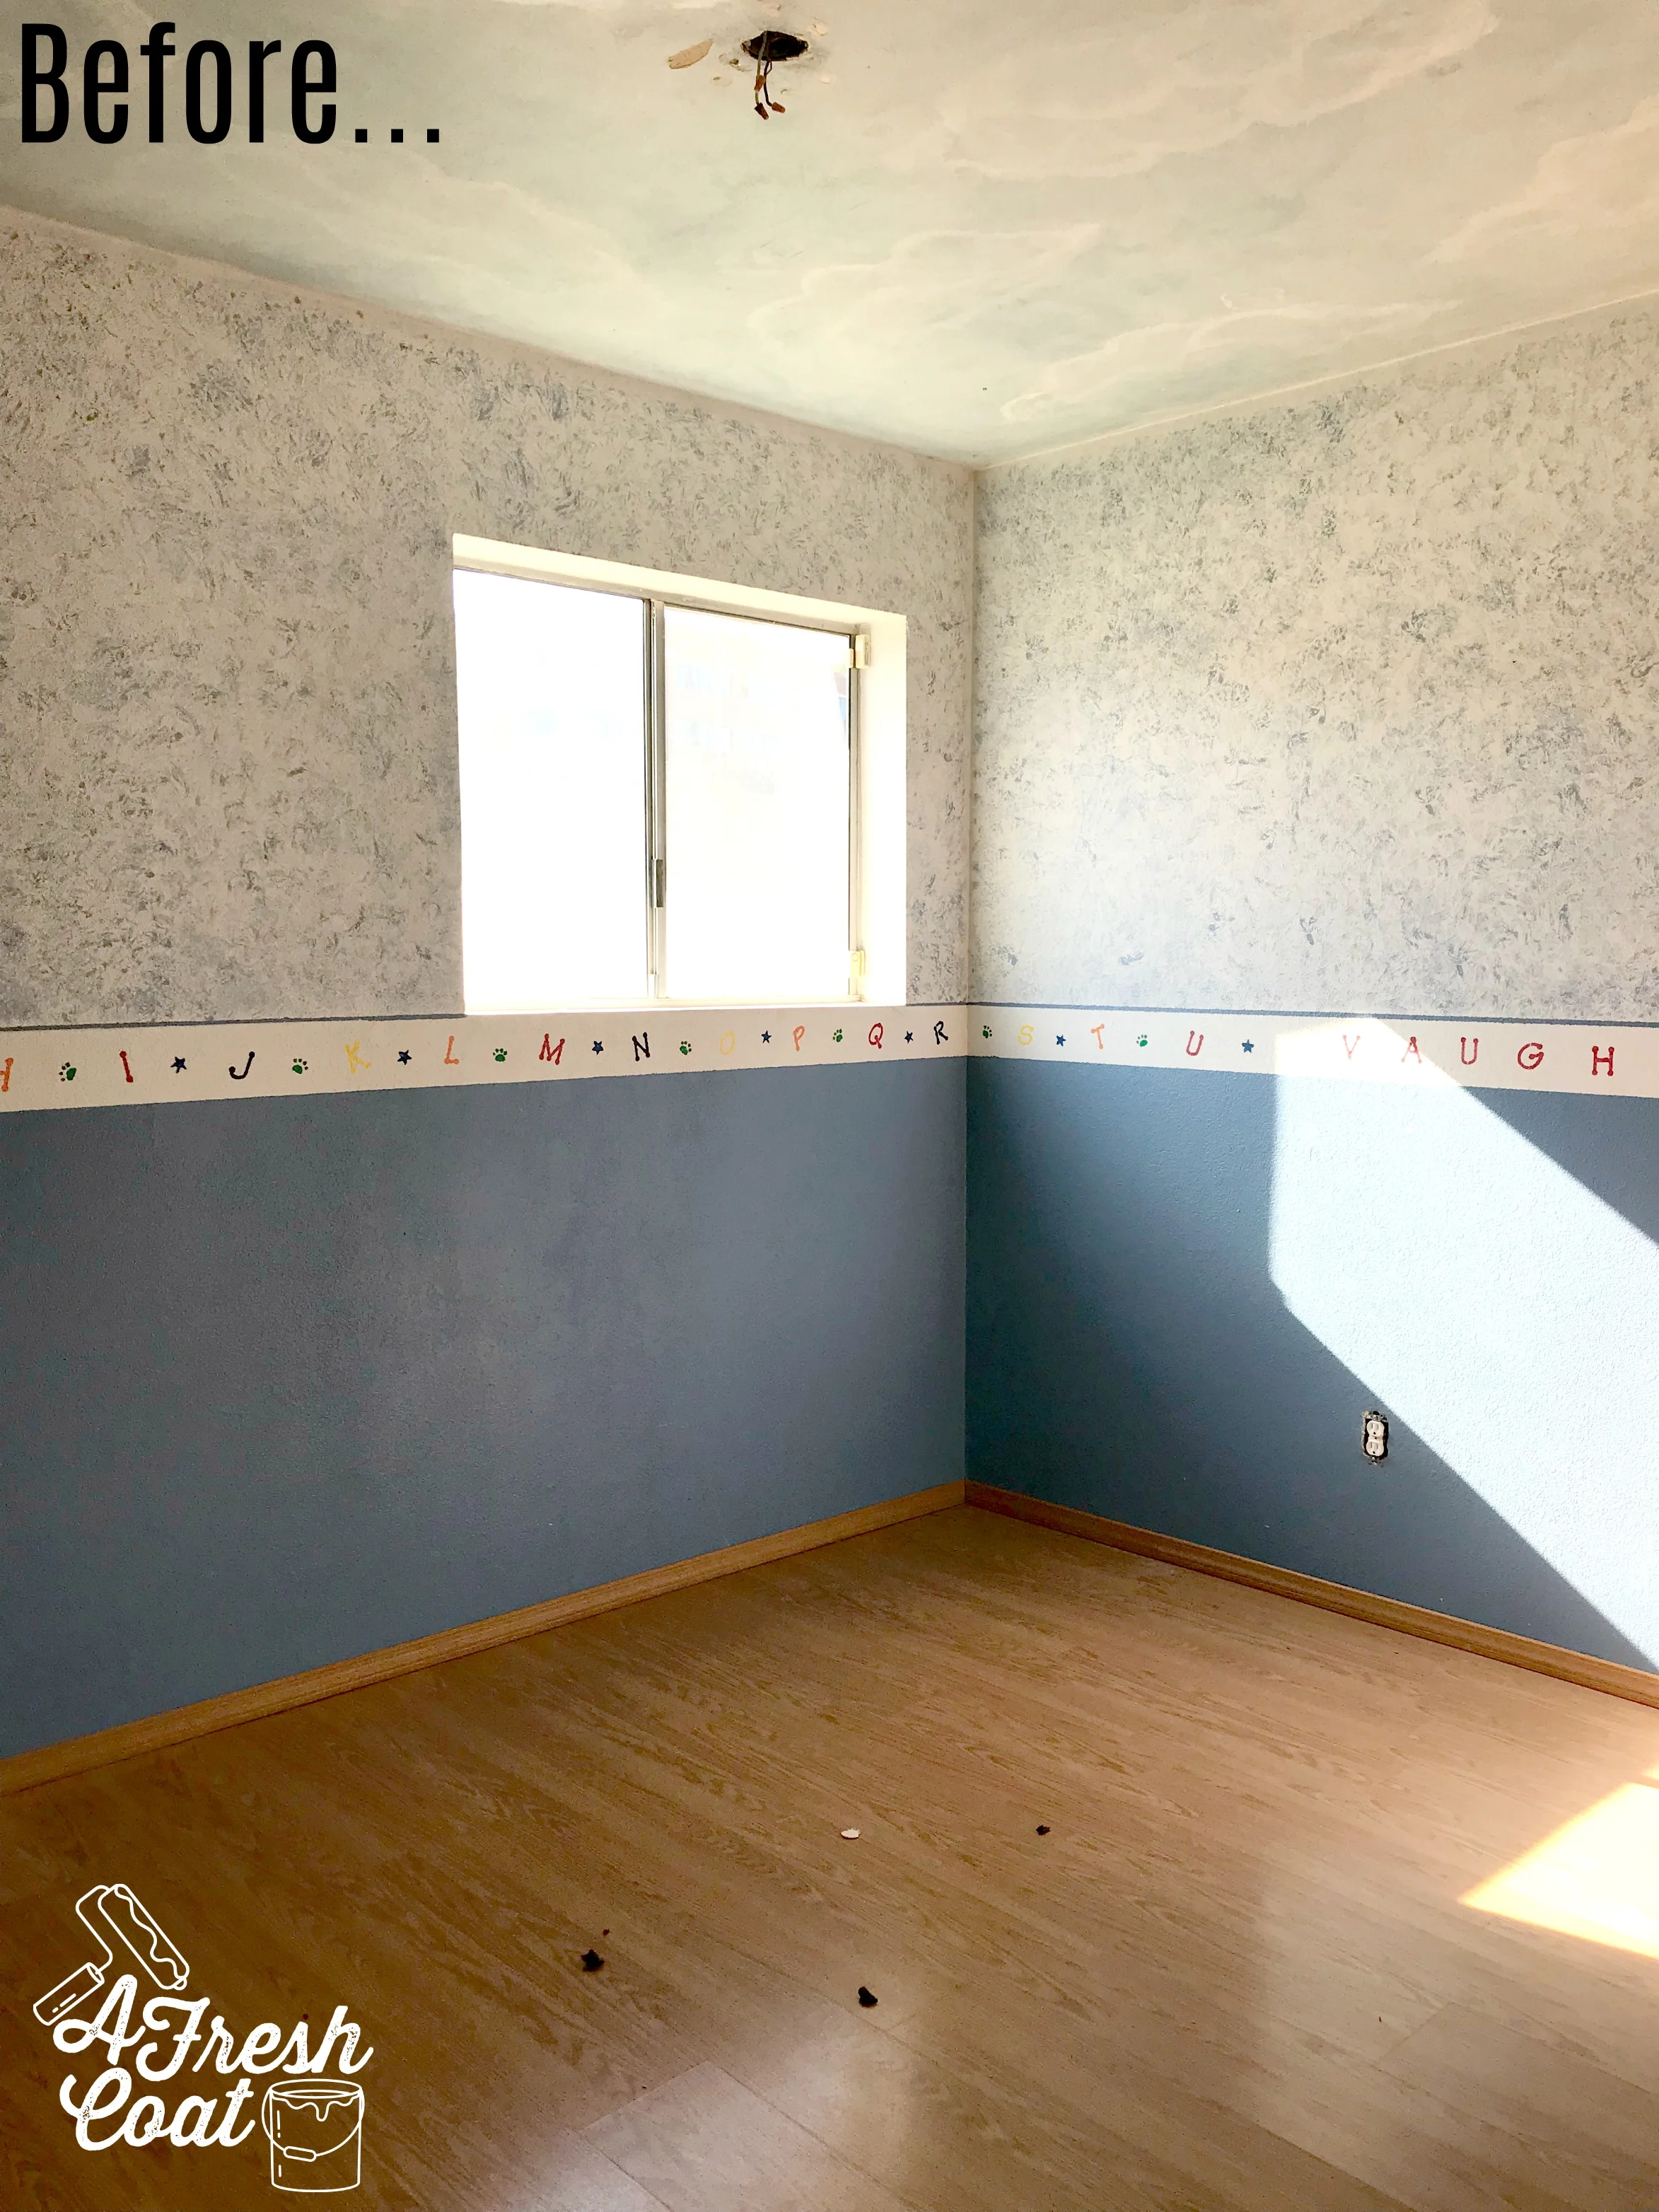
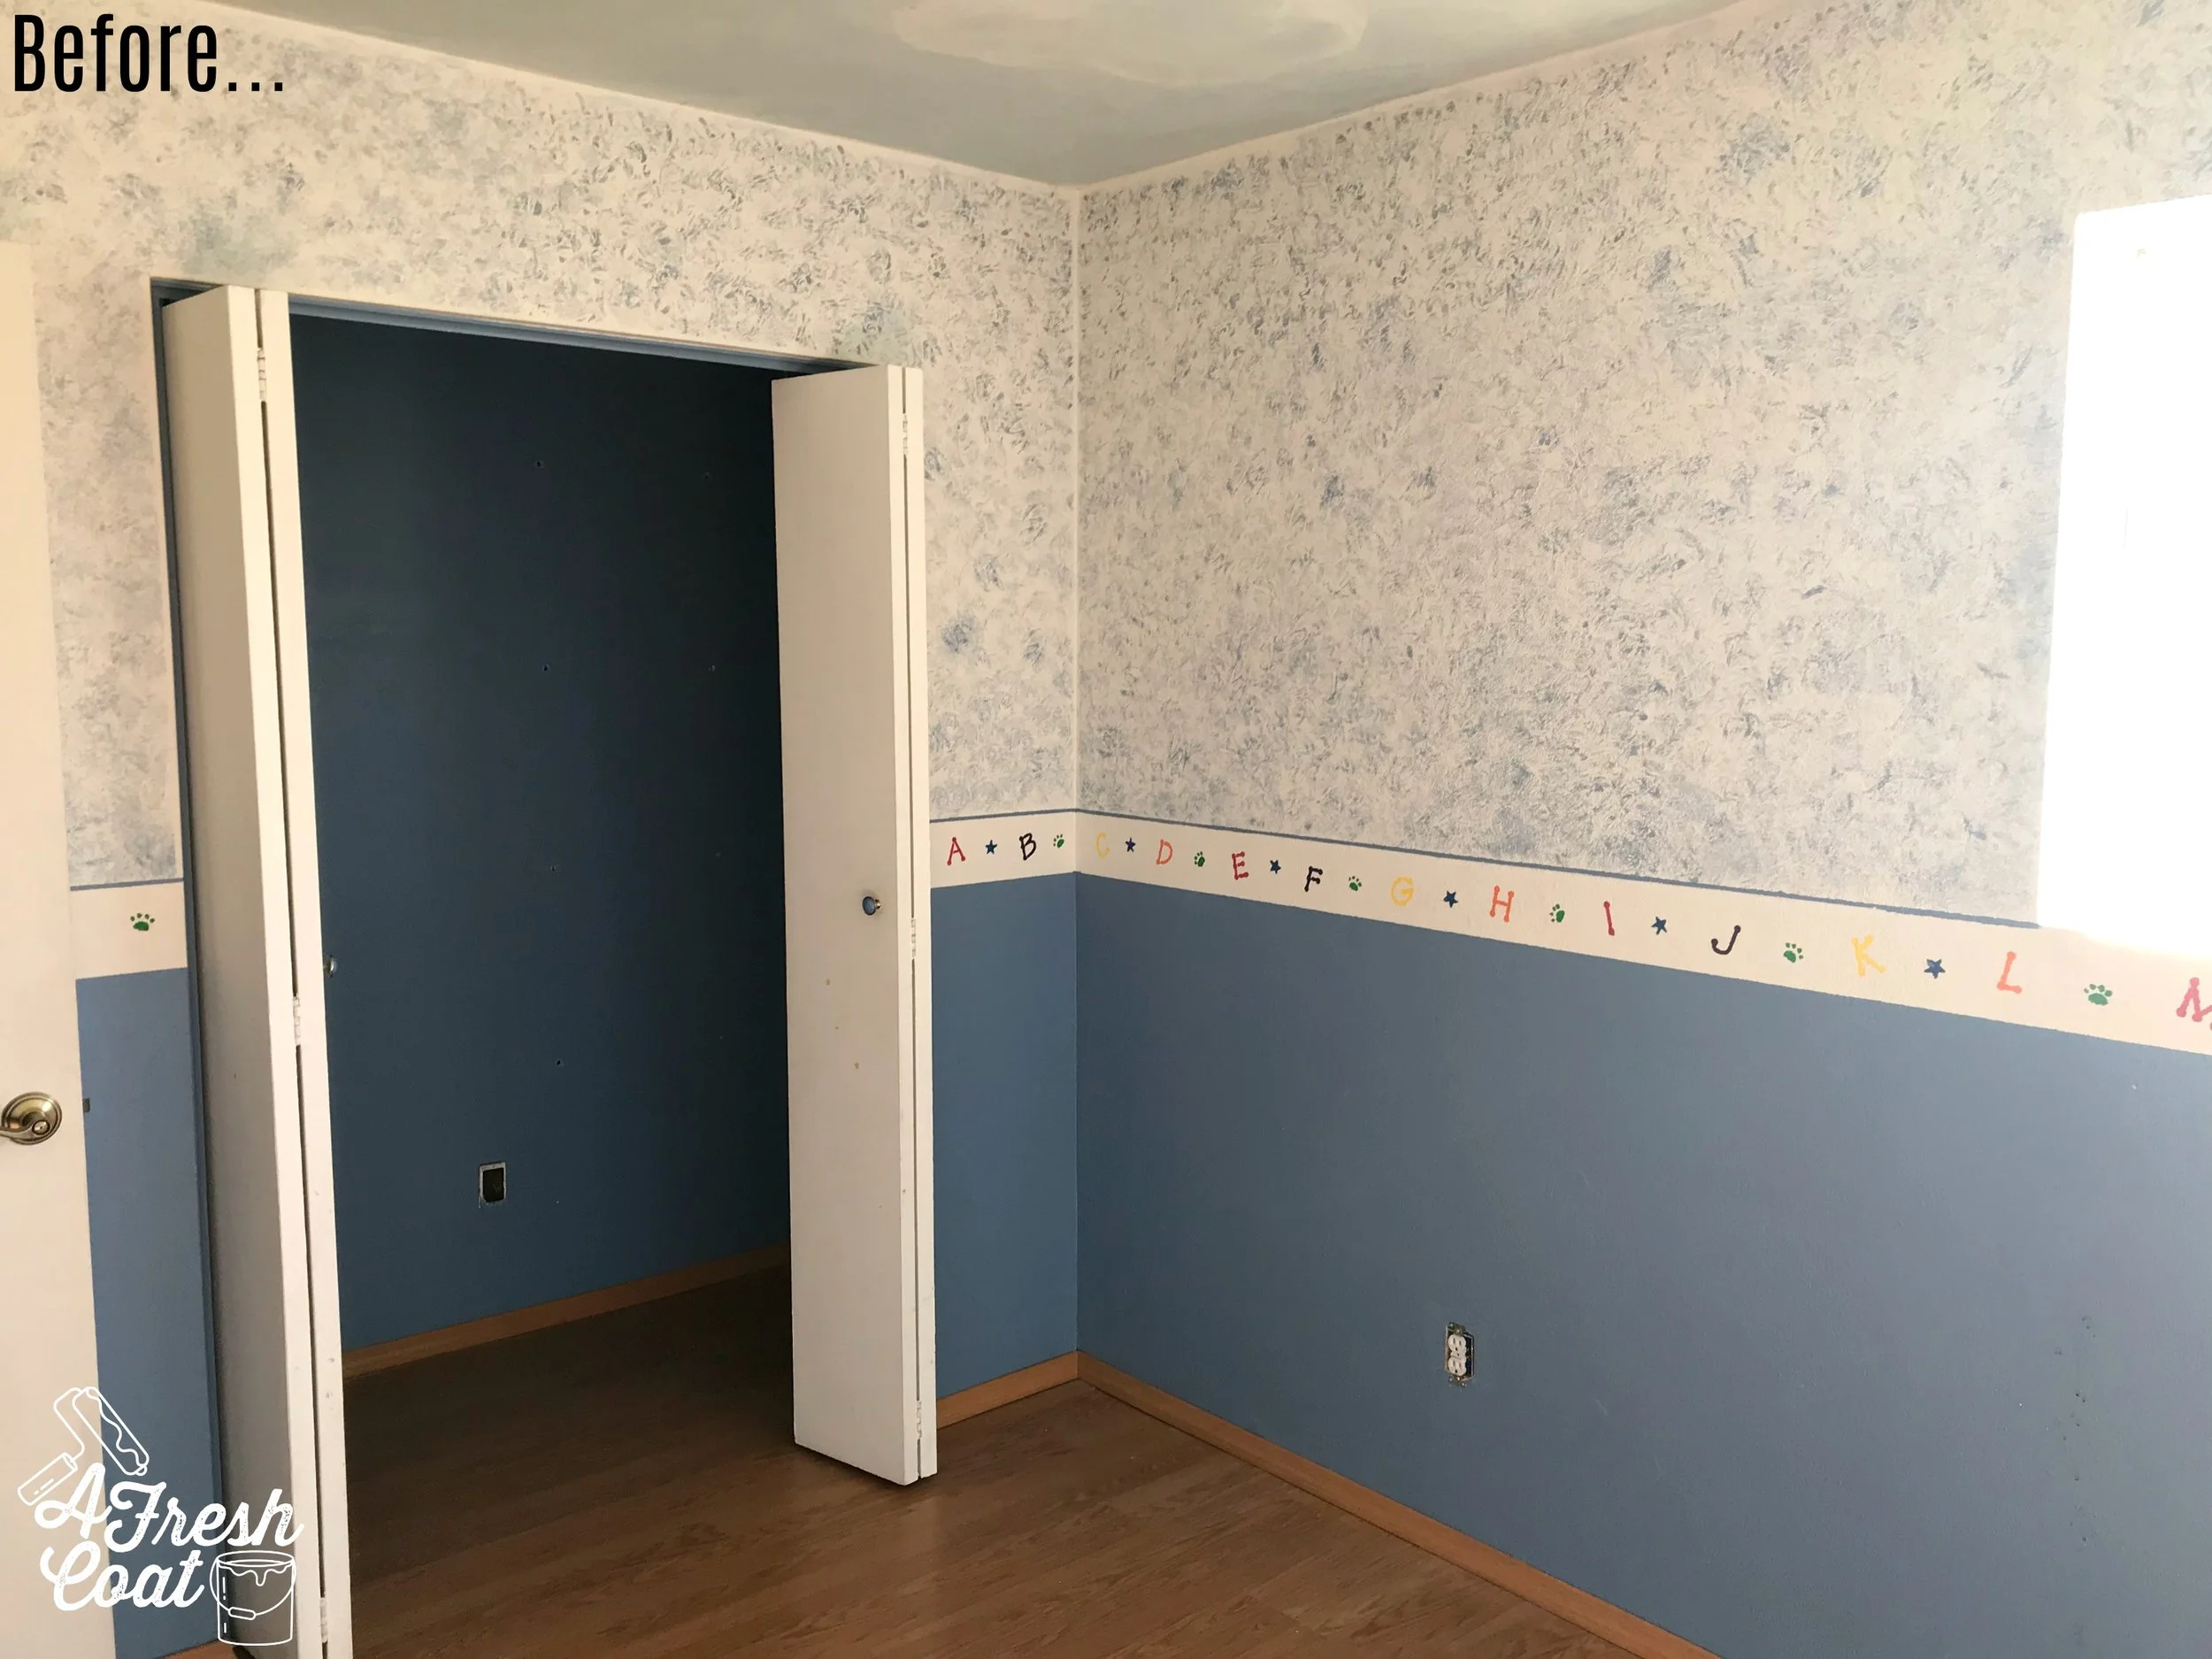
He was ready to move on from the two-tone walls and border into something more mature and reflective of his personality and interests. In fact, the main inspiration for this room and the accent/feature wall that was about to go down was none other than Thor’s sword from Ragnarok.
I love that. And after chatting at our consult about likes/dislikes, here is the vision board I constructed:
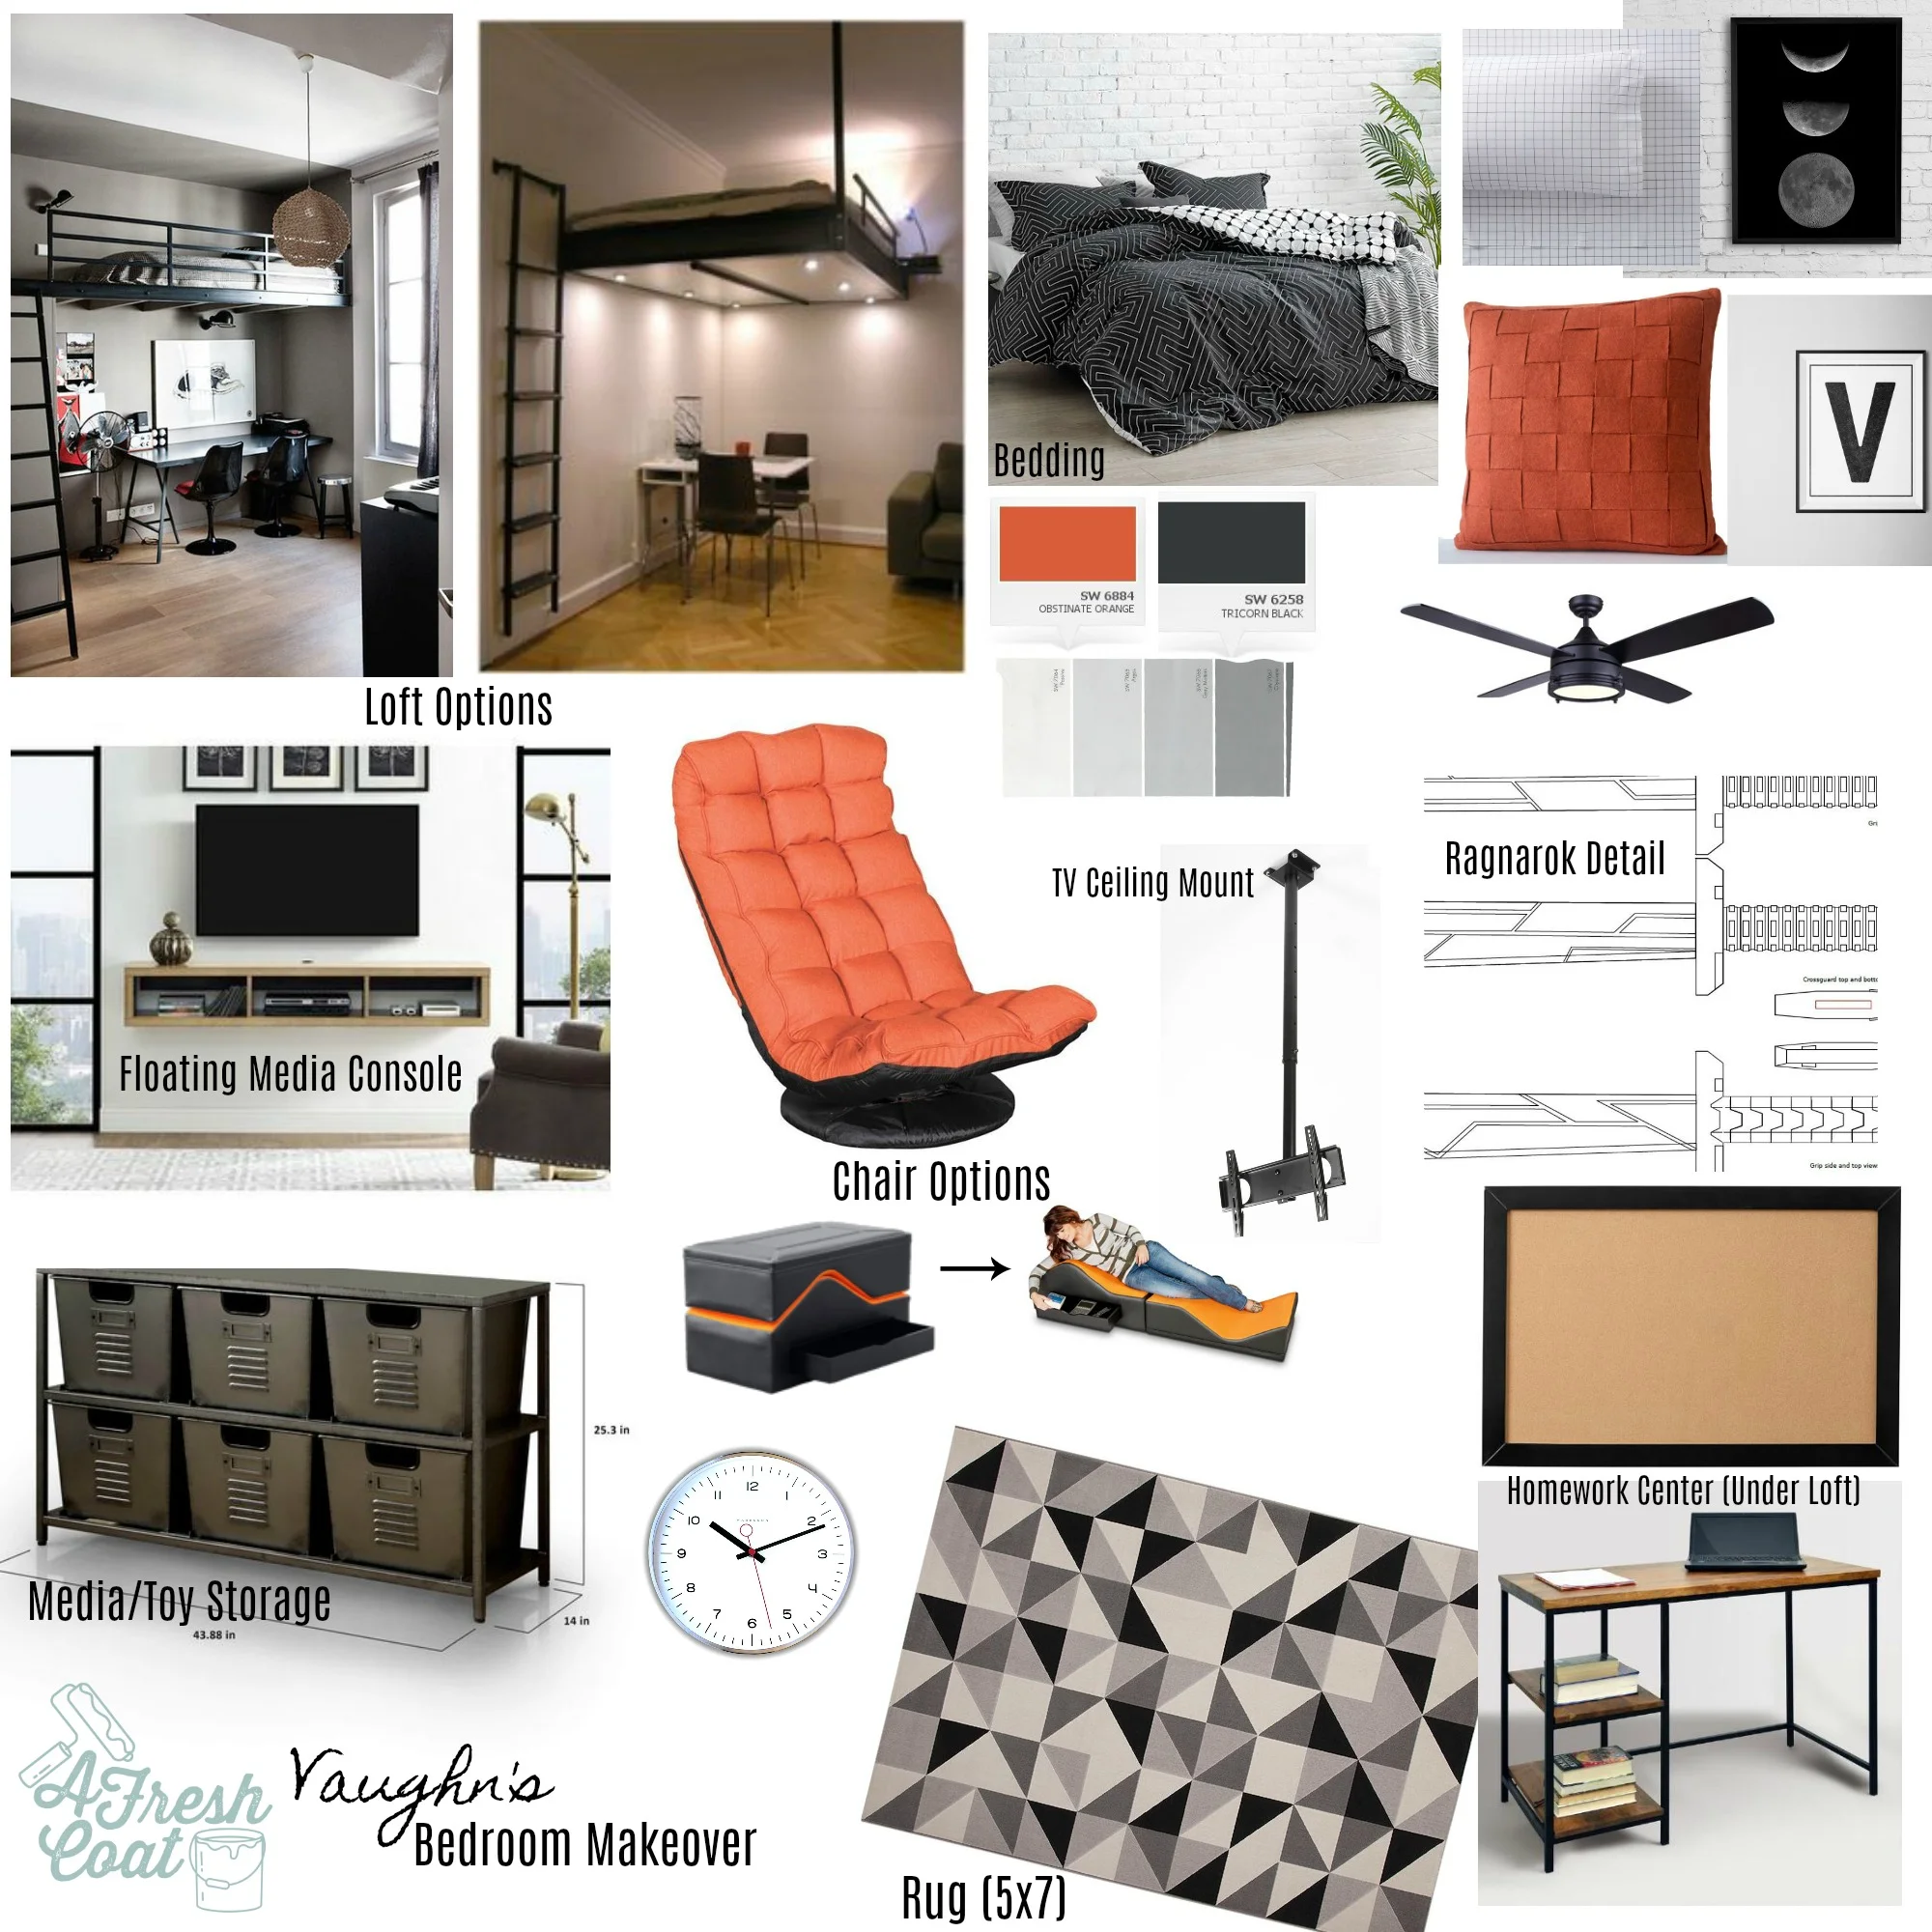
Ragnarok detail: COARTandProps—Etsy, loft images courtesy of Pinterest
“V” wanted a loft bed, media unit, new gaming chair, space under his bed for a desk, a Ragnarok-inspired accent wall, and pops of orange everywhere. With this bold color palette, I also wanted to infuse some cool storage options as well as geometric patterns throughout.
Fun, right?
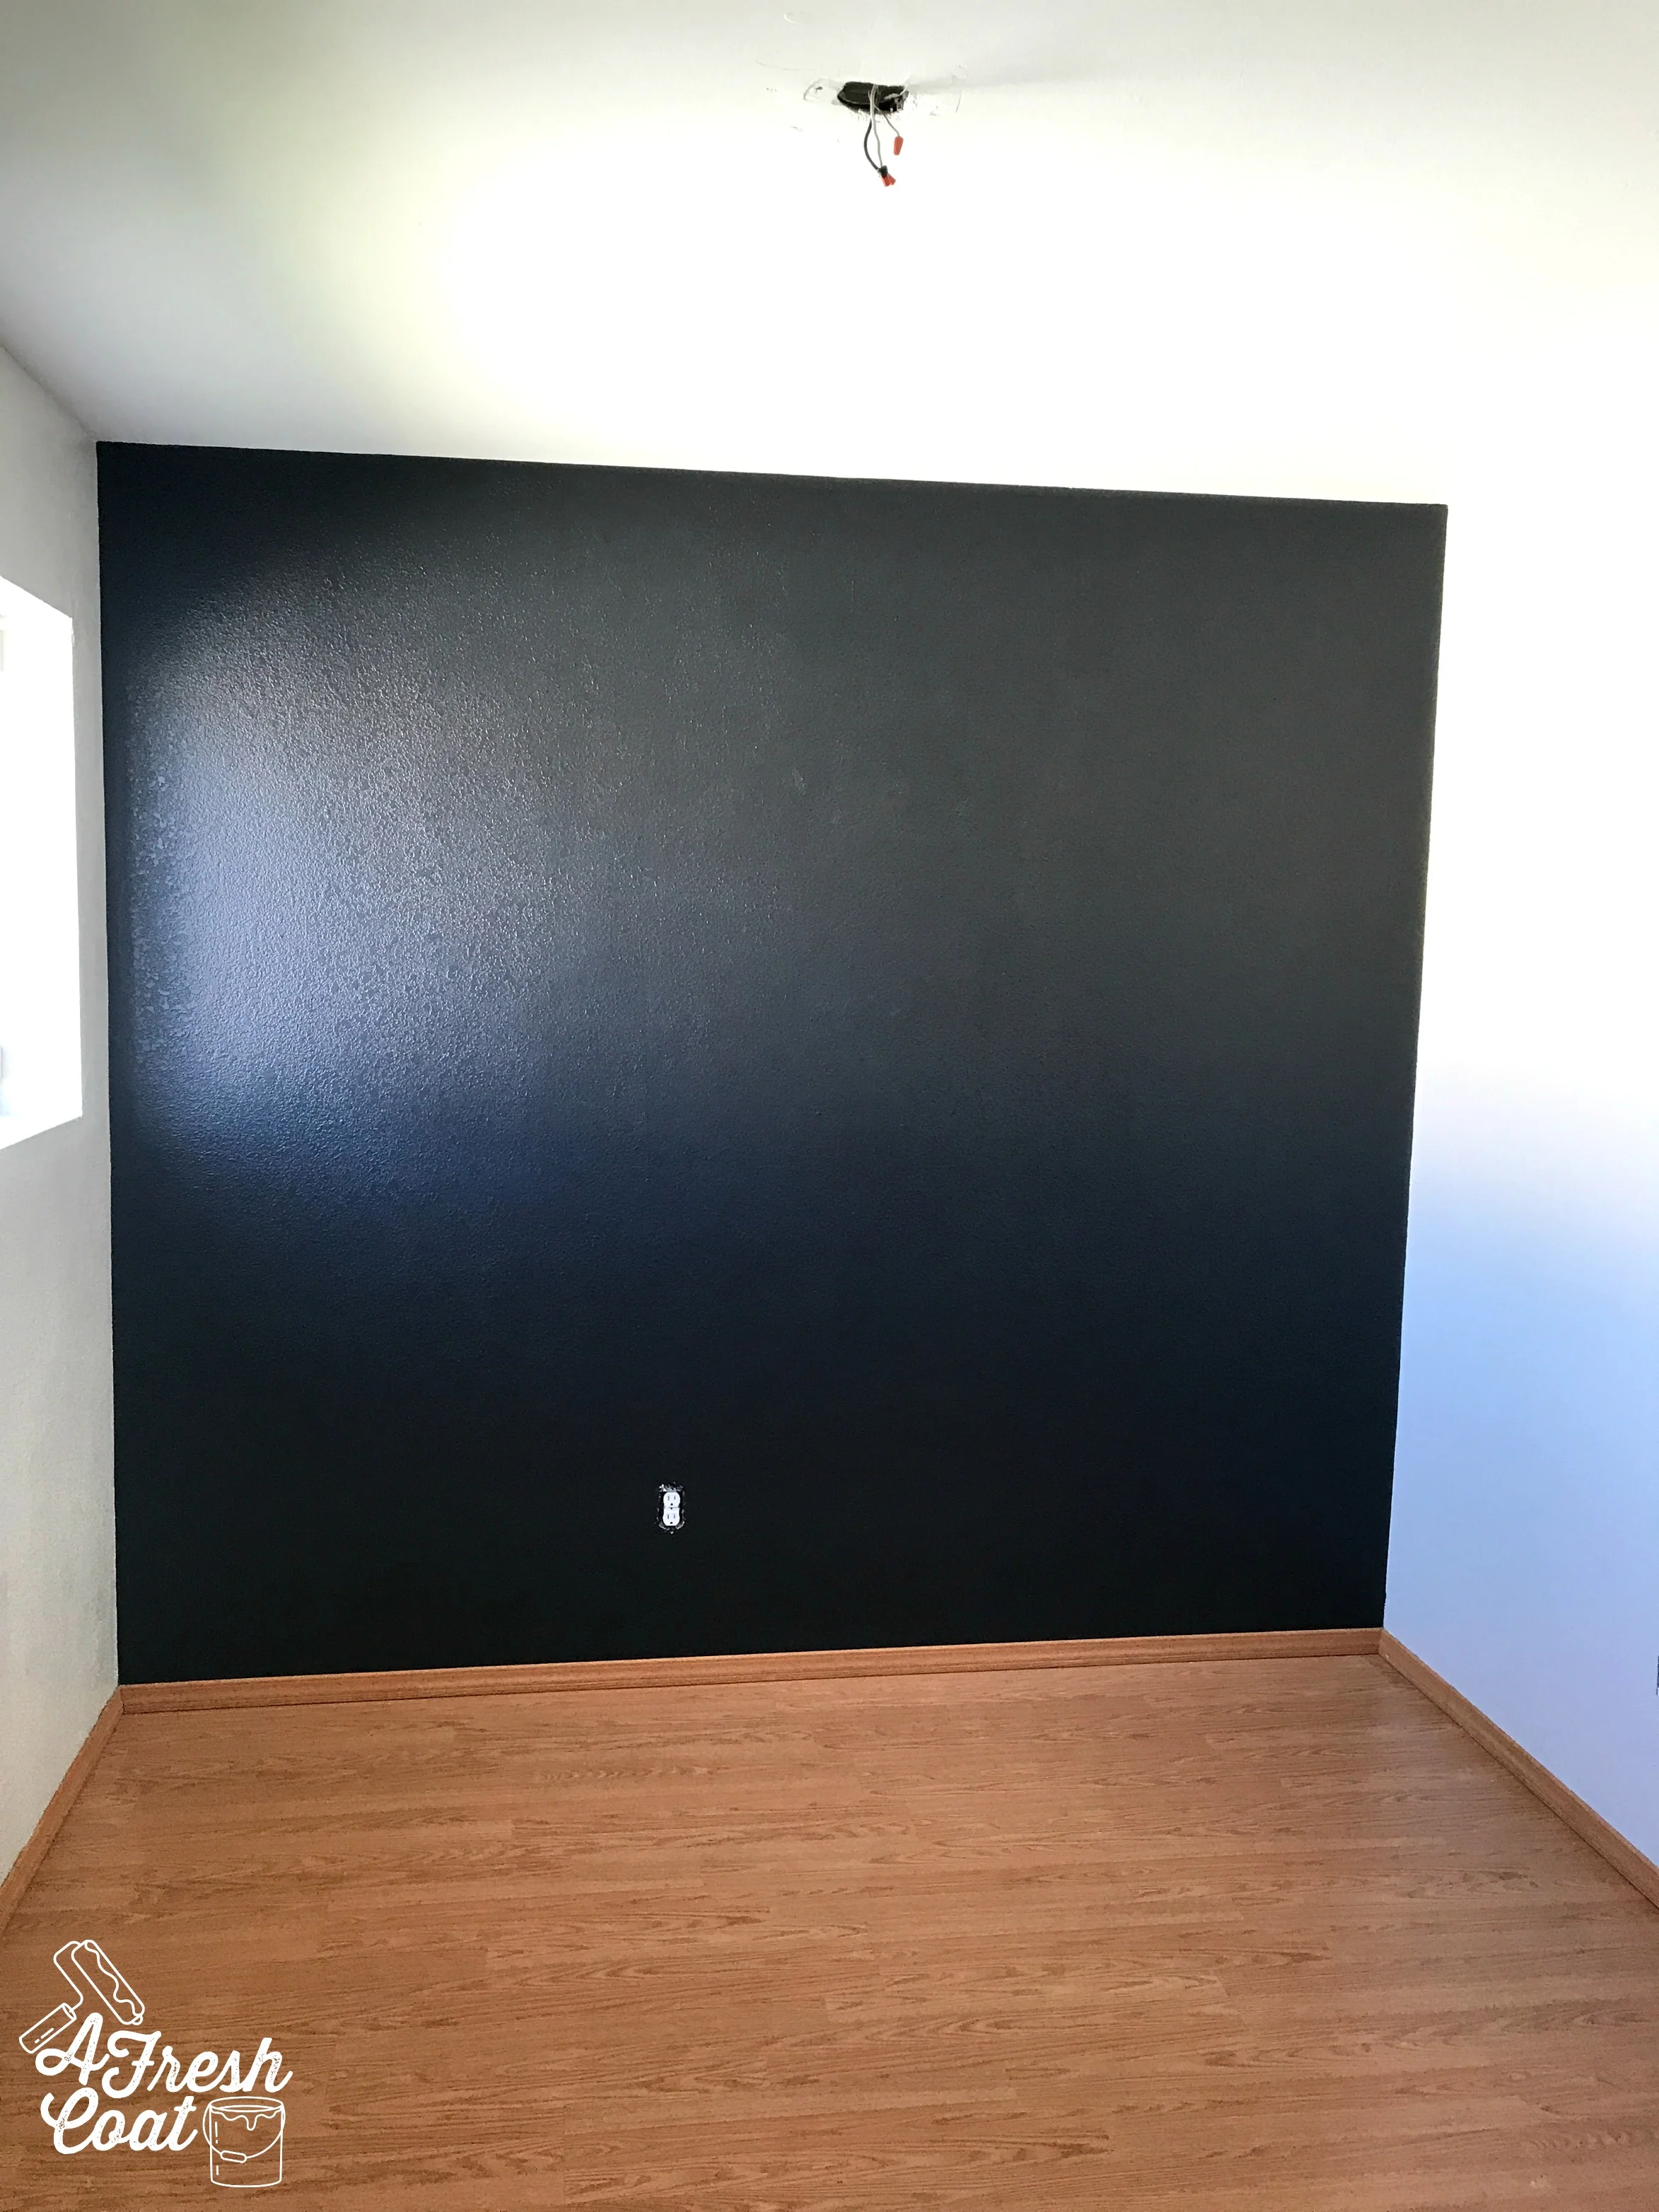
First step? Paint! For this room especially, the paint was going to be the major transforming factor. Using three different paint colors, in addition to ceiling paint, this room took seven hours to transform. Three coats of SW Alabaster inside the closet and on one wall, two coats of SW Agreeable Grey on two more walls, followed by three coats of Valspar’s Dark Kettle Black on the main feature wall. Oh, and two coats of ceiling paint to cover up those clouds and start anew.
Look at the difference:
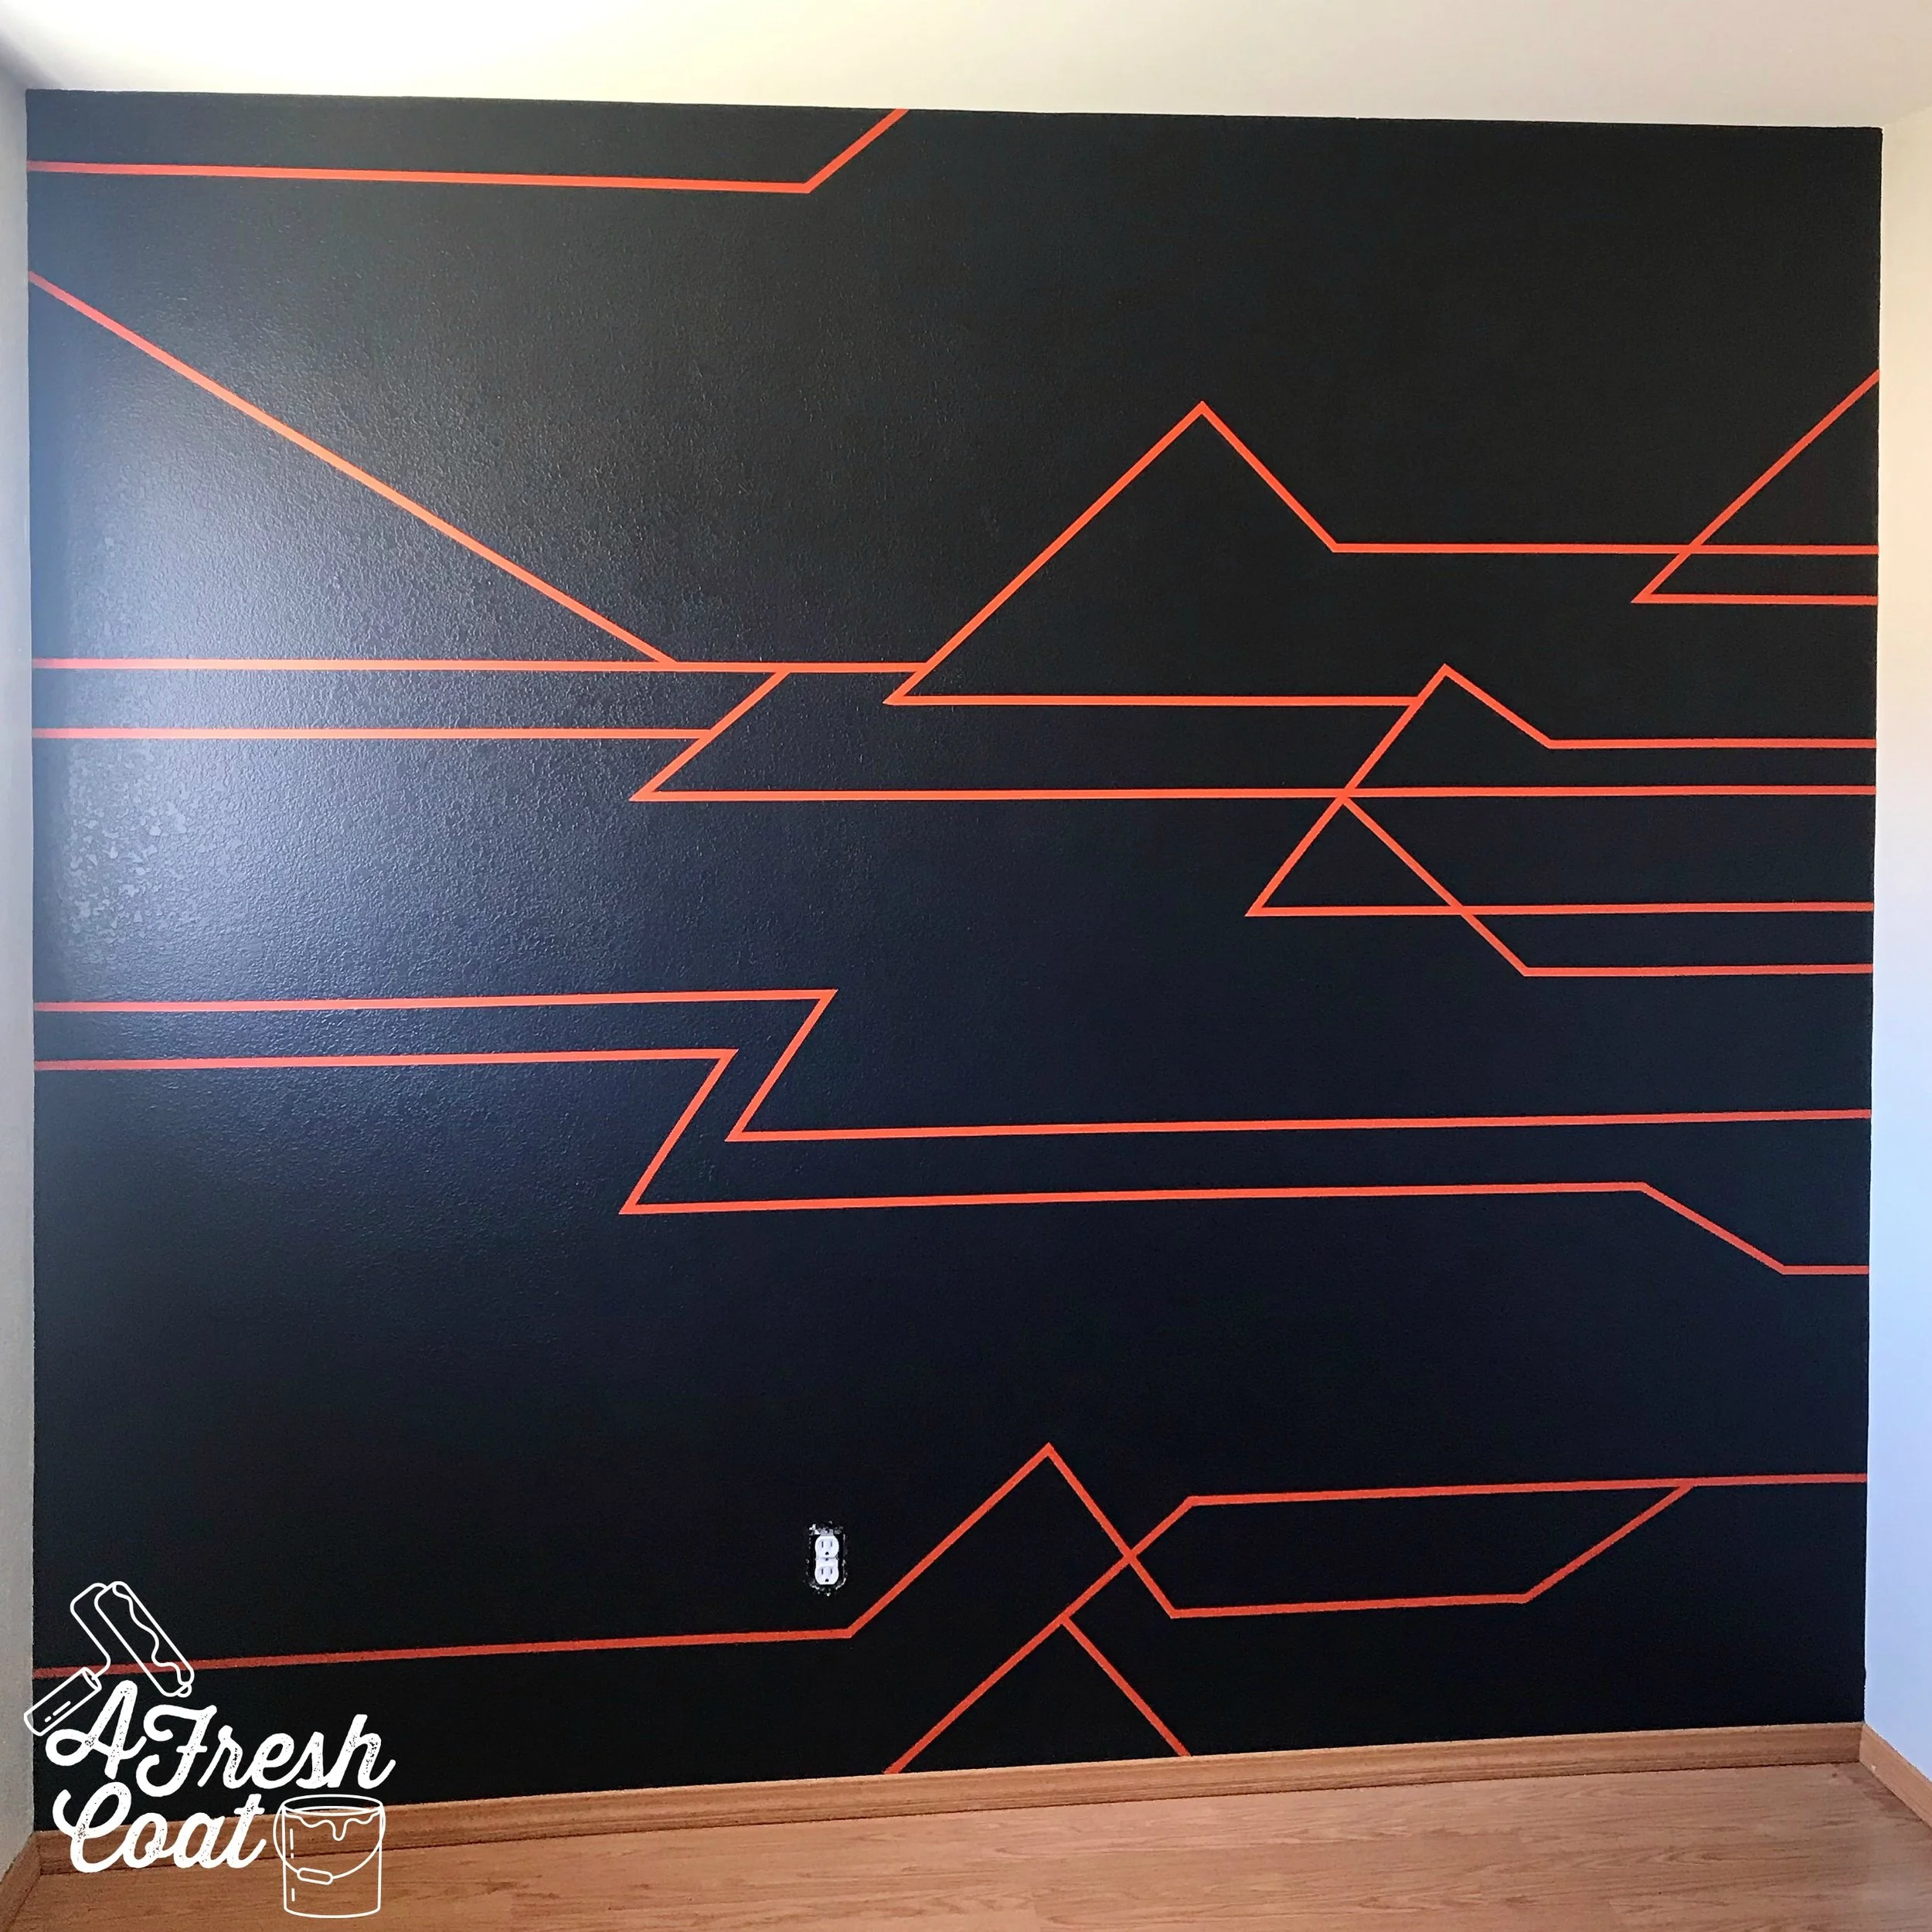
Once the paint had a few days to cure, it was time to hit up that accent wall and deck it out, Ragnarok-style.
You’re probably wondering what Ragnarok-style is because I was wondering the same thing when asked to create this wall. However, I learned that the sword used by Thor in the movie (it is by Thor, right?), there is a specific pattern etched within it. This exact pattern is what “V” wanted on his freshly painted accent wall…but in orange.
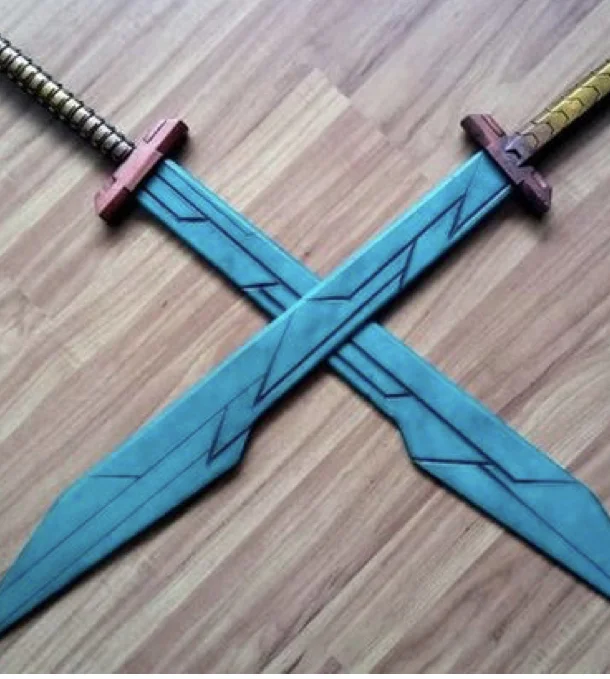
Photo courtesy of BonesPlace on Etsy
Initially, I thought about using painted thin wood strips in order to achieve this pattern, but I didn’t necessarily want to make this a permanent feature with tons of holes in the wall. I also didn’t want to add an additional expense to the budget either. So after randomly viewing a video tutorial on washi tape, I decided this would be the best option. Plus, it’s totally inexpensive.
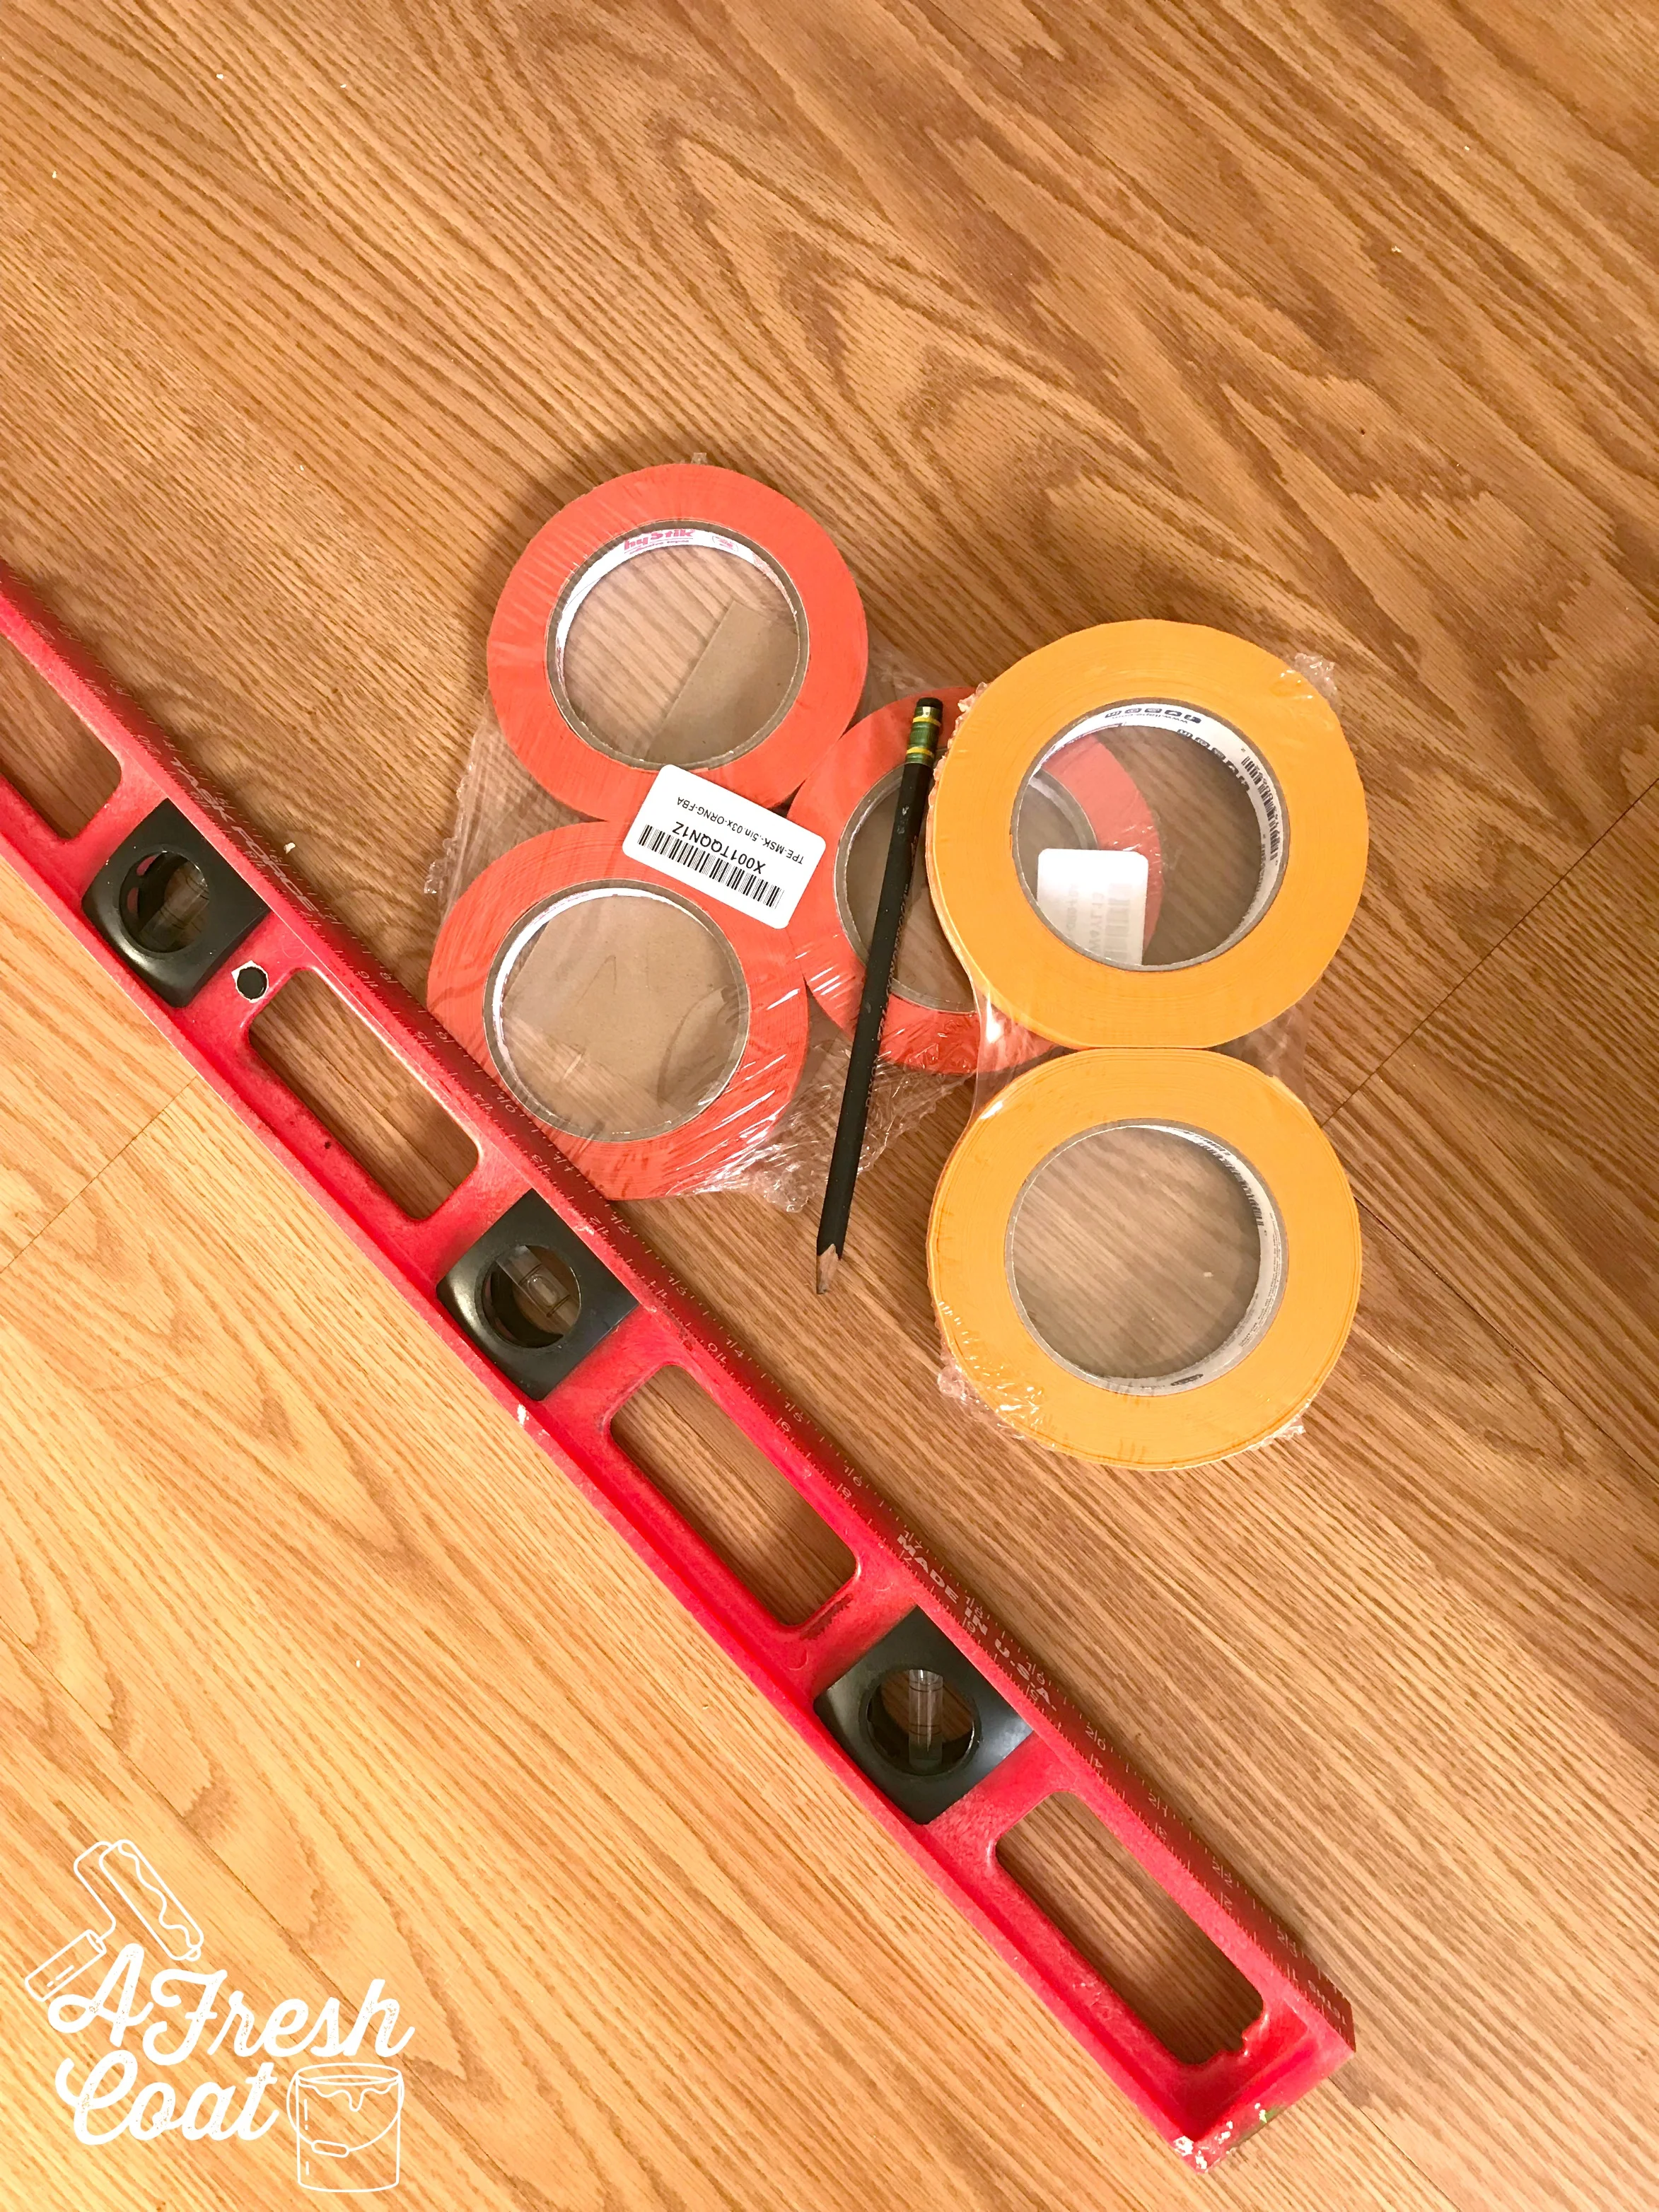
All I needed was the tape, a pencil, and a level to make this feature wall happen. Nice!
Once started, it really began to take shape.
Three hours later, the wall was complete.
Buuuuuut hiccups happen. Especially when you’re working with textured walls—because even though I used TWO layers of tape to ensure these pieces wouldn’t peel, some of them started to.
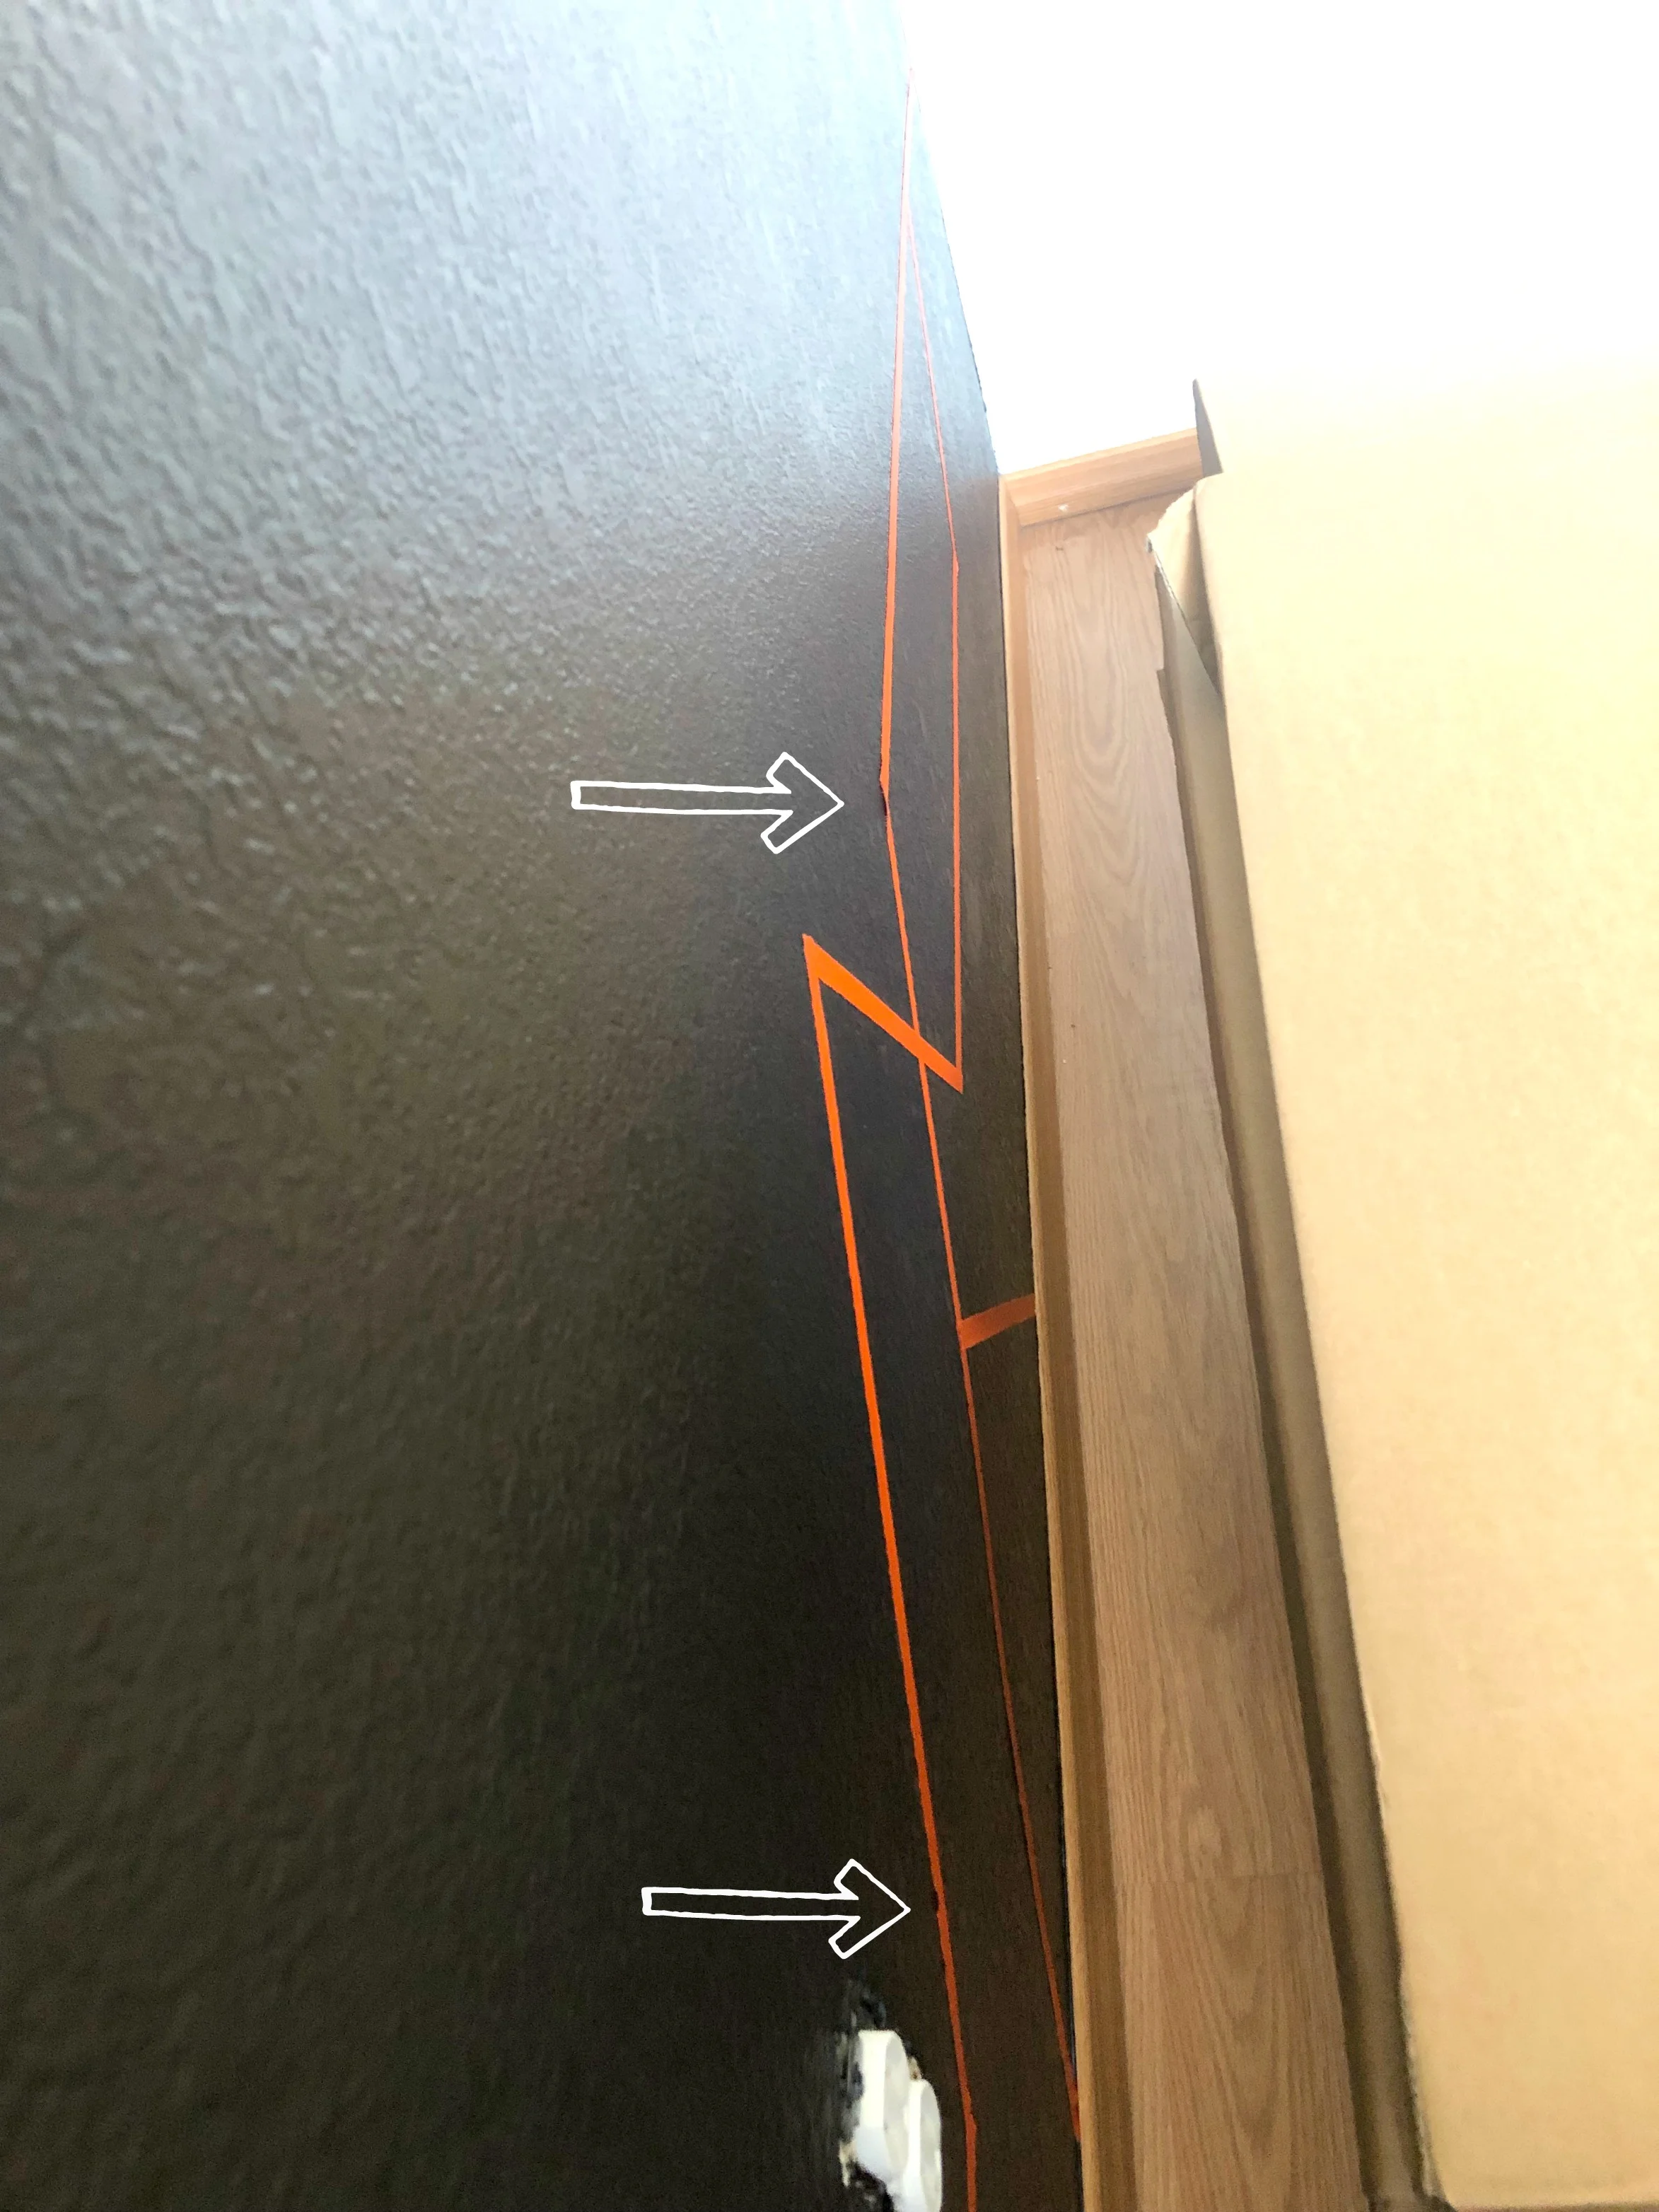
Photo courtesy of G. Grosse
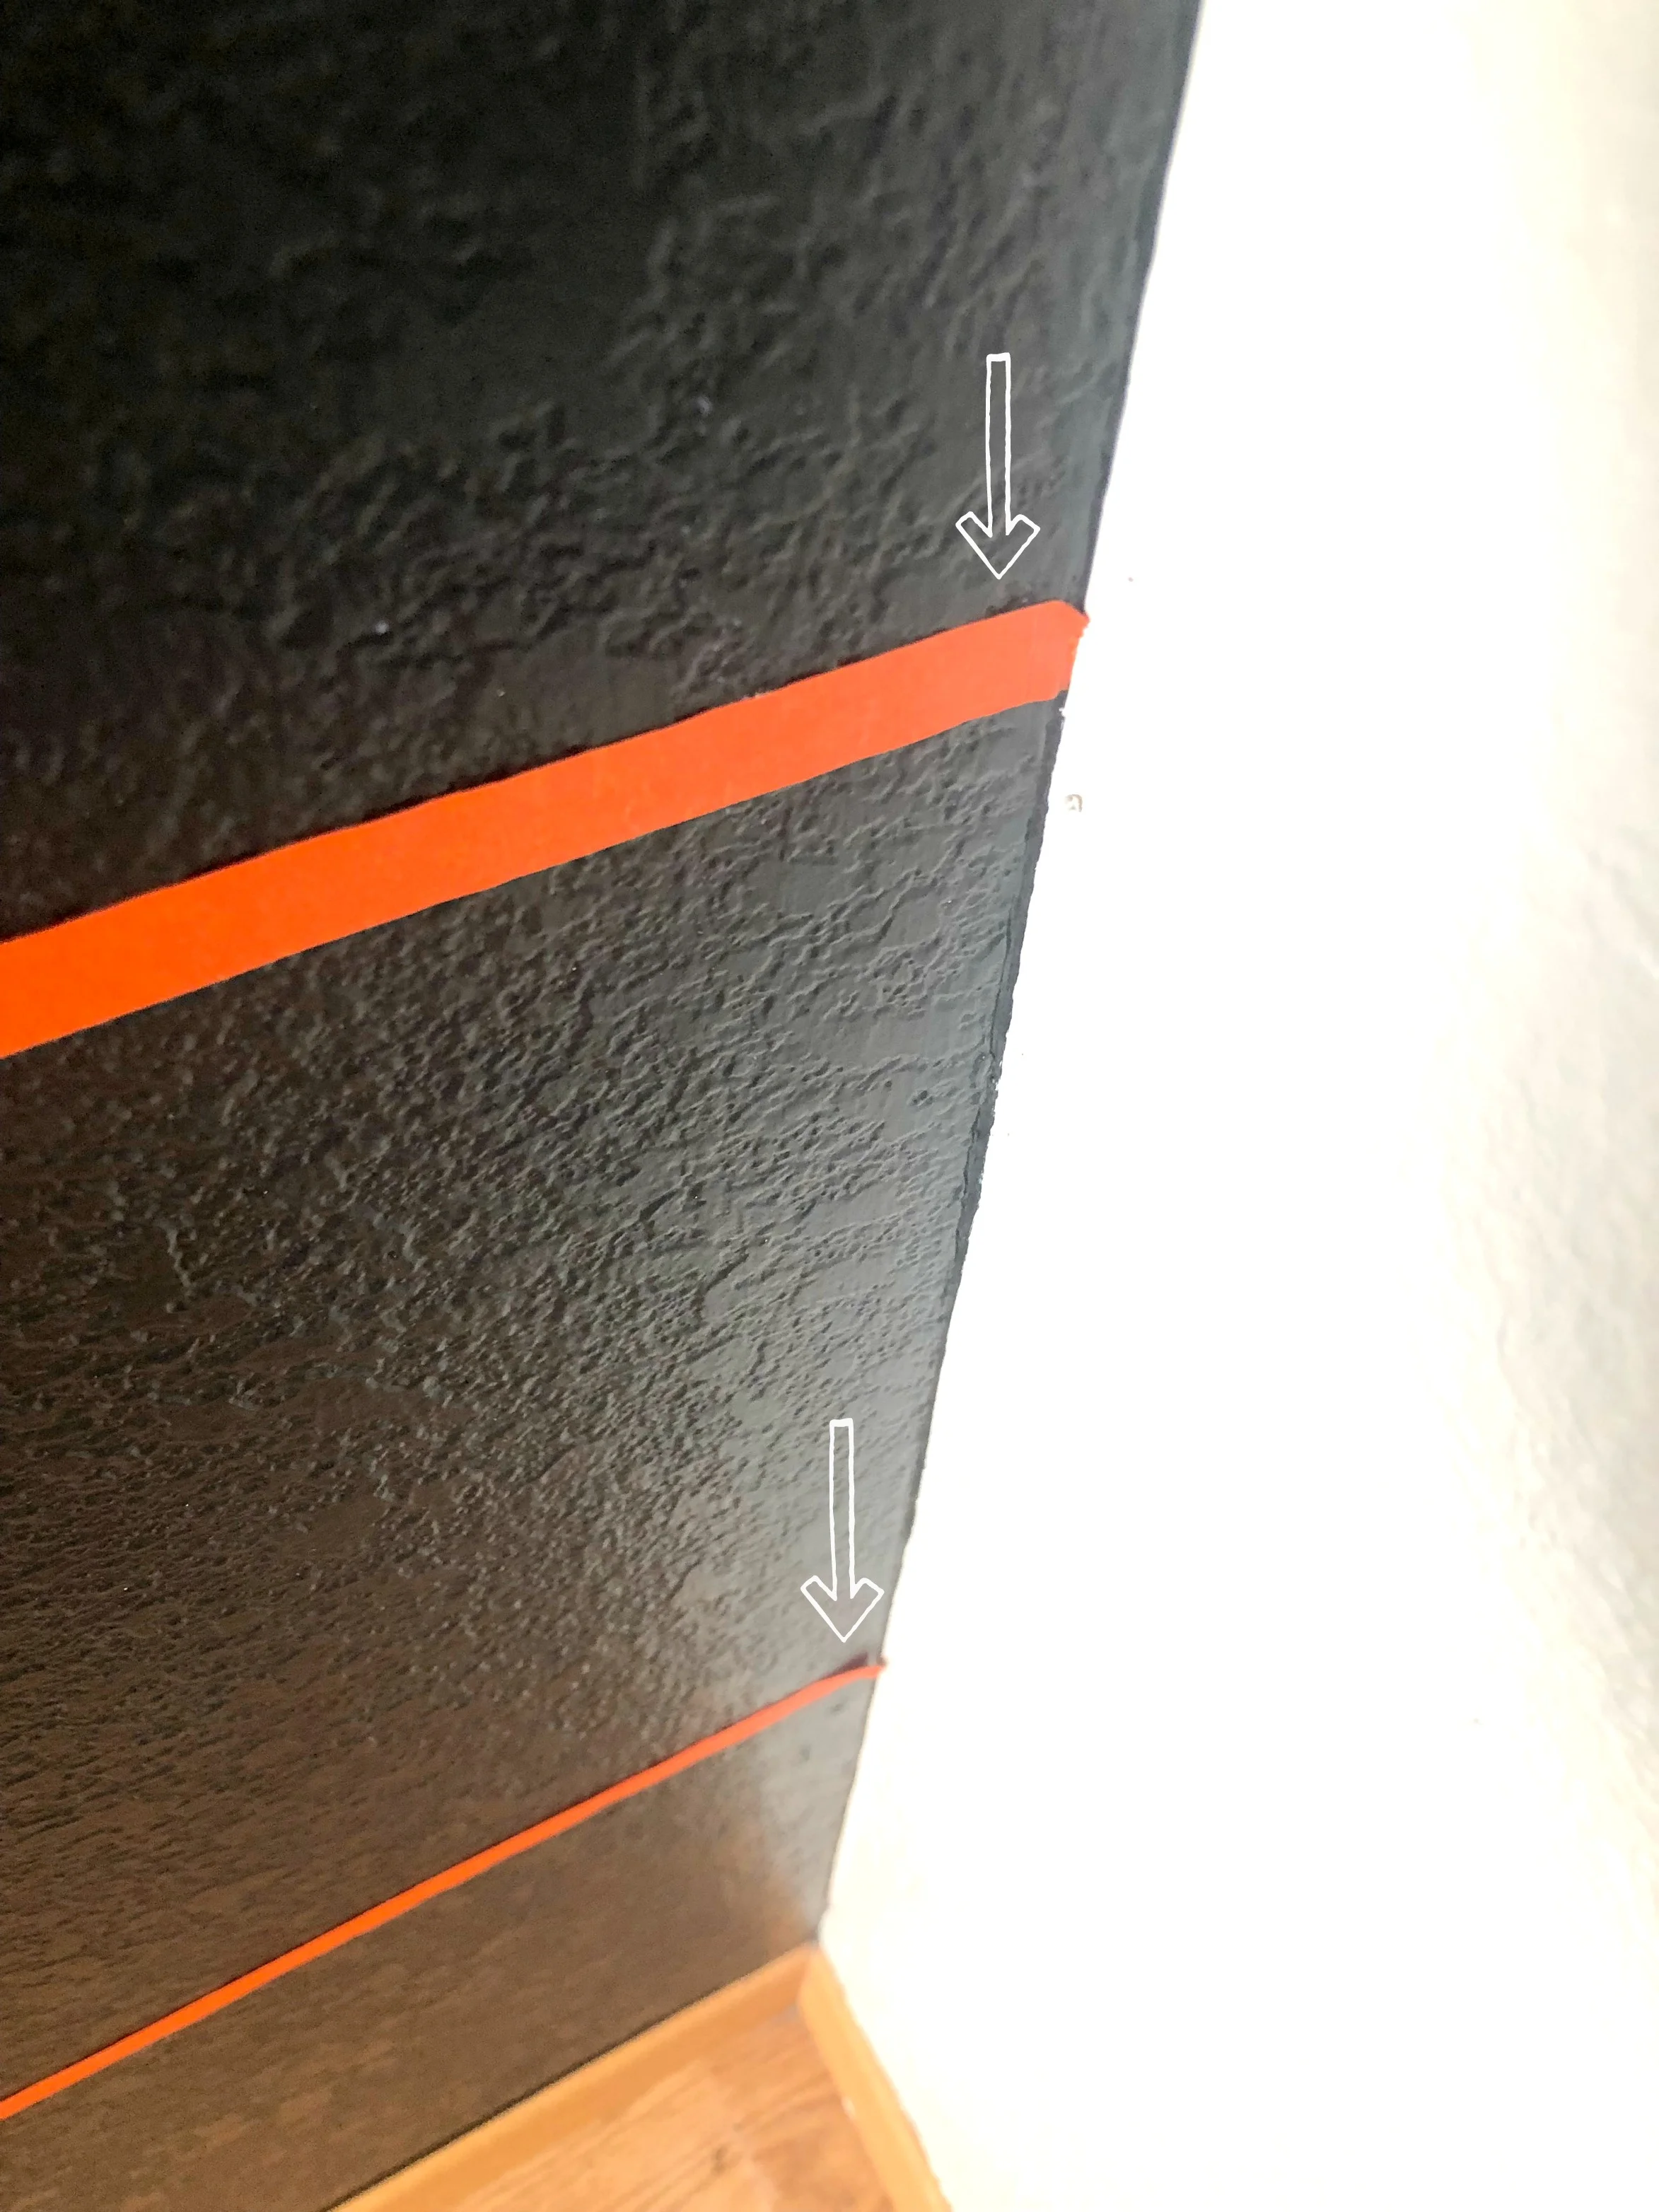
Photo courtesy of G. Grosse
This meant the washi tape was a no-go. It just wasn’t going to last (enter sad face).
But paint would.
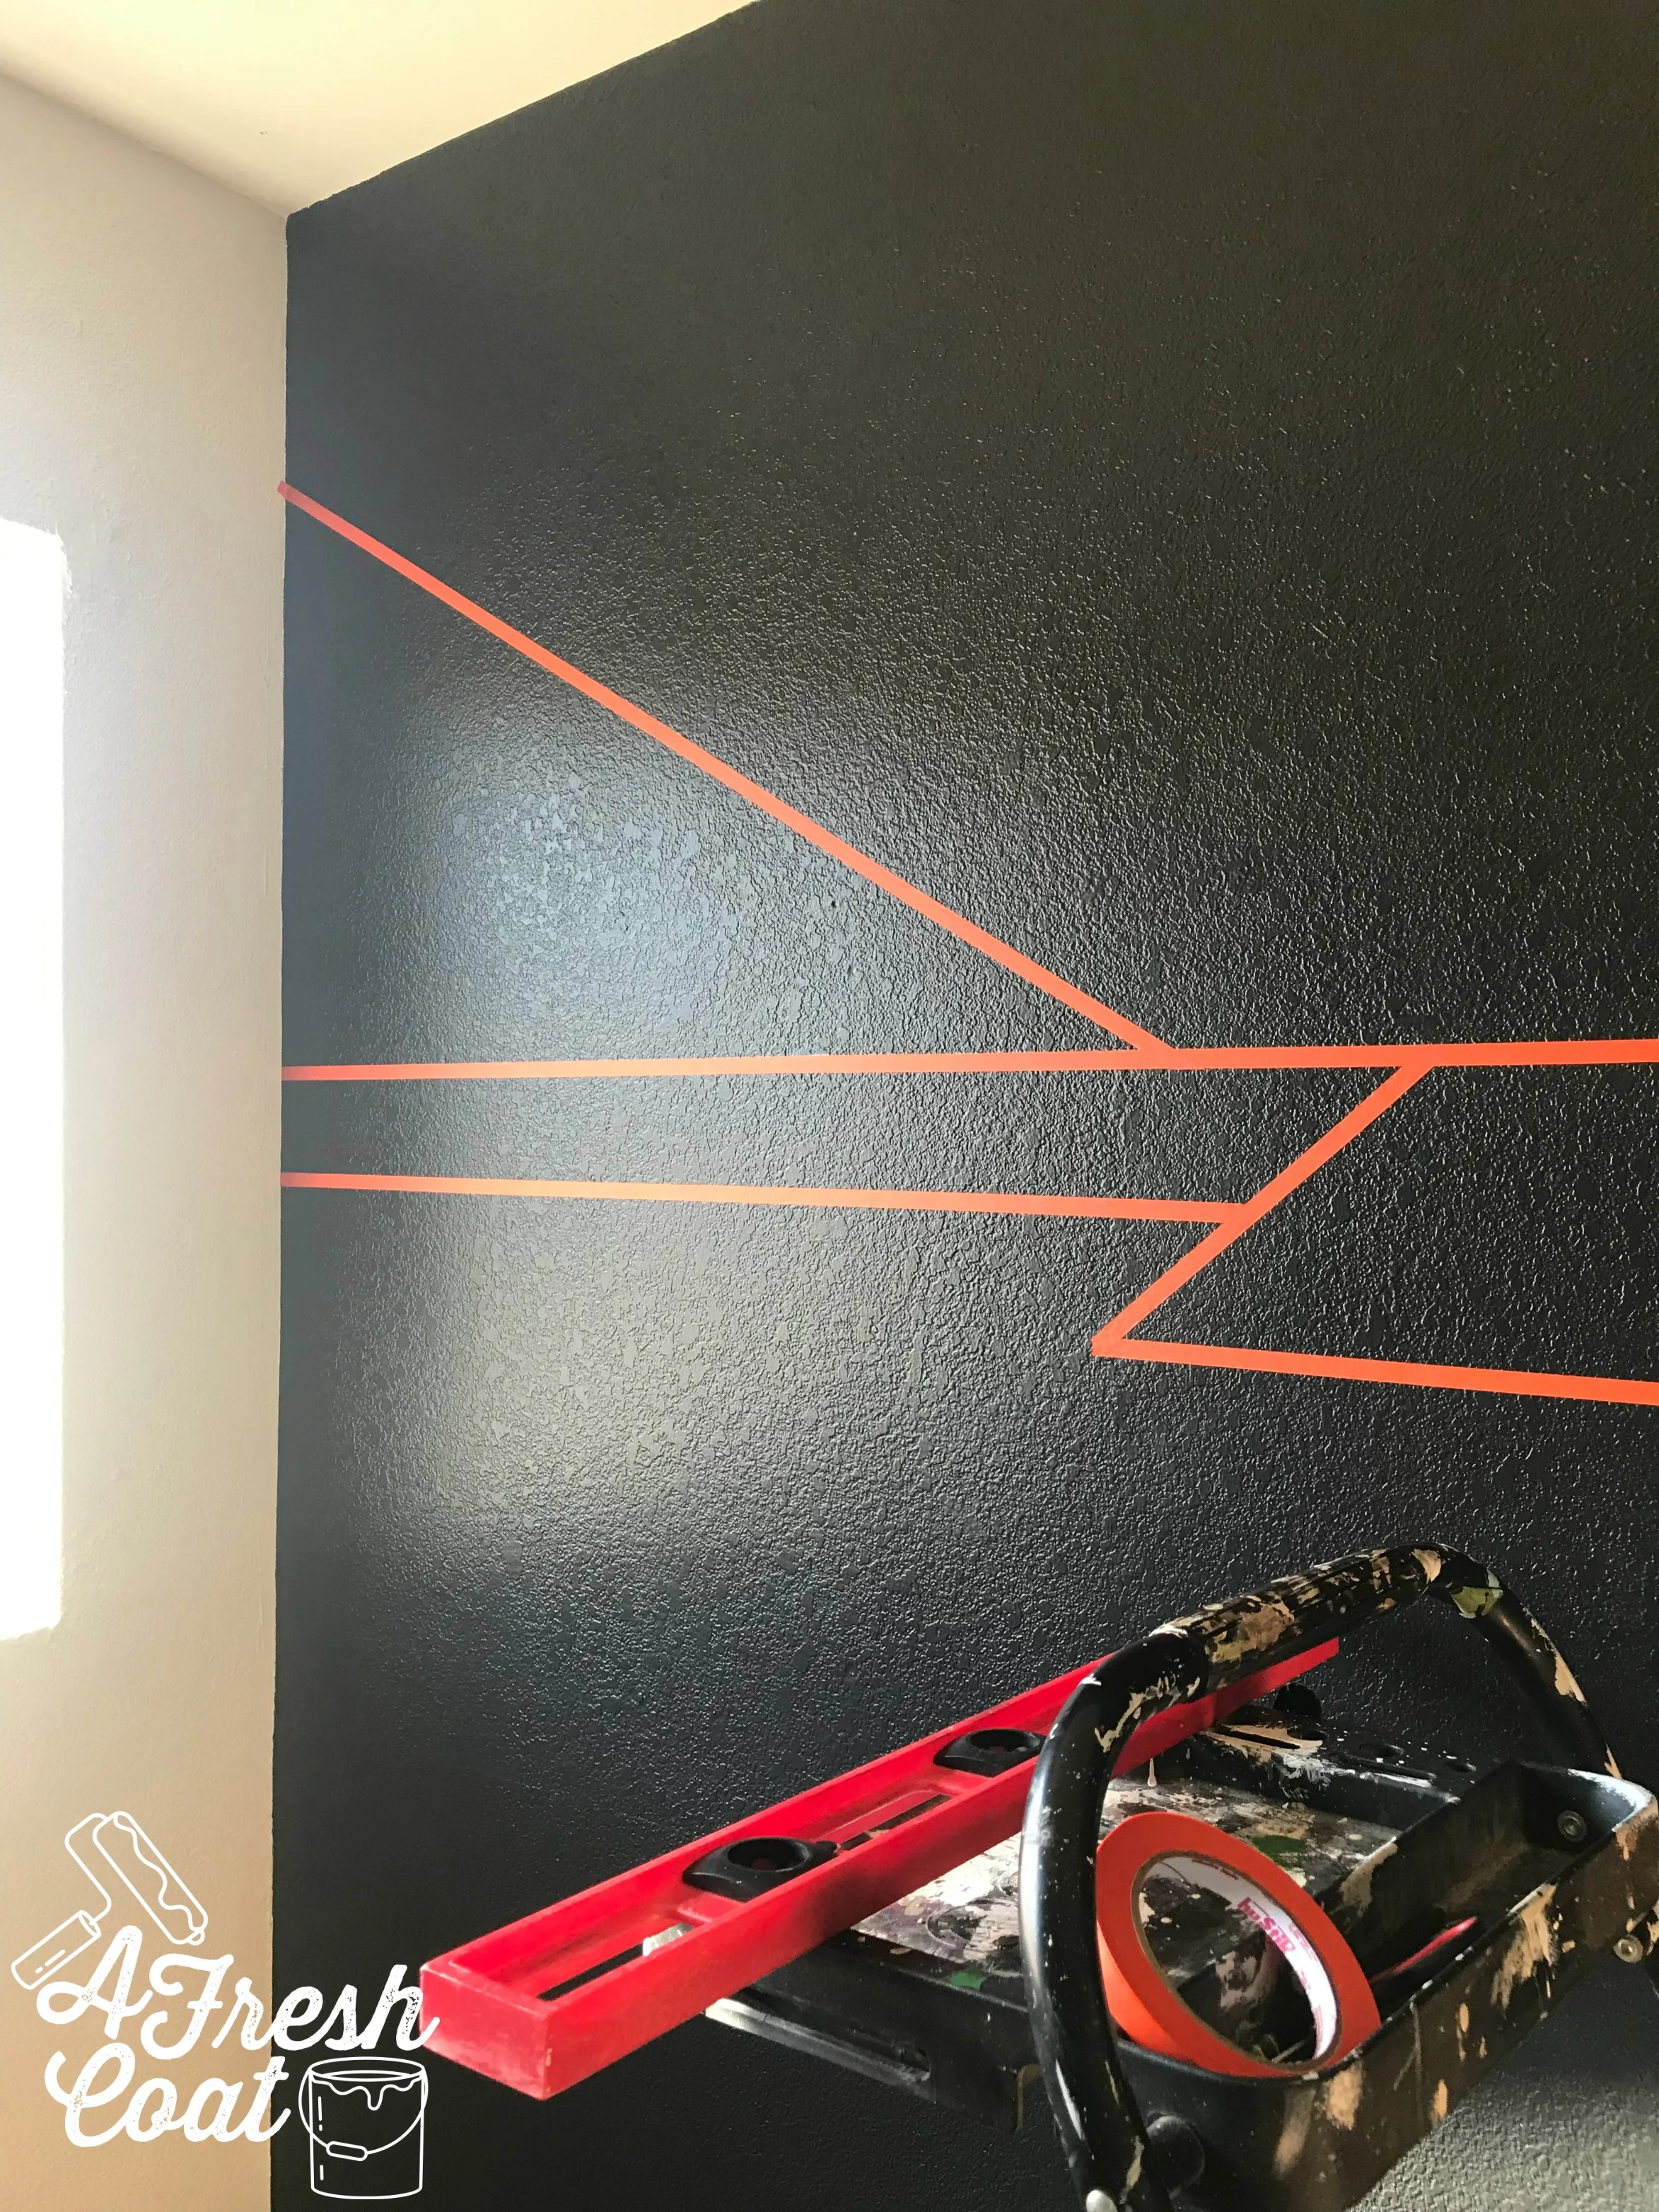
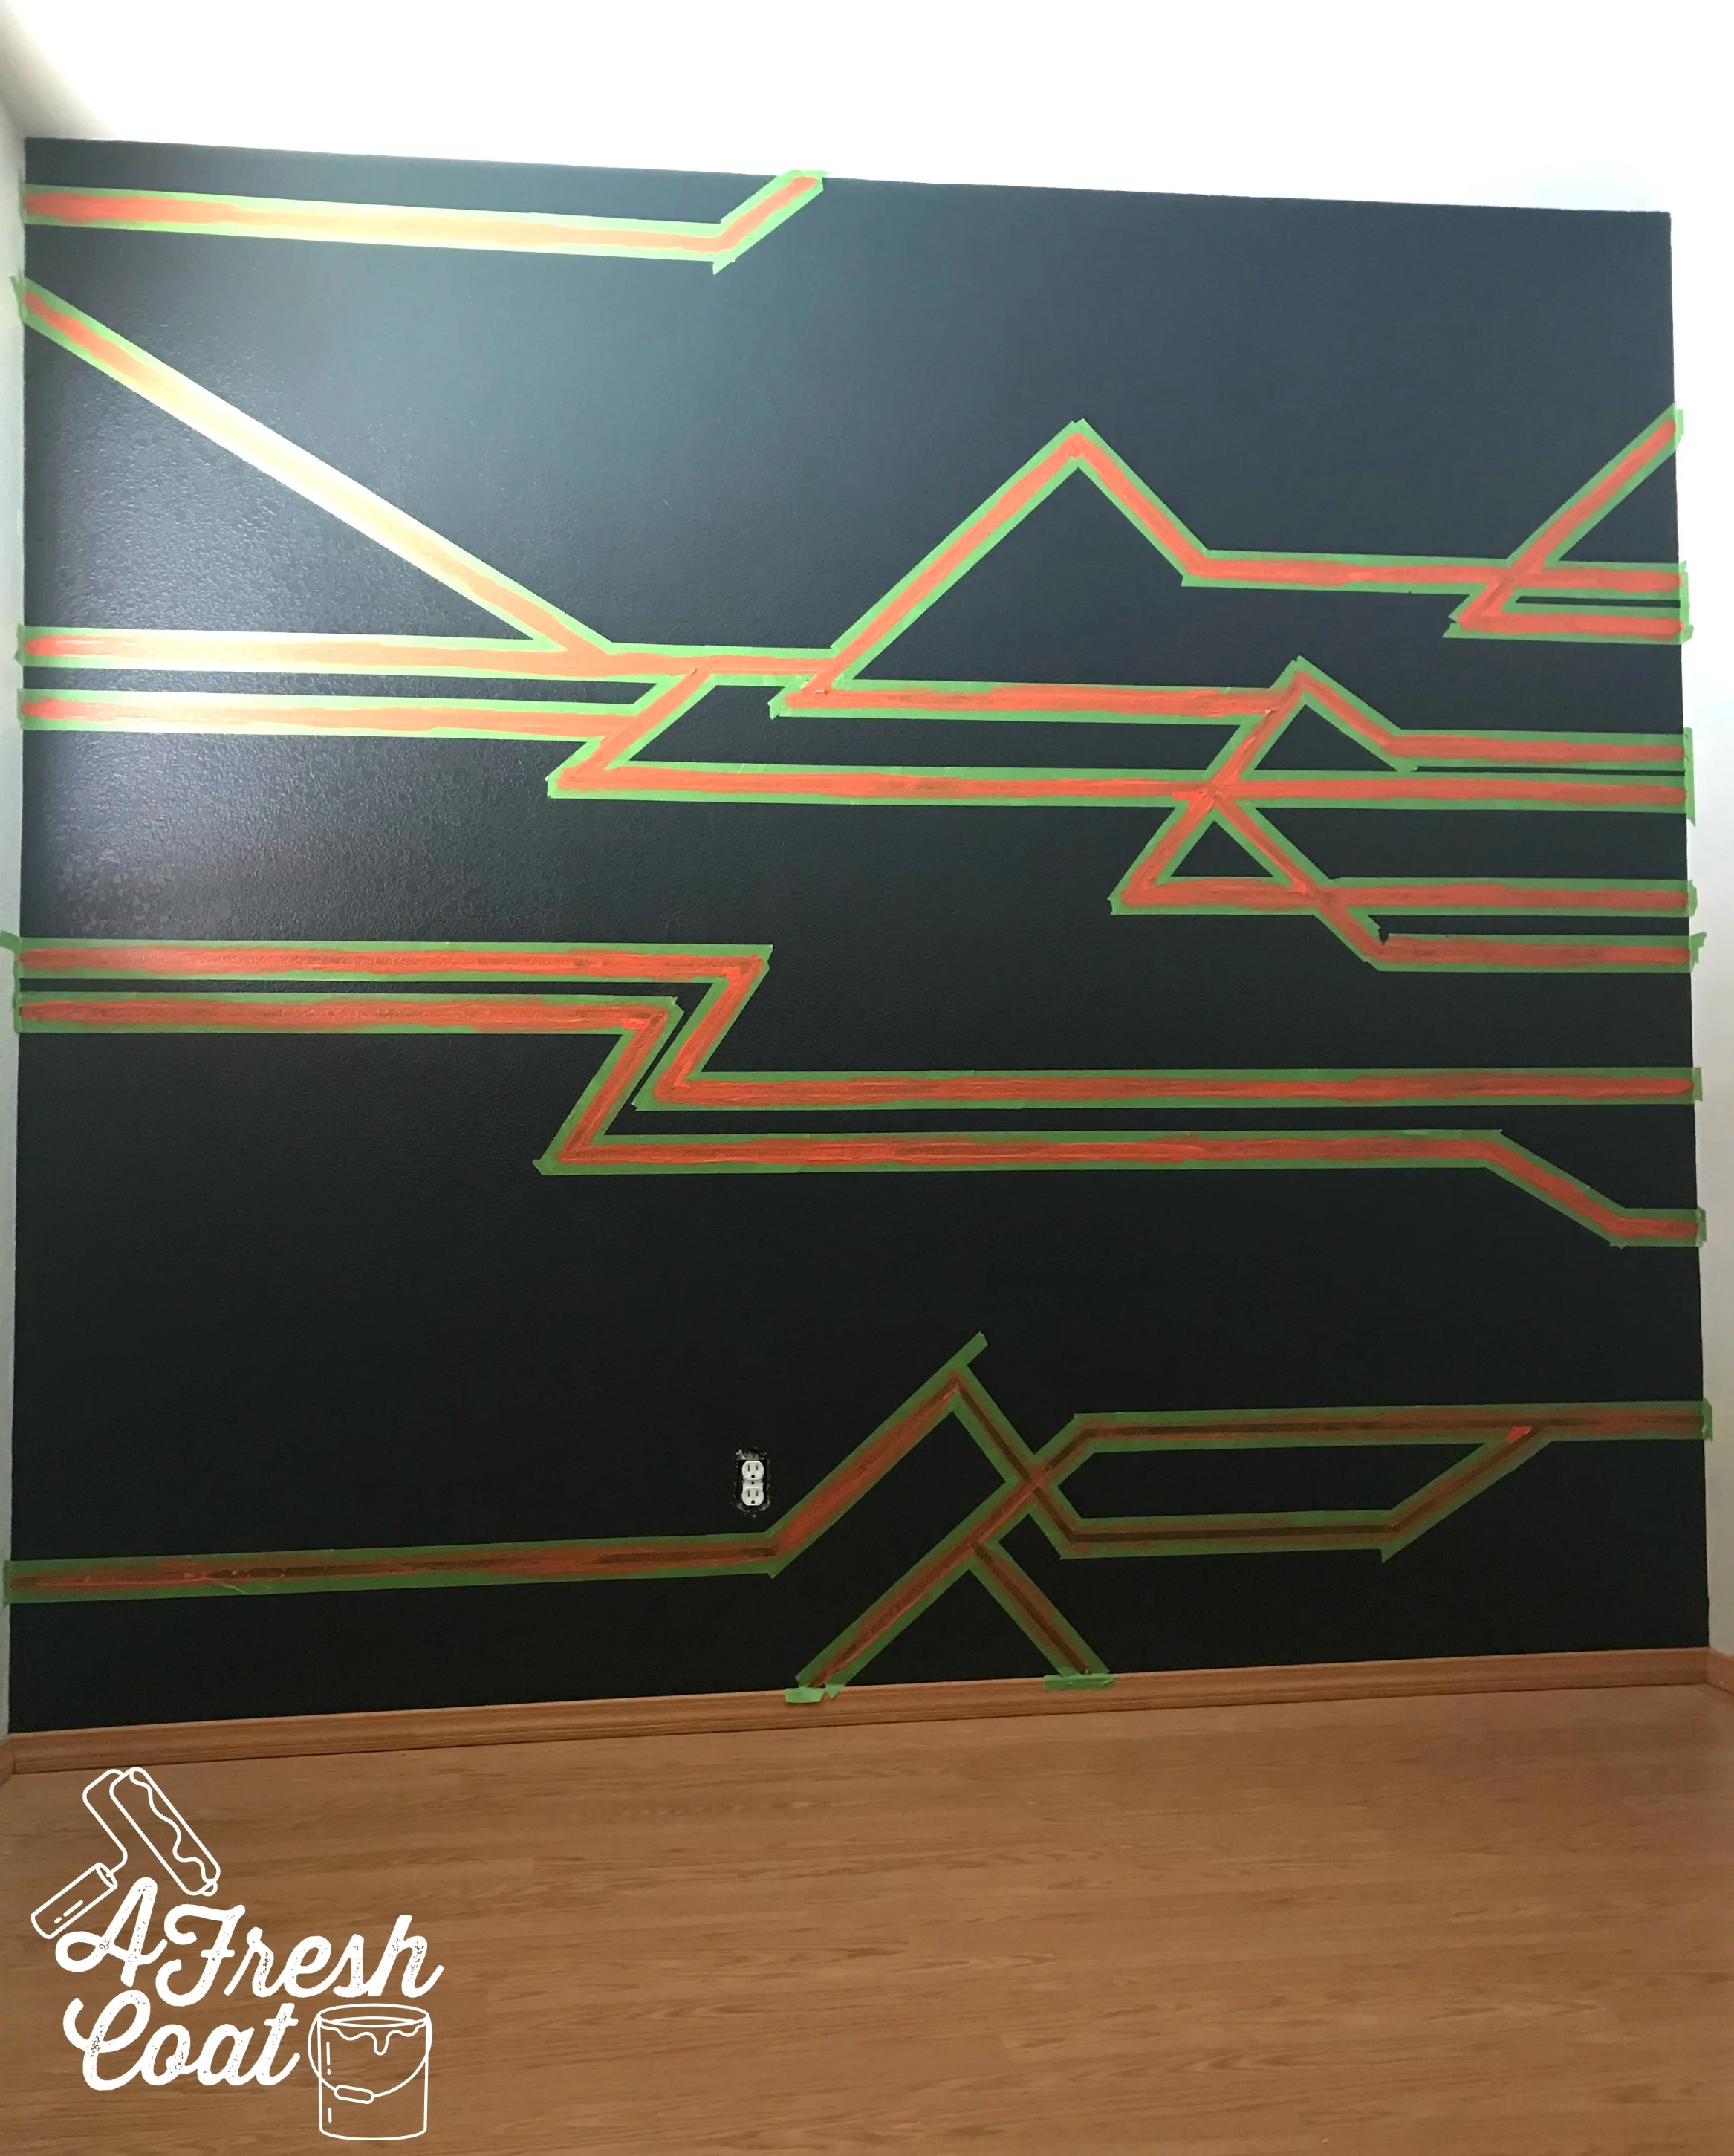
I headed back to “V’s” house, with a sample size of bright orange paint (sorry, the color choice totally escapes me at the moment), my level, and some Frog Tape.
Using the lines I created with the washi tape, I then outlined them with Frog tape. Next, the unruly washi tape was removed.
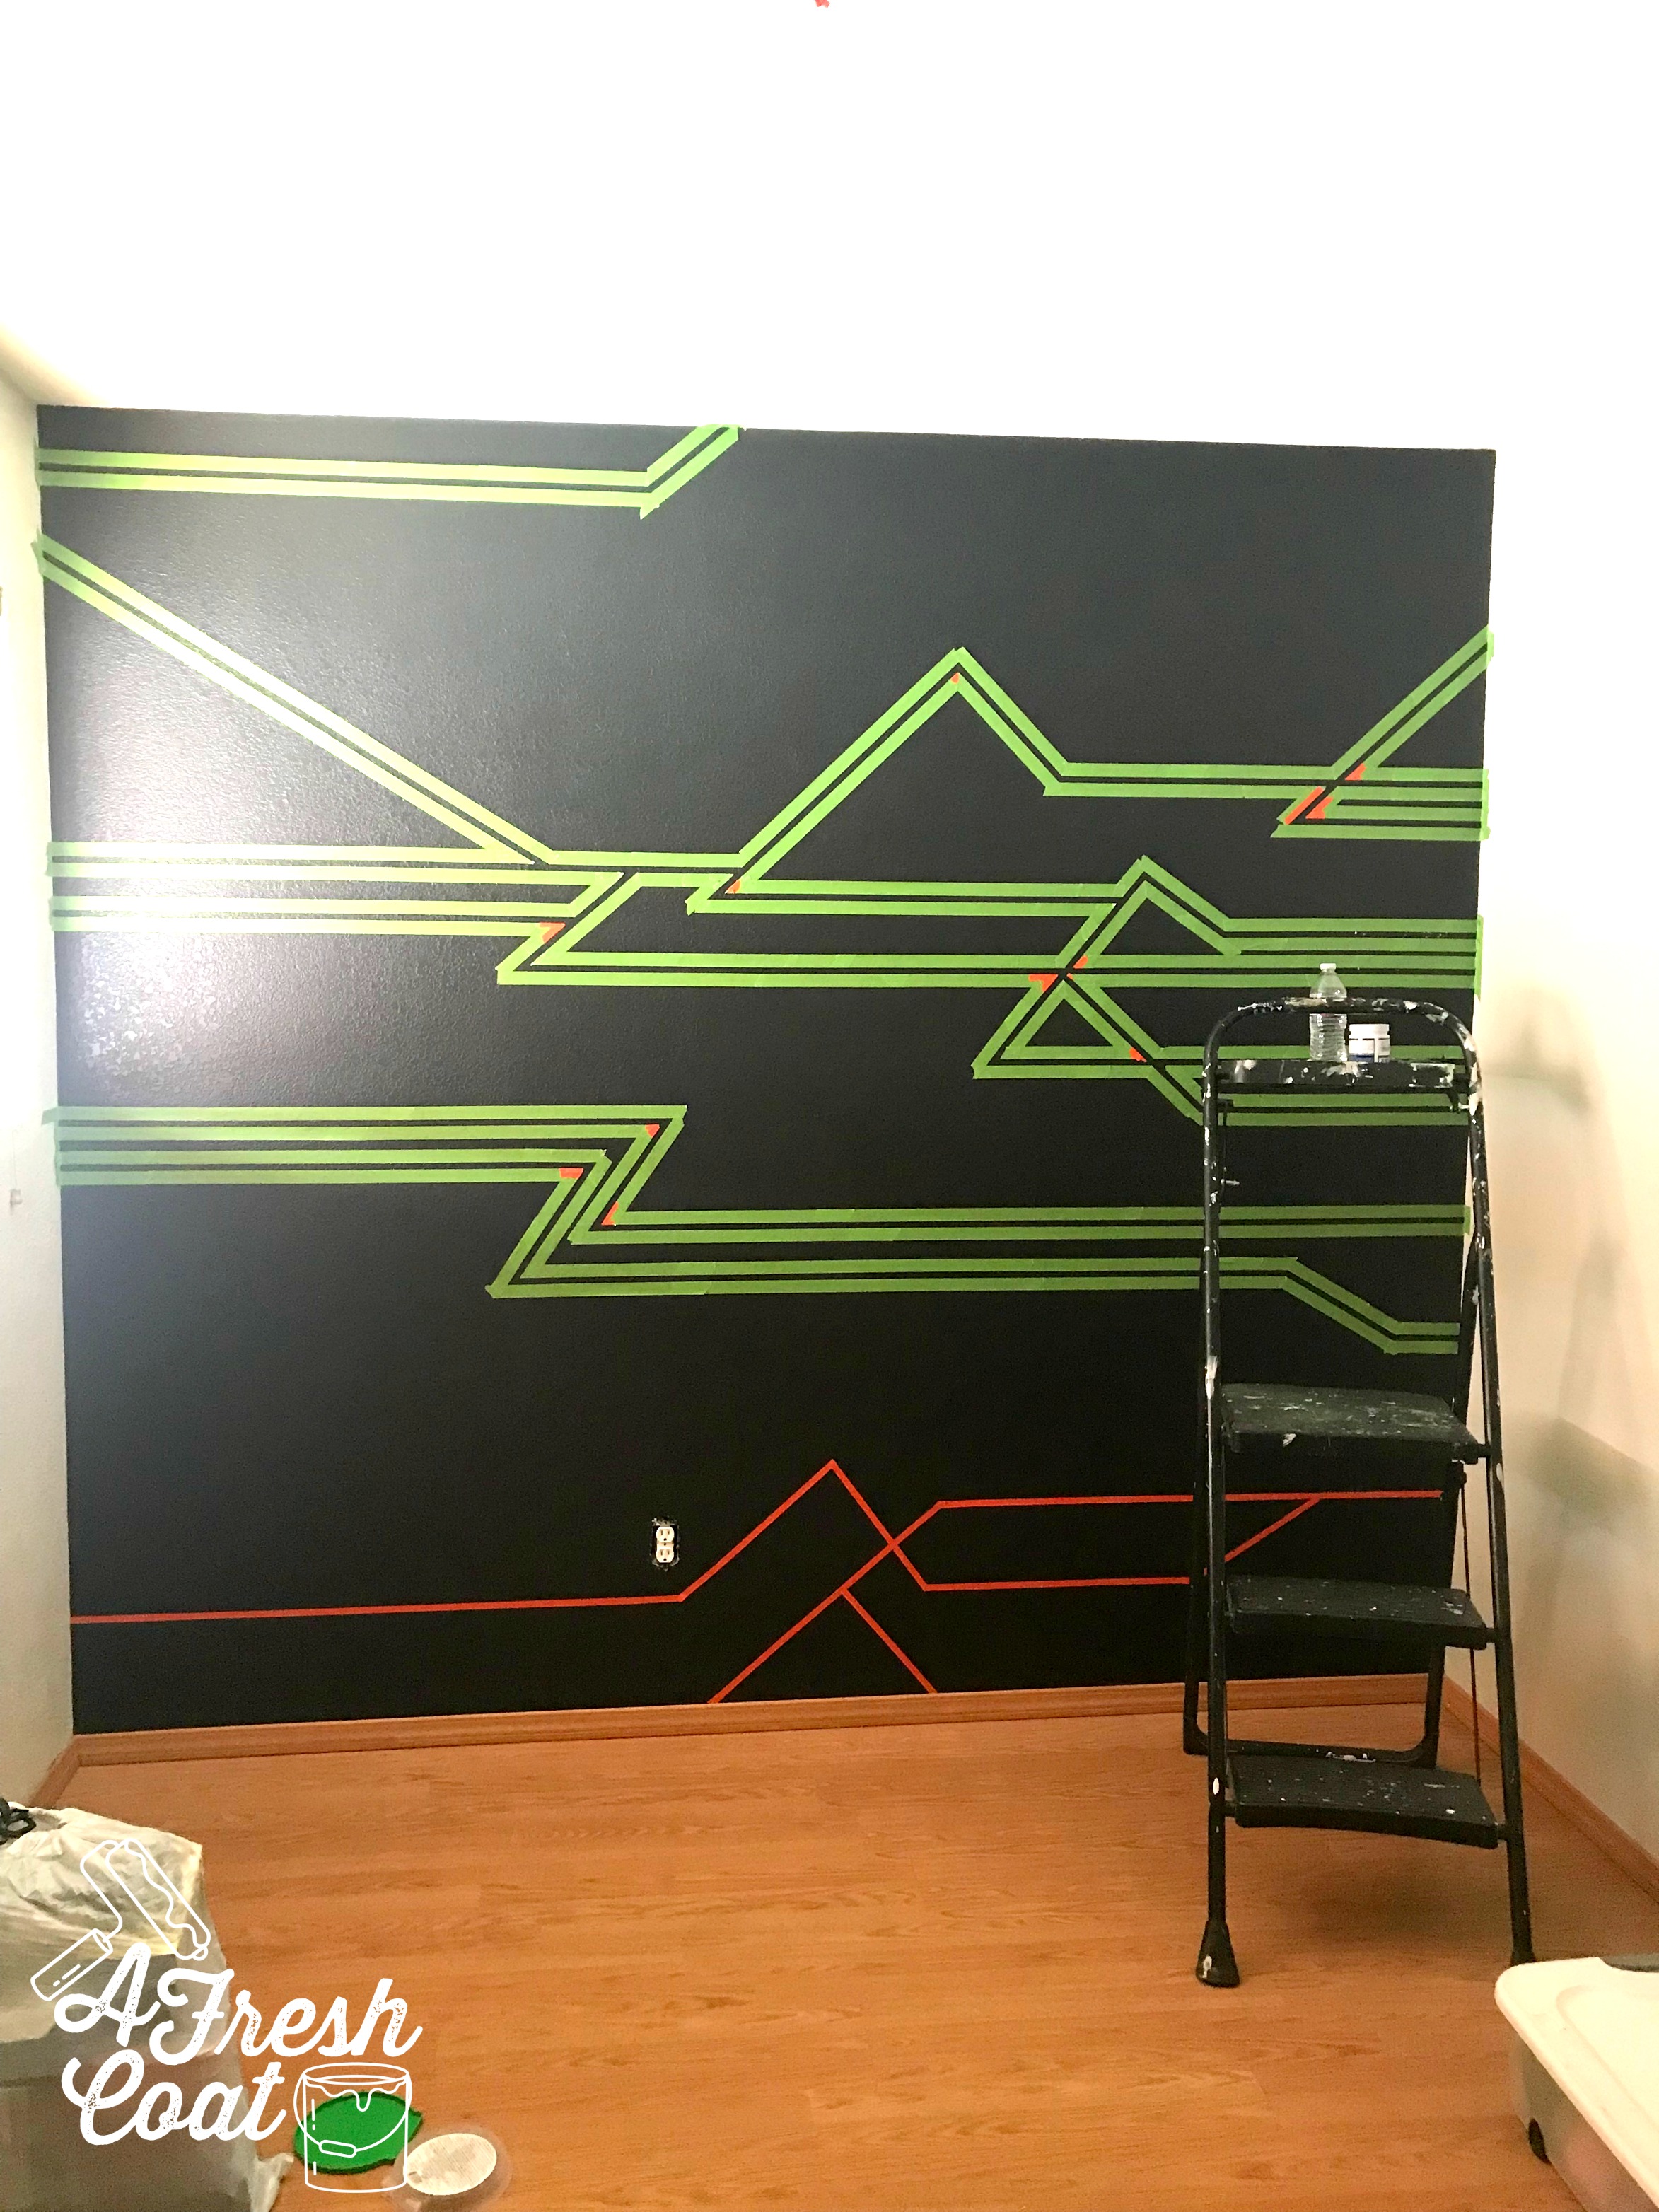
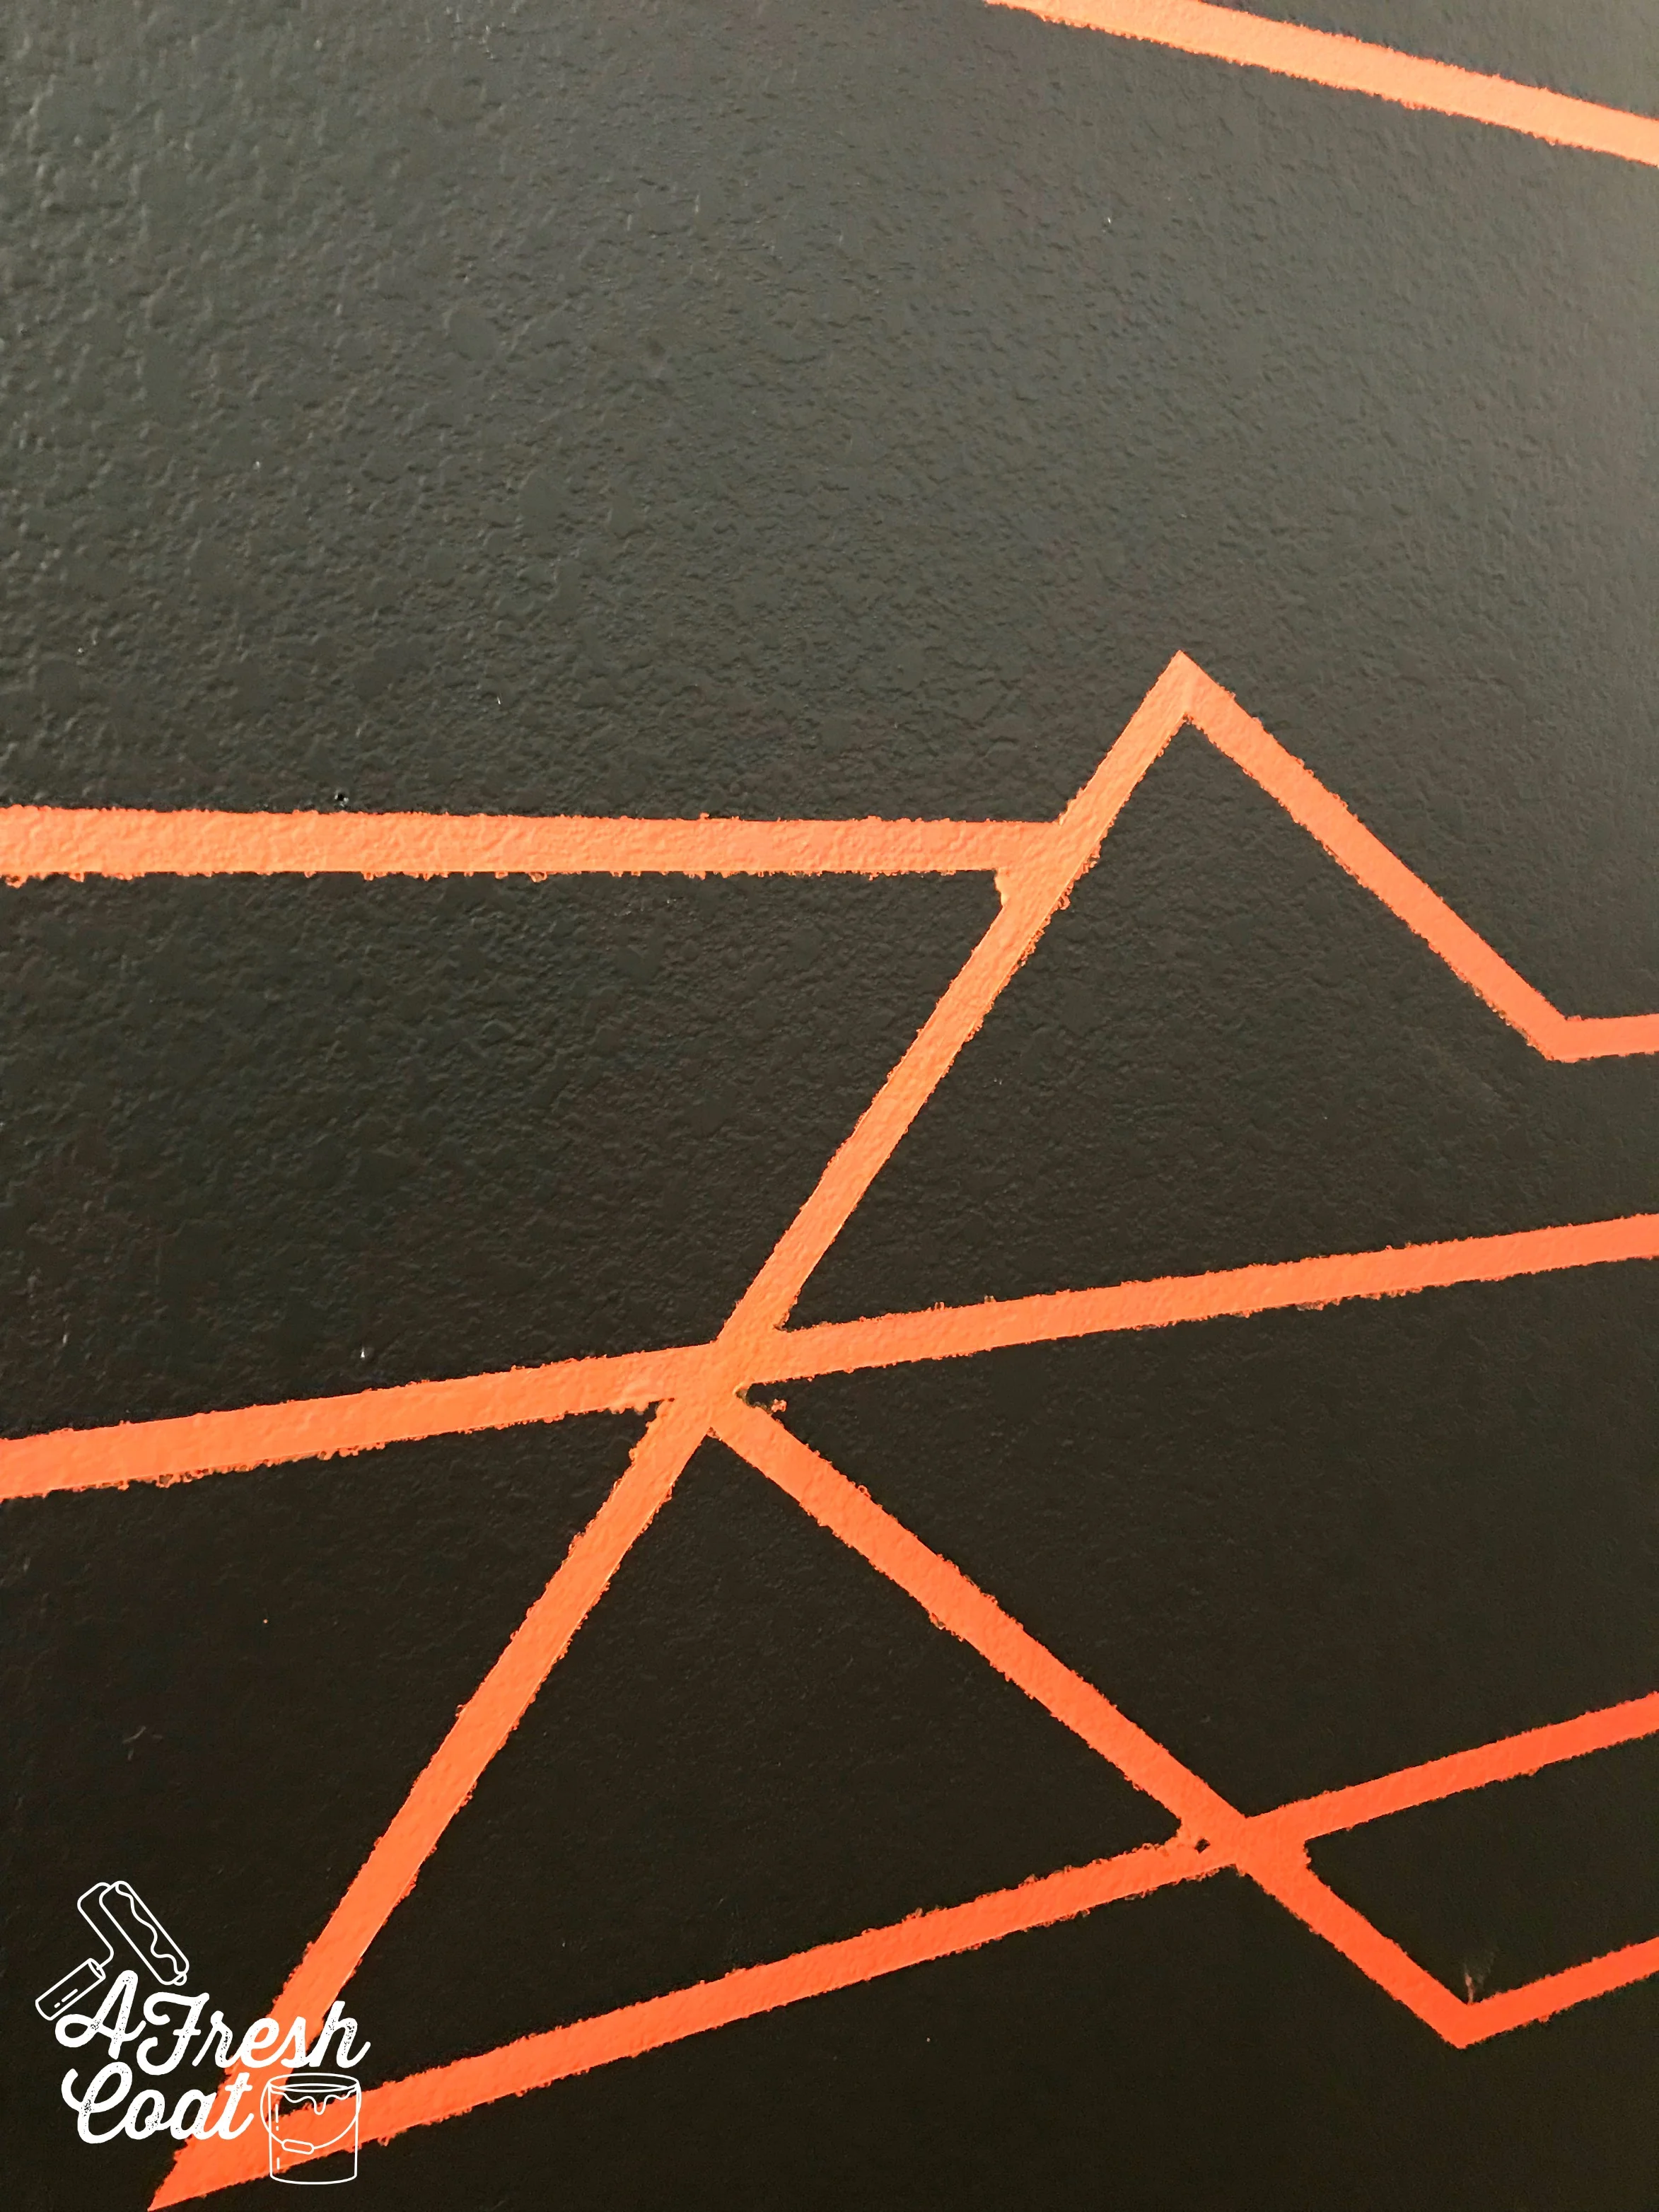
The next step to finishing this feature wall was the paint. I added three coats of the “orange-color-that-I-can’t-think-of-the-name-of.”
Now, there are a few tricks out there to get you nice, clean lines when creating stripes such as these. But they seriously haven’t worked for me. Ever! I’ve always had to clean up my lines—free-handed—and honestly, I’m okay with that. It is what it is.
Once I peeled off all the Frog Tape, I used a flat, angled brush for the detail work.
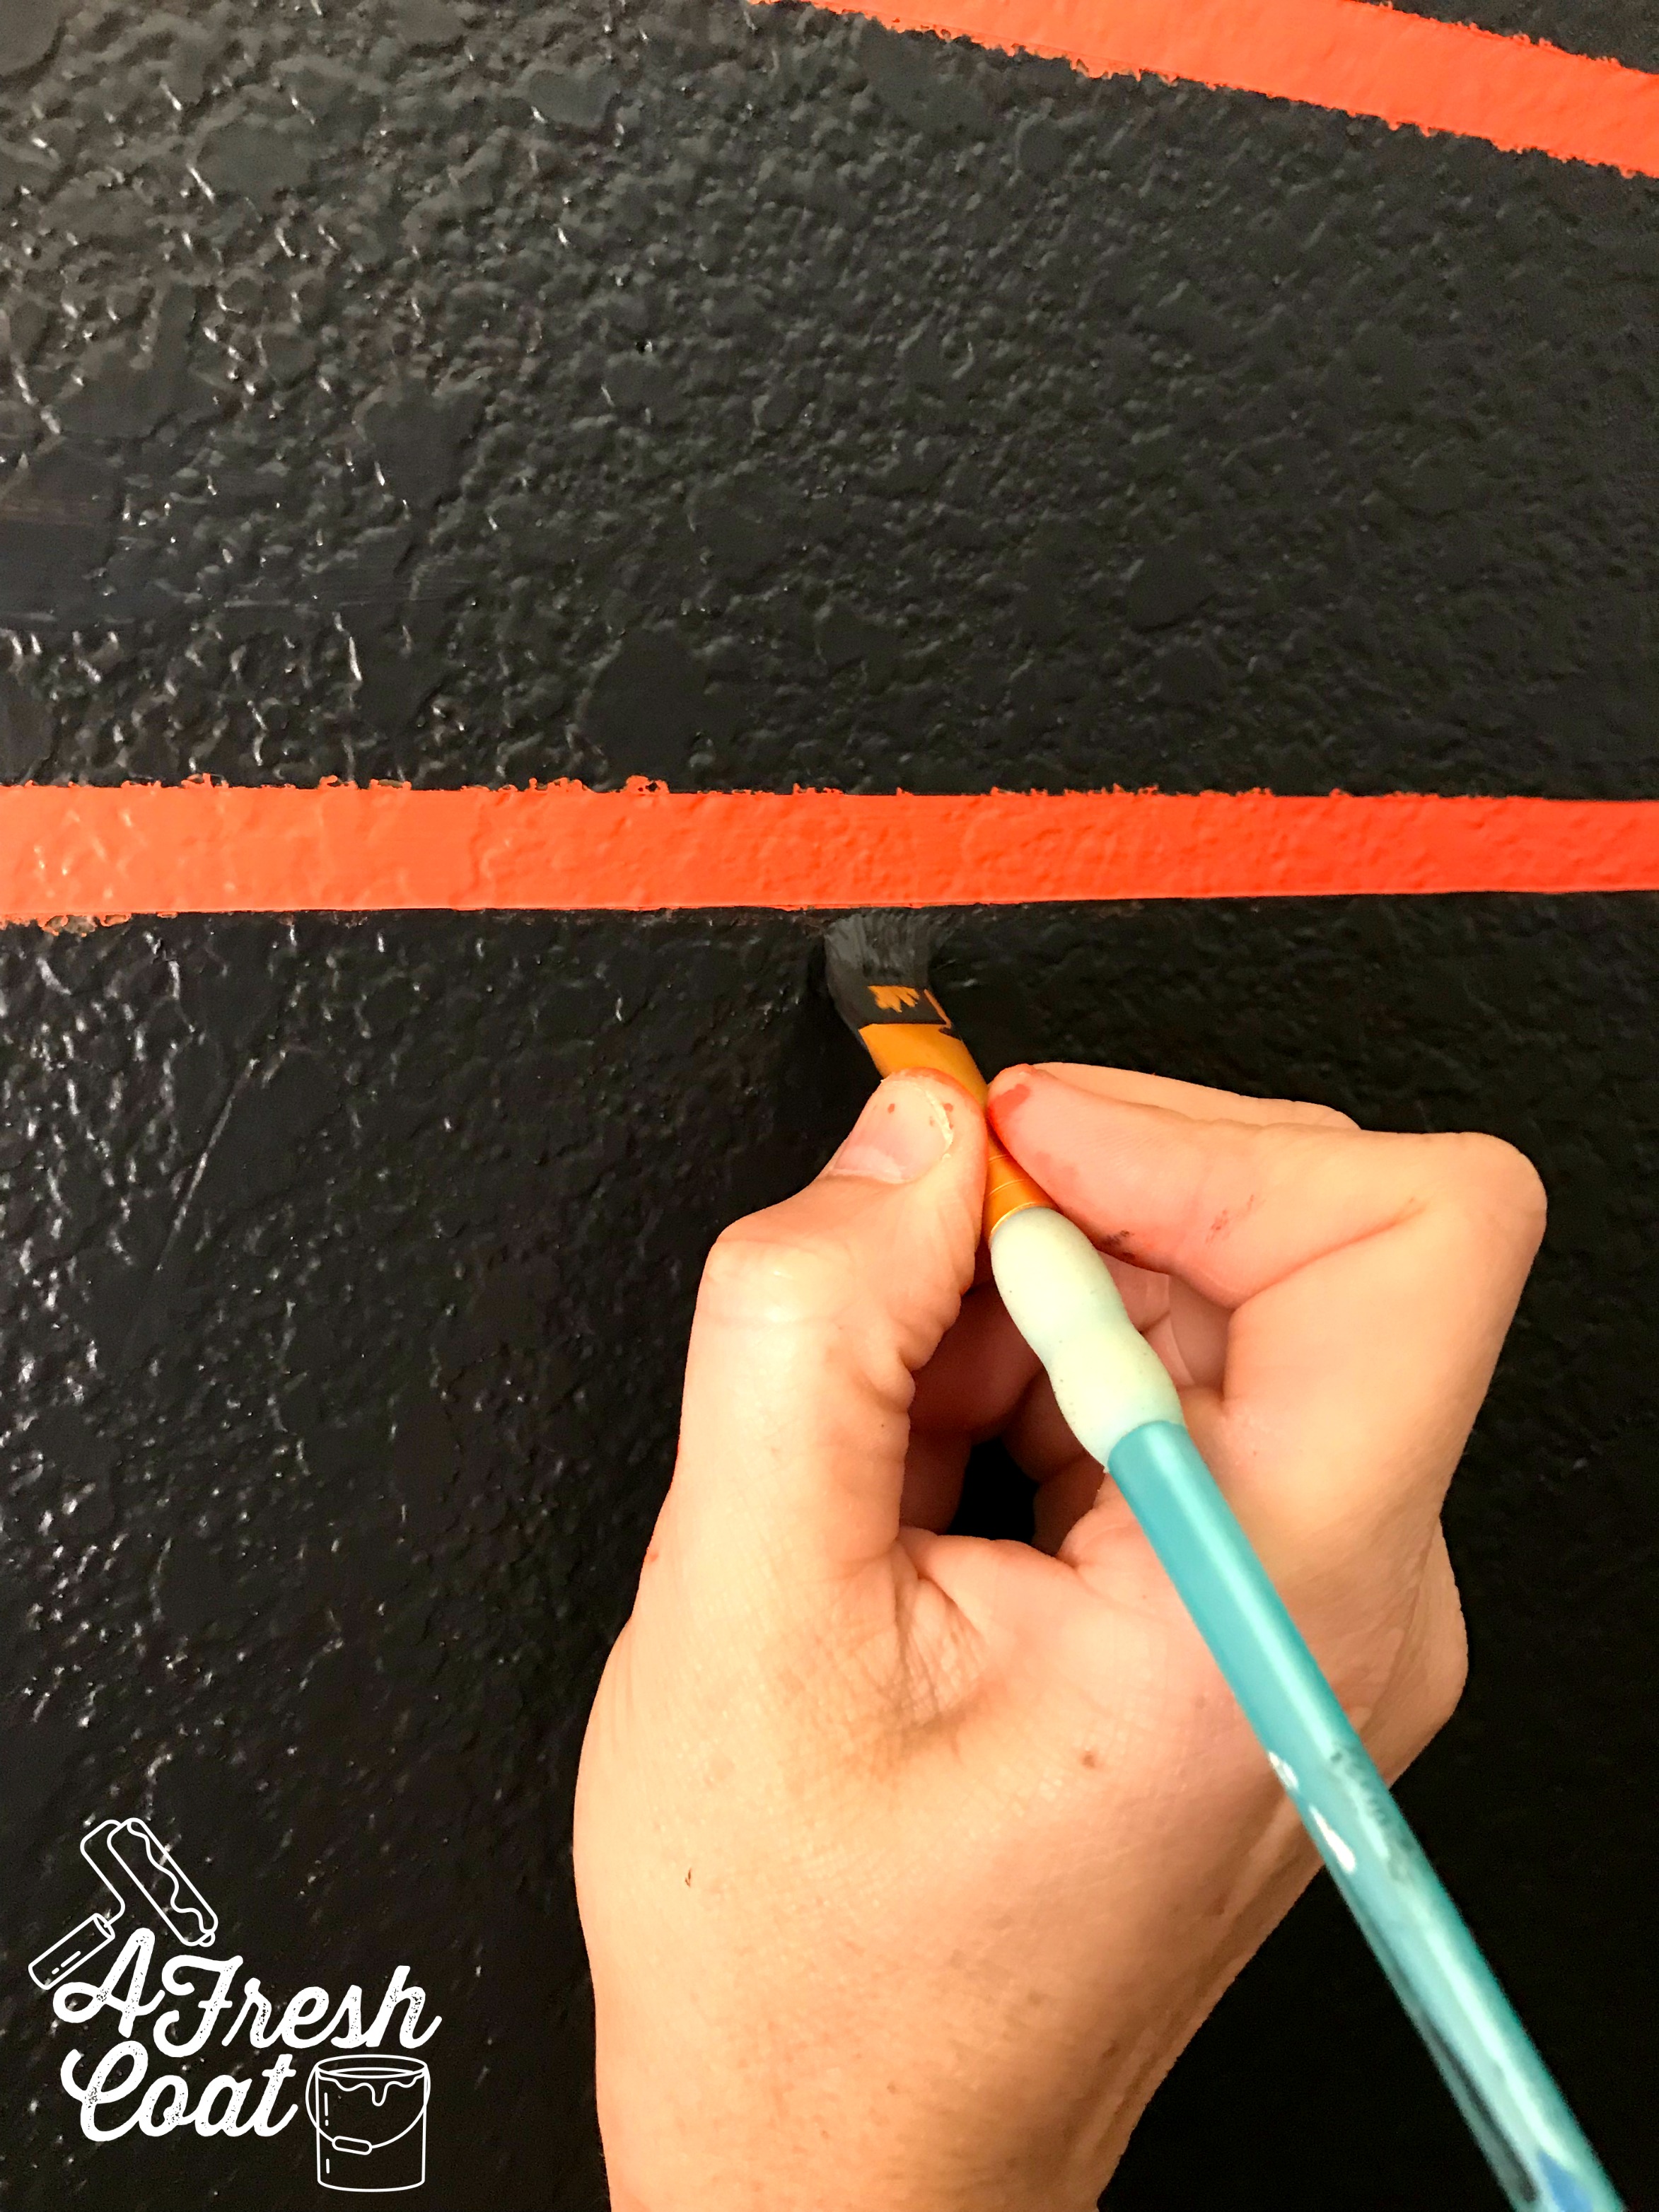
A few hours later and the wall was finished…finally. ;)
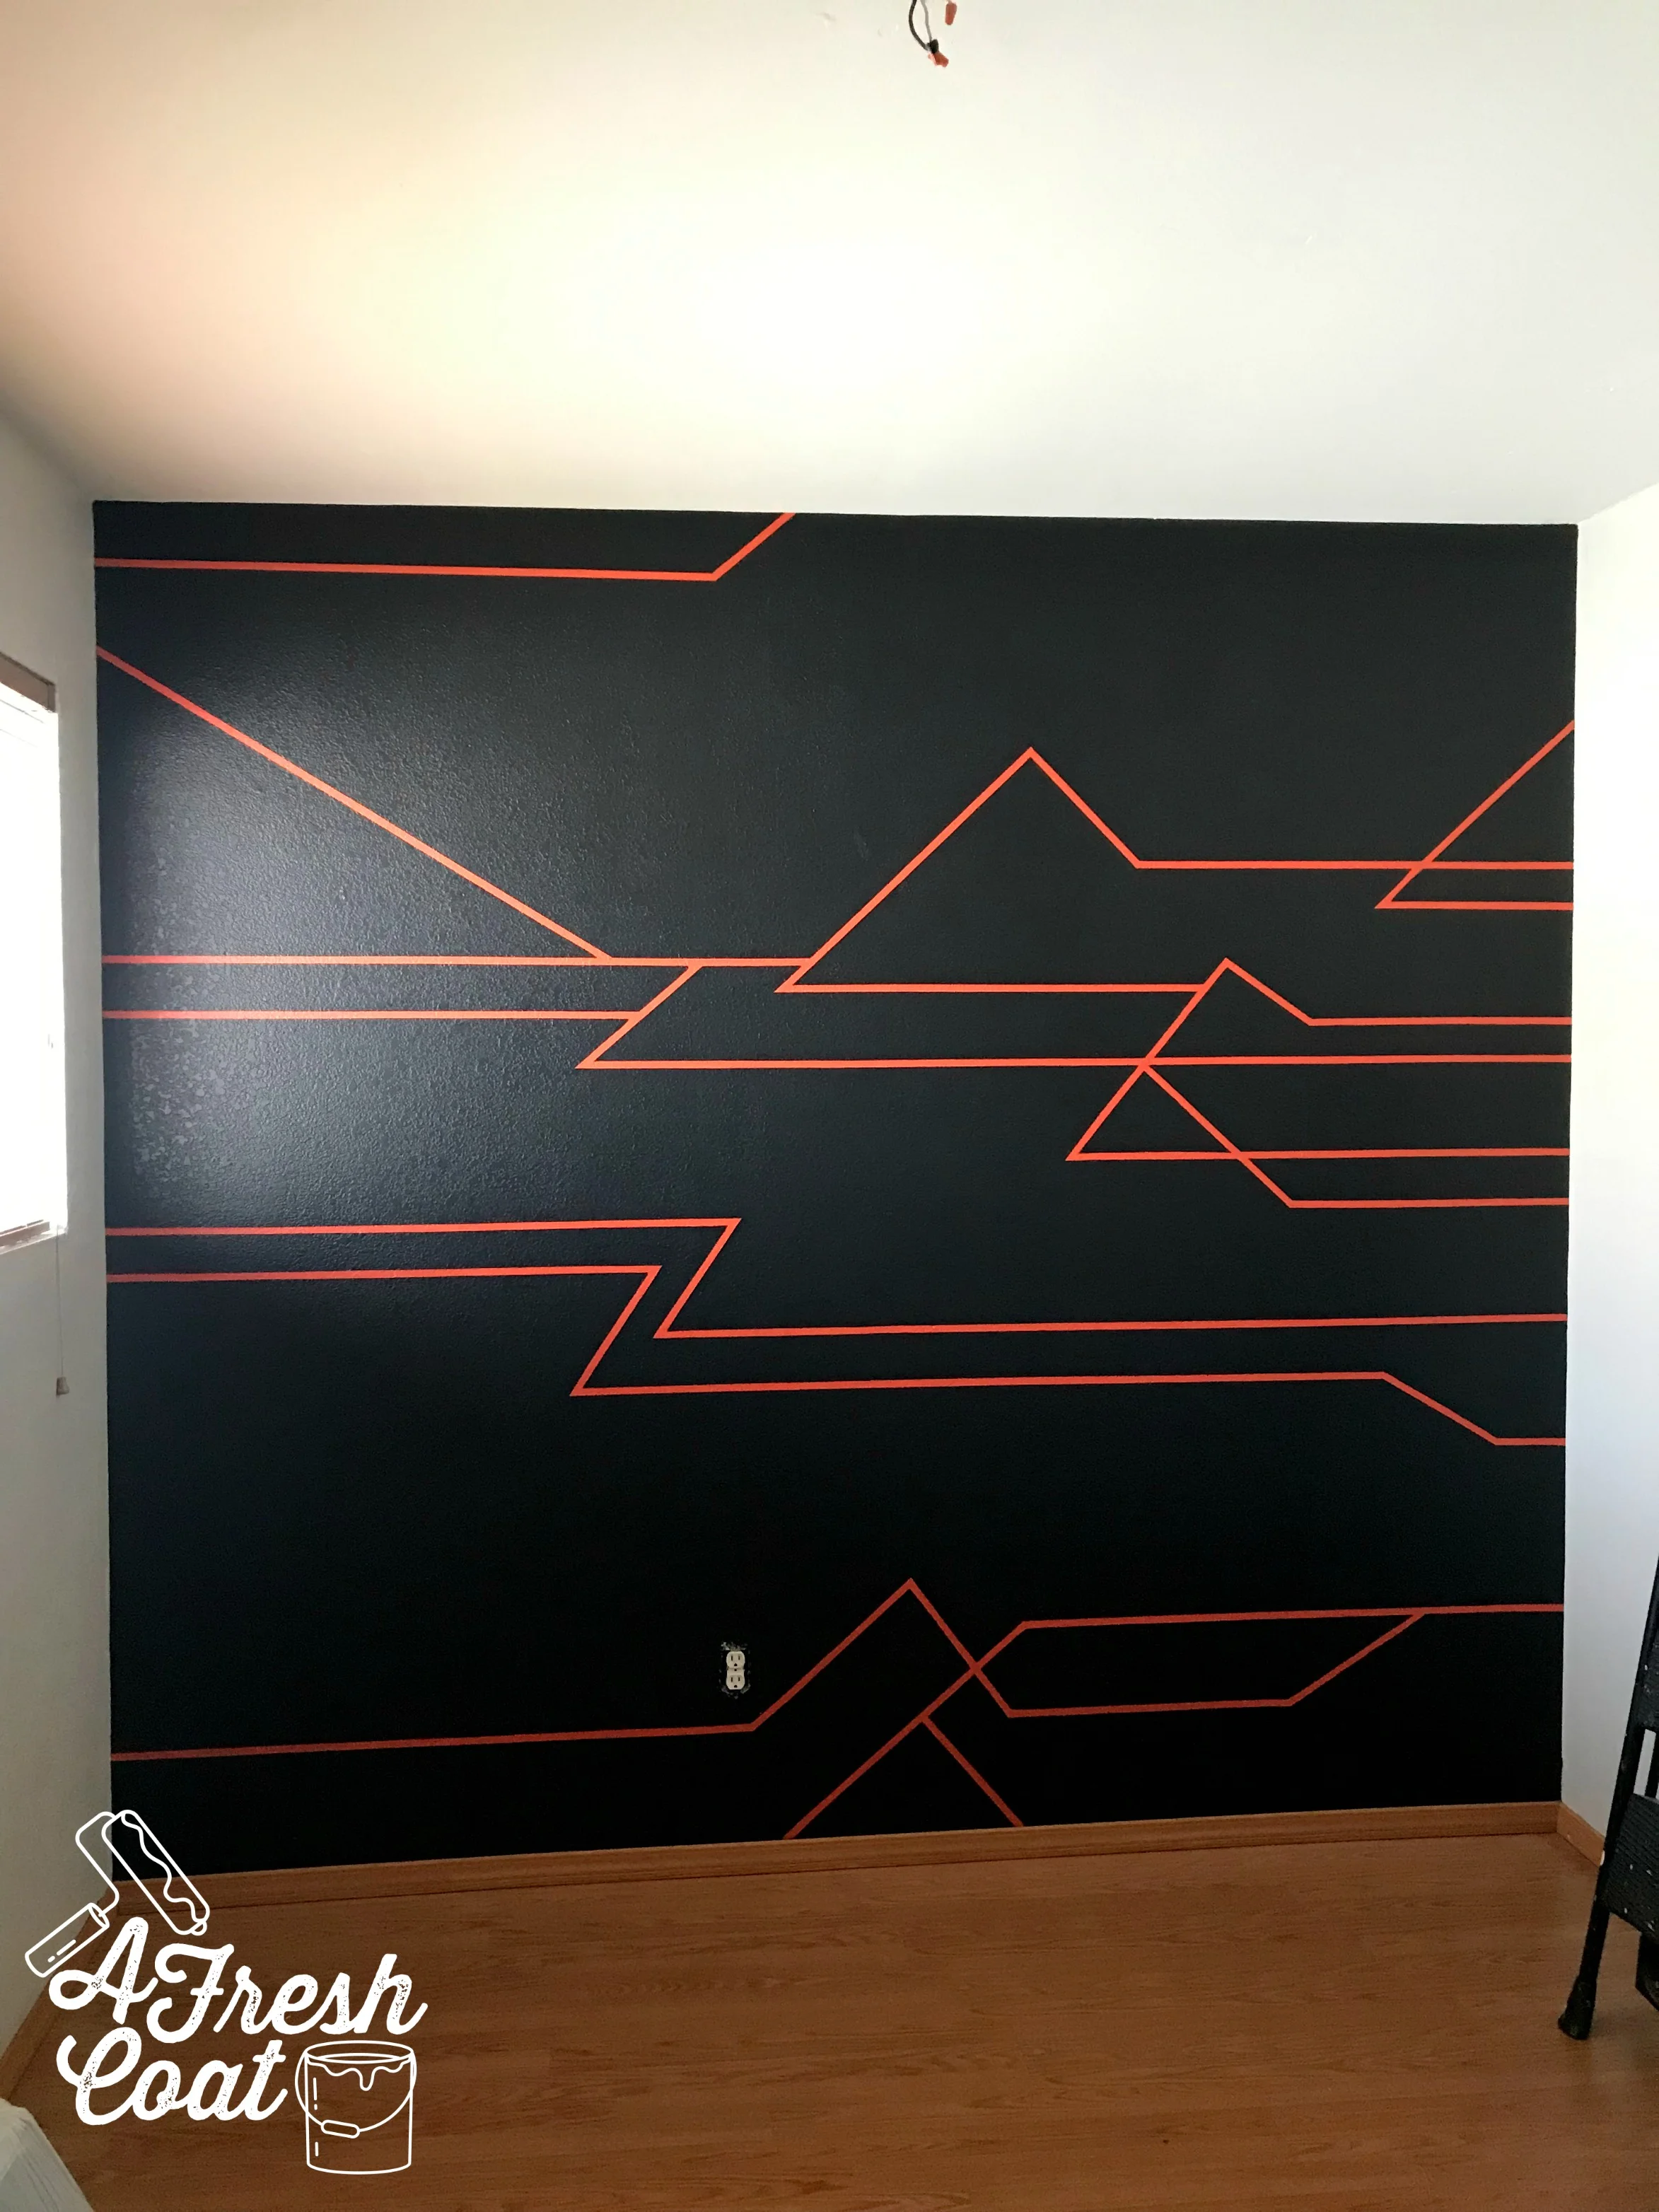
Phew!
“V’s” parents wanted to put the room together and finish up all the detail work themselves. However, they did send me an “after” pic of what they accomplished and I think “V” will be one happy camper.
Mission: Complete.
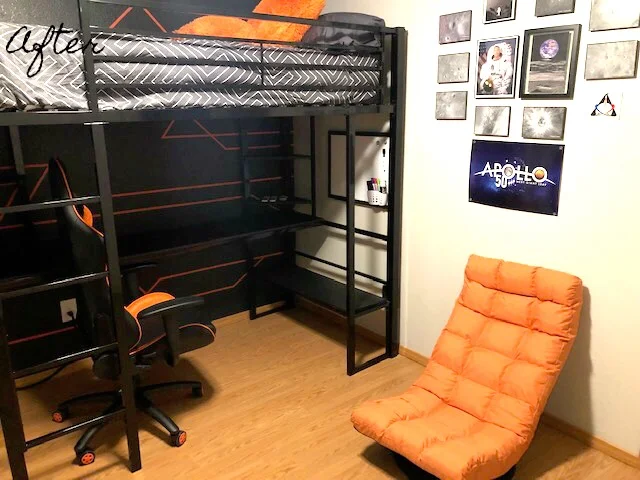
Photo courtesy of G. Grosse
The Details:
Orange Gaming Chair: American Furniture Warehouse
Bedding: Wayfair
Bed: Furniture Row
Ceiling Fan: Wayfair
Washi Tape: Amazon
Paint: Valspar’s Drak Kettle Black, Sherwin William’s Agreeable Grey, Sherwin William’s Alabaster, and the orange color I don’t know the name of anymore…sorry!
Paint Labor: AFC
Feature Wall: AFC
Rug (not pictured): Home Depot
Decorative Pillow: Etsy