A Fresh Coat

Office Overhaul

Home OfficeJenny SulpizioComment

The "H" Family was in need of a new den space and office overhaul. A farming family, they wanted to incorporate the numerous produce signs they'd collected over the years, along with their piano, some family heirlooms, a hint of rustic, and a touch of navy.

The first part was establishing the feature wall of the room. The office/den is the first area you see after entering the front door, so it had to pop. Mrs. "H" was totally on board with this simple molding construction (see below) that I think made a huge impact.

These inexpensive pieces of wood went straight on this textured wall (backer board is optional), and A Fresh Coat got to work painting them a brilliant navy blue. The rest of the room received the greige treatment in SW Agreeable Grey.

Unknown.jpegOffice Overhaul/A Fresh Coat Yuma 1

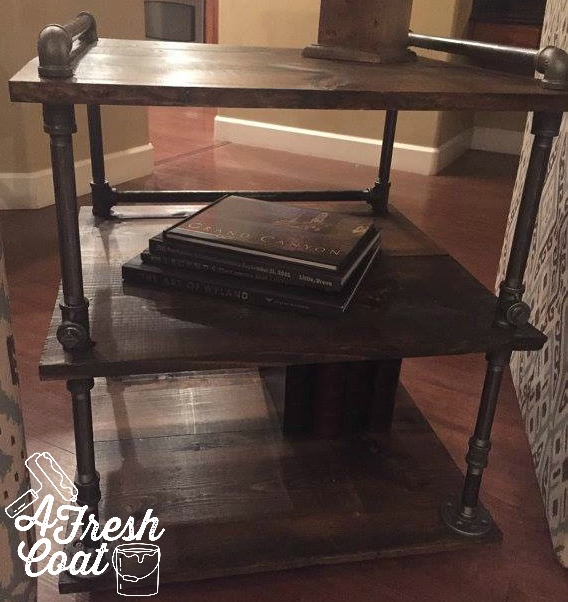
Next up? The drapes and accent pieces. The side table pictured below provided the perfect resting place for numerous frames of family members as well as a few accent pieces. Drapes (Pier 1) were a great find and the subtle navy paisley print manages to pick up the office feature wall perfectly.

Notice those shelves? Plumbing pipe and a piece of lumber from one of the big box stores was all it took to complete these. And how about those produce signs!! They look perfect and provide a pop of color perched above that new reclining chair.

Office Overhaul/ A Fresh Coat Yuma 2

Last but not least was this little corner of the room where the family piano was located. Alternating seed signs were hung to coordinate with those sitting on shelves opposite wall, and this beautiful piece of Scripture (Hobby Lobby) got some special treatment. By framing this canvas piece in black, it really makes it stand out. And by pairing it with the large key, a smaller piece of Scripture, and some greenery, it all works together. Finally, a few more accent pieces and this office was officially overhauled!

Office Overhaul/ A Fresh Coat Yuma 3

The Details:

Paint: SW Agreeable Grey and Valspar's Indigo Streamer--A Fresh Coat-Yuma

Shelving: A Fresh Coat Yuma

Drapes: Pier 1 Imports

Frames & Decor: Hobby Lobby, JoAnn's, Kirkland's

Produce Signs: provided by owner (Yuma, AZ produce)


Dressin' Up the Chimney

Fireplace RenoJenny SulpizioComment

Okay, so maybe it's not the chimney so much as it is the actual facade of this fireplace that needed some fixing up. Either way, a major overhaul was in order when it came to this fire starter.

fireplace reno-A Fresh Coat Yuma 7 copy.jpg
fireplace Reno-A Fresh Coat Yuma 1.jpg

A 90's design if I ever did see one this unit provided a number of challenges from the very beginning. First, this fireplace is a corner unit that runs floor to ceiling. The mantle originally created for this area was not only too shallow, but also disproportionate to the rest of the space. And? It was oak. It just screamed "1990" and even though I adored that decade, the design styles indicative of such a time definitely need to be laid to rest...for good! The other challenges? The green marbled tile, the gold grill face plates, and just the overall awkwardness that comes with this corner unit.

Here is where we started....

One thing was for certain: the fireplace was the focal point of this family room, and it needed a serious makeover in order for the rest of the family room to come together. I knew I wanted a farmhouse feel, and after resorting to Pinterest time and time again (too many times to count), I finally figured out exactly what I wanted.

Shortly after moving in, I gel stained the oak black in order to make some sort of effort towards improving it. No suck luck. This thing needed a total overhaul!  So, we took it down to the studs. No more tile, no more weird mantle...just a clean slate to start over with.

fireplace Reno-A Fresh Coat Yuma 2.jpg

 Once again I enlisted my awesome carpenter, Nate Koogle to make the plans I'd been dreaming up come to life.

Here's what went down:

The Mantle: It needed to be big and deep in order to house all of the knick-knacks and decor I wanted to dress it with each season. We came up with this box piece. Nate constructed it and AFC stained and painted it. Classic Oak and Weathered Grey were mixed together in order to achieve this specific color. The mantle was also installed higher than its predecessor so its proportions would appear..well, proportionate.

The Shiplap: I knew I wanted some mock shiplap somewhere in my home and figured those horizontal wood pieces would definitely add some character.

fireplace Reno-A Fresh Coat Yuma 3.jpg

The Tile: Even though they were pretty pricey, I love the look and texture of these basketweave pieces. They're bold yet pretty. Masculine yet feminine. And up against the white moldings look pretty spectacular (or at least I think). The hearth was completed by grabbing a few pieces of cheap 12x24 tiles in coordinating colors from Lowe's. It also helped offset the cost of the textured pieces.

The Grill: That gold quickly got covered up by spray painting it with BBQ high heat spray paint in black matte. Available at Lowe's.

fireplace Reno-A Fresh Coat Yuma 4.jpg

Once the moldings were added and the fireplace was trimmed out, the finished product was exactly what I had hoped for. It's beautiful, functional, totally custom, and makes a statement, I think.

fireplace Reno-A Fresh Coat Yuma 5.jpg

Here's my girl at Homecoming with our remodeled fireplace as the backdrop.

fireplace Reno-A Fresh Coat Yuma 7.jpg

The only thing left to do? Corbels. Once I find the right pair, corbels will provide the final finishing touch.

In the meantime, it's all dressed up for Christmas. On to the next project!

Jenny


The Details:

Paint: Done by AFC in SW Alabaster White

Mantle/Shiplap/Trim Work-Nate Koogle

Clock-Bellacor

Decor-Hobby Lobby, Kirkland's, Tai Pan Trading Company

Basketweave Tile: Home Depot

Hearth Tile: Lowe's

Tilework: Hardin Development, LLC


A TEEN GIRL'S REVAMPED ROOM

Teen Girls RoomJenny SulpizioComment

K's room need a little "umph". A slight re-vamp of sorts. And after chatting with her (and her mom) on what she wanted incorporated into her room, I had a number of ideas on how to pull together the existing elements in this space while implementing a bit of the new as well.

Here is where we started. Four walls in SW Passive Grey, along with a number of pieces that K created herself. The space was good but it needed cohesion...and a little bit of tidying. A polishing of sorts.

Teen Girl Room Revamp 3: A Fresh Coat-Yuma.jpg
Teen Girl Room Revamp 5: A Fresh Coat-Yuma.jpg

My first thought? This room needed a feature wall to dress it up a bit. That beautiful bedding (Pottery Barn Teen) needed some pillows in prints and pops of color to make it really stand out. The bed also needed a headboard to dress it up and define the space.

Second? K needed some shelving/storage room and that established nook was screaming for them. She also wanted to keep as much of her wall decor as she could in her finished bedroom. We started with the mood board...

K's bedroom makeover.jpg

and then got to work!

We addressed the feature wall first by adding stripes (you know how I love me some stripes), and K was on board. I simply added 14" blocks in SW Alabaster Grey and that wall came to life.

Teen Girl Room Revamp 6: A Fresh Coat-Yuma.jpg

Next up? The headboard. I love this upholstered charcoal grey piece that gives an added touch of femininity to the room and really makes that bed look amazing. AFC then created a mini gallery wall using some of K's existing decor along with a few new items.

Teen Girl Room Revamp 2: A Fresh Coat-Yuma.jpg

Next up? The shelving. These custom-made stout pieces were made by Simply Mo and stained by AFC using a hint of mahogany finish blended with Classic Oak and Weathered Grey. The result is a rustic finish with a tinge of rose hue..

Teen Girl Room Revamp: A Fresh Coat-Yuma.jpg

A number of the above accents were purchased from Hobby Lobby, my good friend Becky Fessler (look at that coffee filter wreath she made!), and Simply Mo Designs. A new desk and fun industrial chair were then added to finish the area. This nook is now rockin' and is definitely an efficient use of space.

Finally, there was one more area to address. I've always wanted to incorporate an oversized chalkboard into a room. And this one? This one just happens to be magnetic too. Simply Mo Designs created the custom frame while AFC painted three coats of magnetic paint followed by one coat of chalkboard finish. The end result? K has a super fun, creative piece that she can write on and use magnets to hold items with. I love how it turned out. Even better? I love that this girl's revamped room has elements that are not only functional but aesthecially pleasing as well. When fun and function collide, it's a beautiful thing!

Teen Girl Room Revamp 4: A Fresh Coat-Yuma.jpg

K's Room:

Paint: Sherwin Williams Passive & Alabaster Grey

Bedding: Pottery Barn Teen

Headboard: Wayfair

Desk: Wayfair

Industrial Aqua Desk Chair: Wayfair

Striped Feature Wall: A Fresh Coat-Yuma

Wall Decor: Hobby Lobby and Kirkland's

Shelving/Frames/Signage: Simply Mo Designs

Decorative Pillows: Hobby Lobby


Why Brick Panels Are All the Rage.

Teen Boys RoomJenny SulpizioComment

By now you've probably seen them pop up all over Pinterest. Or maybe you've spotted them on one of your strolls through the local home improvement store aisles. Either way, the look of brick is in and brick panels are all the rage. 

Brick panels basically give the look of a brick wall without all of the hassle, mess, or expense. Granted they aren't the real thing but if you're anything like me, I change my mind a lot when it comes to decor and it's probably best if some elements within my home remain semi-permanent. Even better? These panels can be whitewashed if so desired for a totally different, antiqued look. Plus, they can go anywhere and everywhere within a home.

I so dig them.

But if you haven't seen these panels, you're probably begging the question: " how do they really look?"

Check these rooms out:

Brick Paneled Room | A Fresh Coat Yuma

"R" wanted a superhero room complete with a cityscape and brick panel wall. The goal was to create a room with an urban feel that could grow with this seven year-old but also change as needed. We used a total of three brick panels in this space on one full wall (that makes two feature walls in one room!) and I'm kind of crazy about it.

IMG_8964.JPG

This kiddo also needed a desk so once again, we implemented some pipe/wood shelving (thanks to mastermind and carpenter, Nate Koogle) to create a functional but also really cool, classic piece for him to use. I dunno but I think he's pretty happy with his new digs

Brick Panels and Wood Shelving | A Fresh Coat Yuma

Next up? "B's" room. This sixteen year-old asked for a fresh, fun, updated space for his birthday and his parents definitely delivered.

Exposed Brick Teen Boy Room | A Fresh Coat Yuma .jpg

"B" dug the look of the exposed brick and preferred the grey grout (found at Home Depot) over the black grout as shown in the room above (located at Lowe's). These panels retail for $25 each and even though I've stated it before, they are a great value considering the texture and "wow factor"they bring to a room.

After using six panels spanning two walls, a lot of cutting was involved in order to make the look we achieved appear less faux and more fo reals. A mix of wood/pipe shelving and a matching nightstand were then implemented, along with an industrial clock and magazine rack to finish up this space. Two-tone Pottery Barn linen curtains were added to dress the windows. And the coolest part? Check out those guitar grips! Metal hands extending from the wall meant specifically to hold this guy's favorite instruments. So awesome and functional!

Exposed Brick Teen Boy Room | A Fresh Coat Yuma .jpg
Brick Paneled Room | A Fresh Coat Yuma

So what do you think? Would you give these panels a go?


R's Room:

Brick Panels-Lowe's

Drapes-custom made, fabric purchased from Hobby Lobby

Cityscape Wall Mural- A Fresh Coat-Yuma

Tire Toy Storage-Amazon

Bedding-Pottery Barn Kids

Pillows-Kirkland's/Etsy

Superhero Wall Decor-Kirkland's

Locker Nightstand-Target

Desk-Nate Koogle, Carpenter

Desk Decor & Knick-knacks-Hobby Lobby


B's Room:

Clock-Wayfair

Drapes-Pottery Barn

Bedding-Amazon

Brick Panels-Home Depot

Magazine Rack-Hobby Lobby

Guitar Grips-Amazon

Nightstand/Shelving-Arizona Rustic Lights- Yuma, AZ


THE Kitchen Makeover

KitchensJenny Sulpizio8 Comments

I love room makeovers. I think most people hooked to home improvement shows like myself, do. There's something incredibly fun in seeing a room transform into something totally new and amazing. Especially when the "before" space was outdated and just plain ugly. 

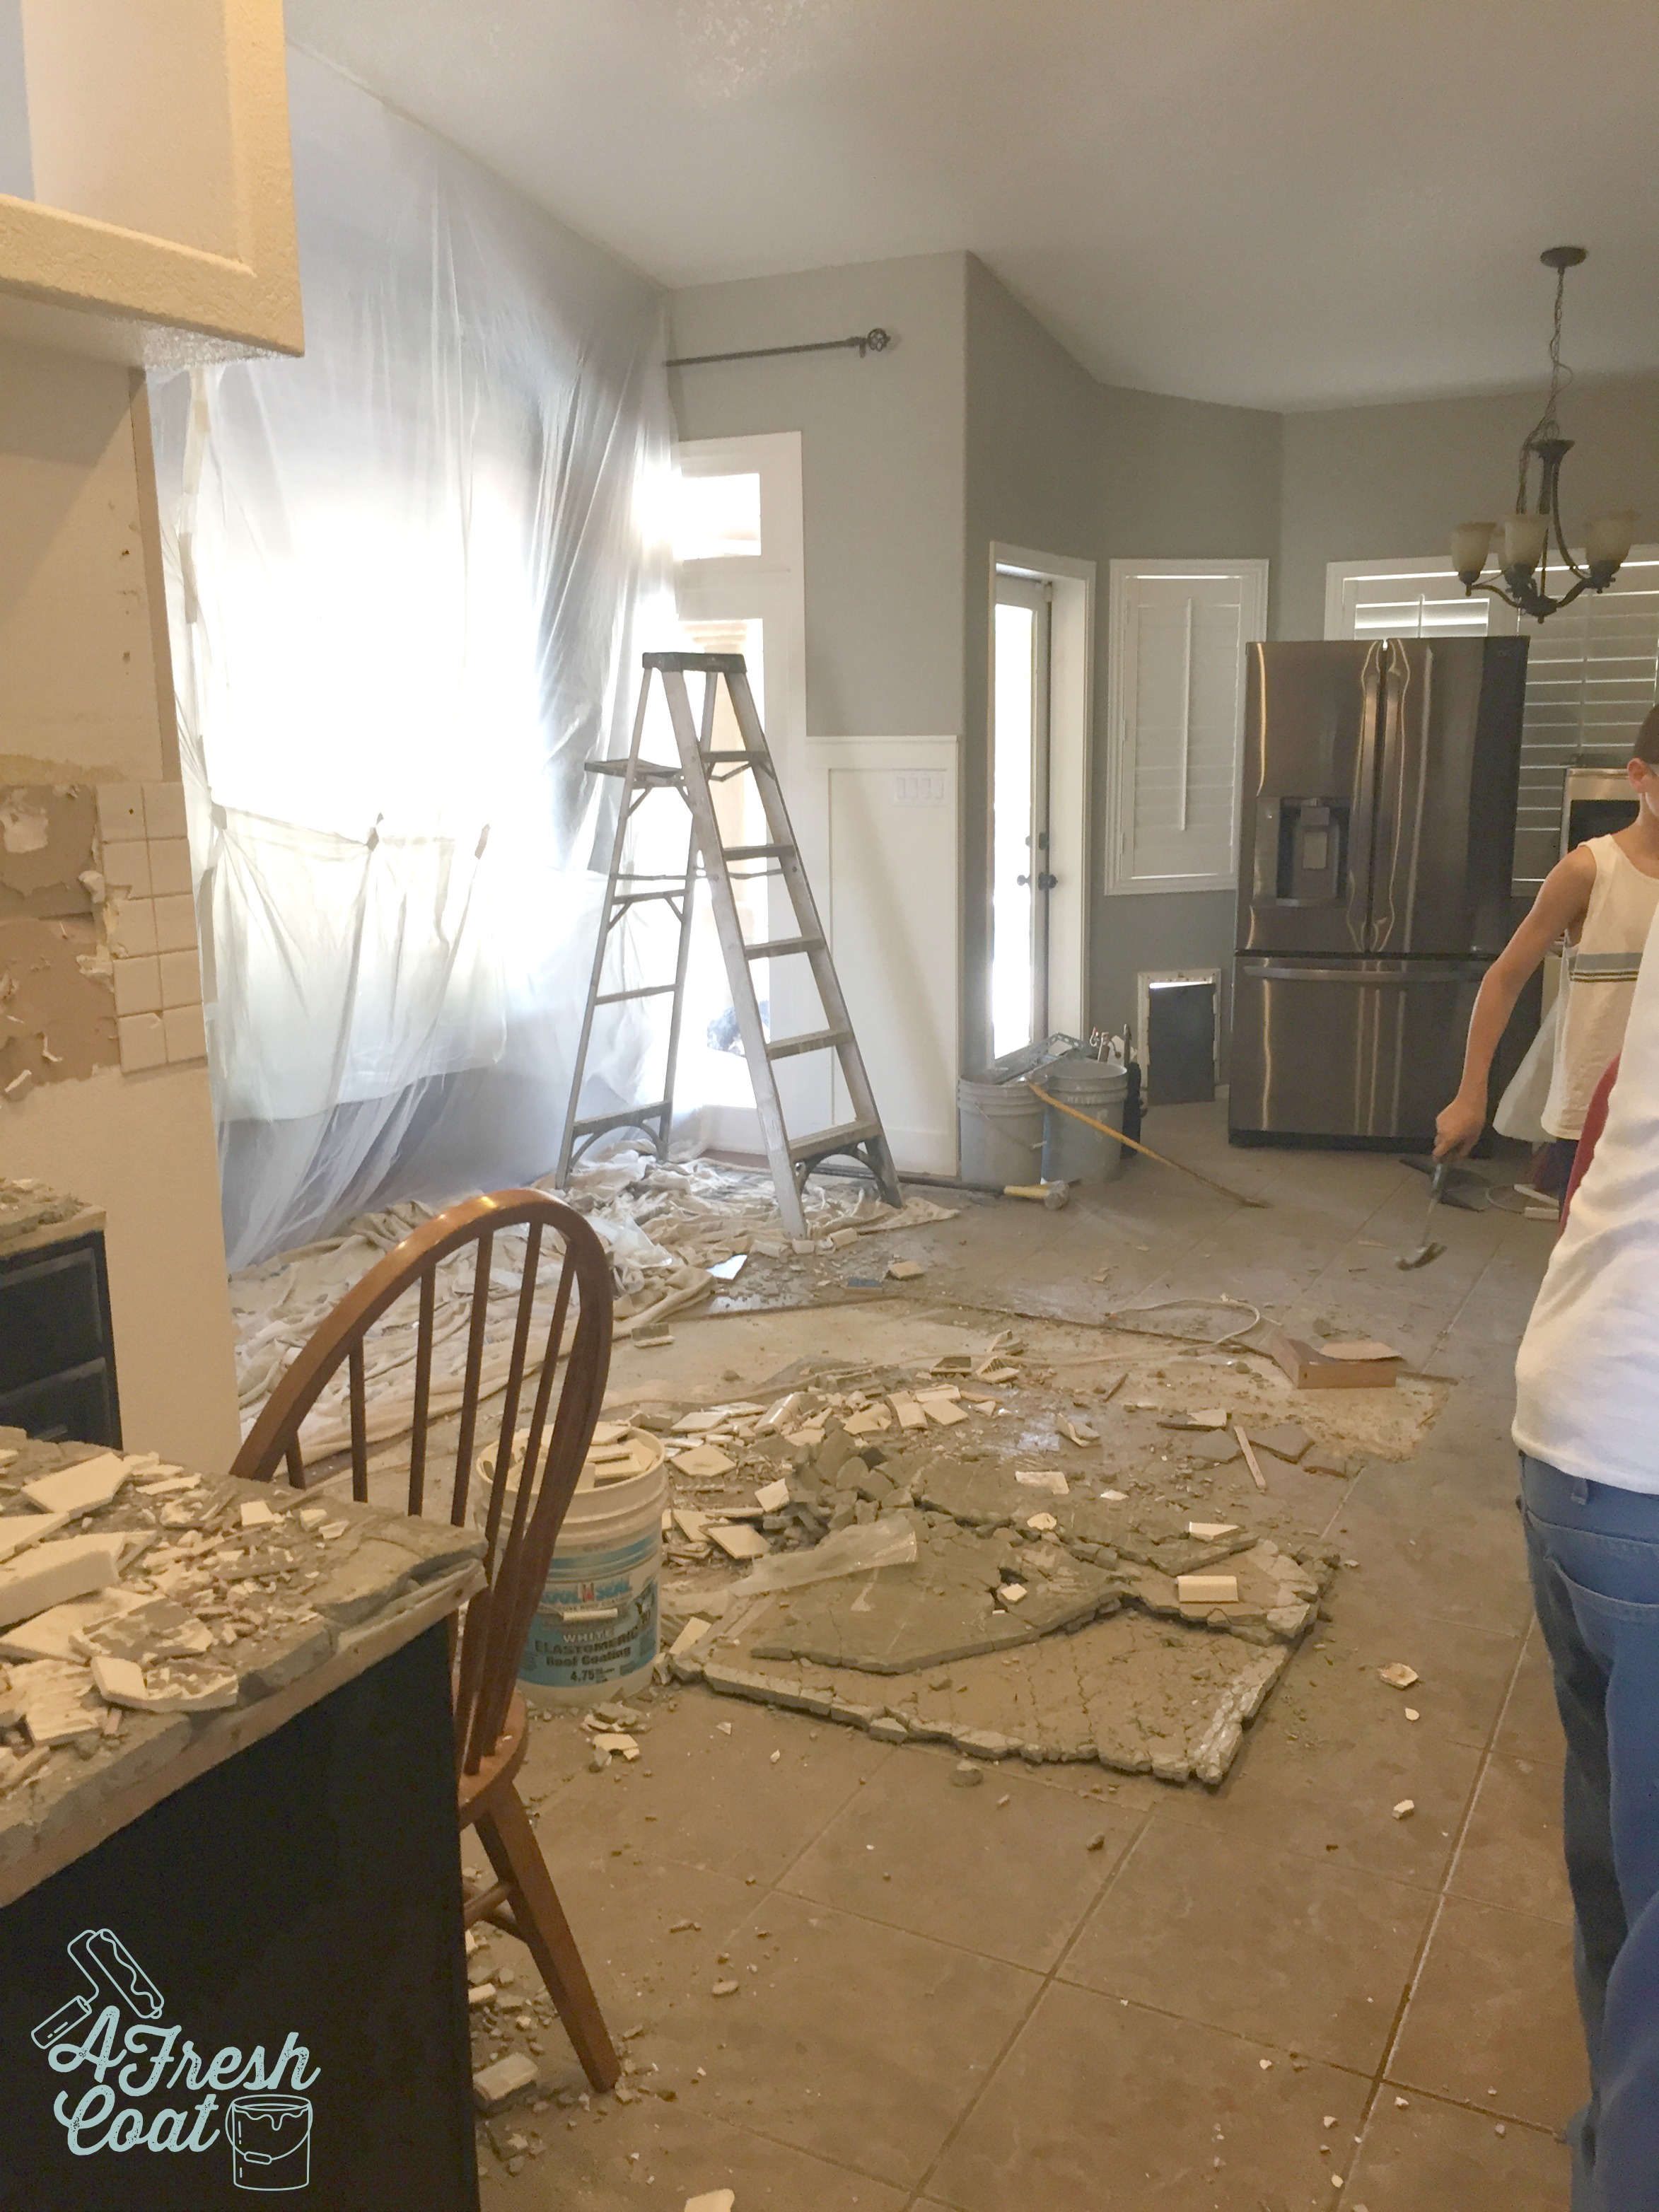
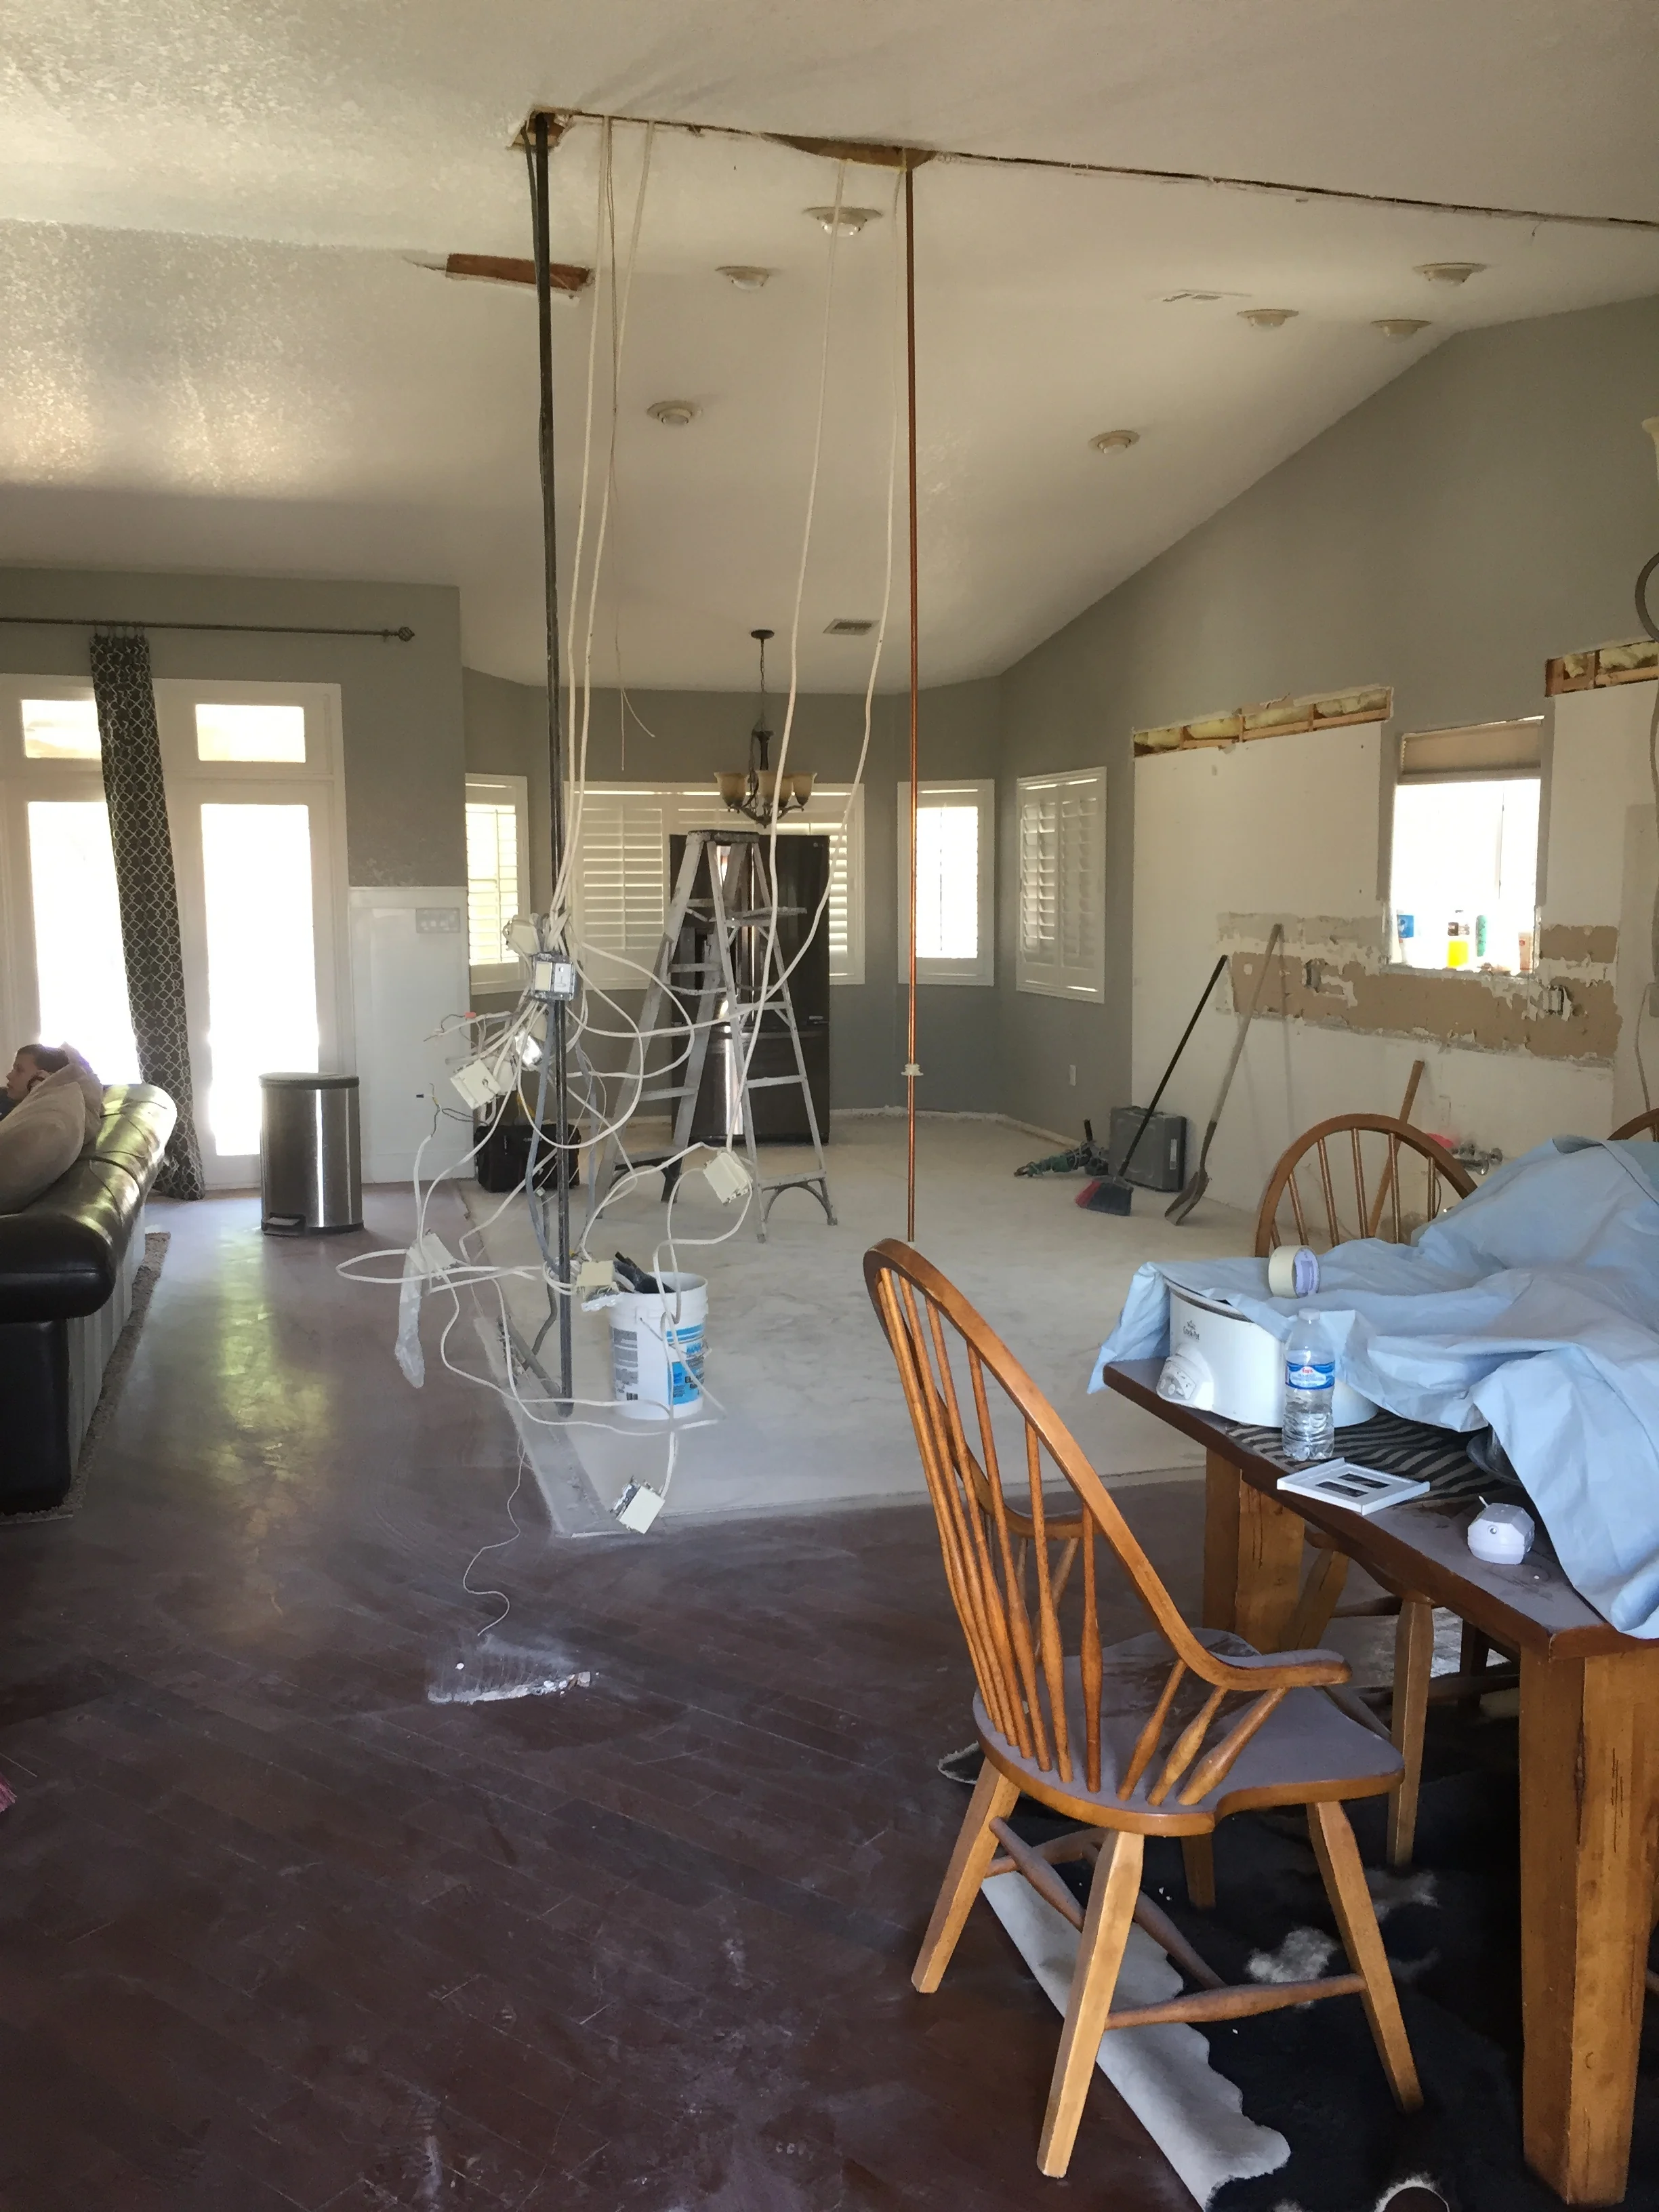
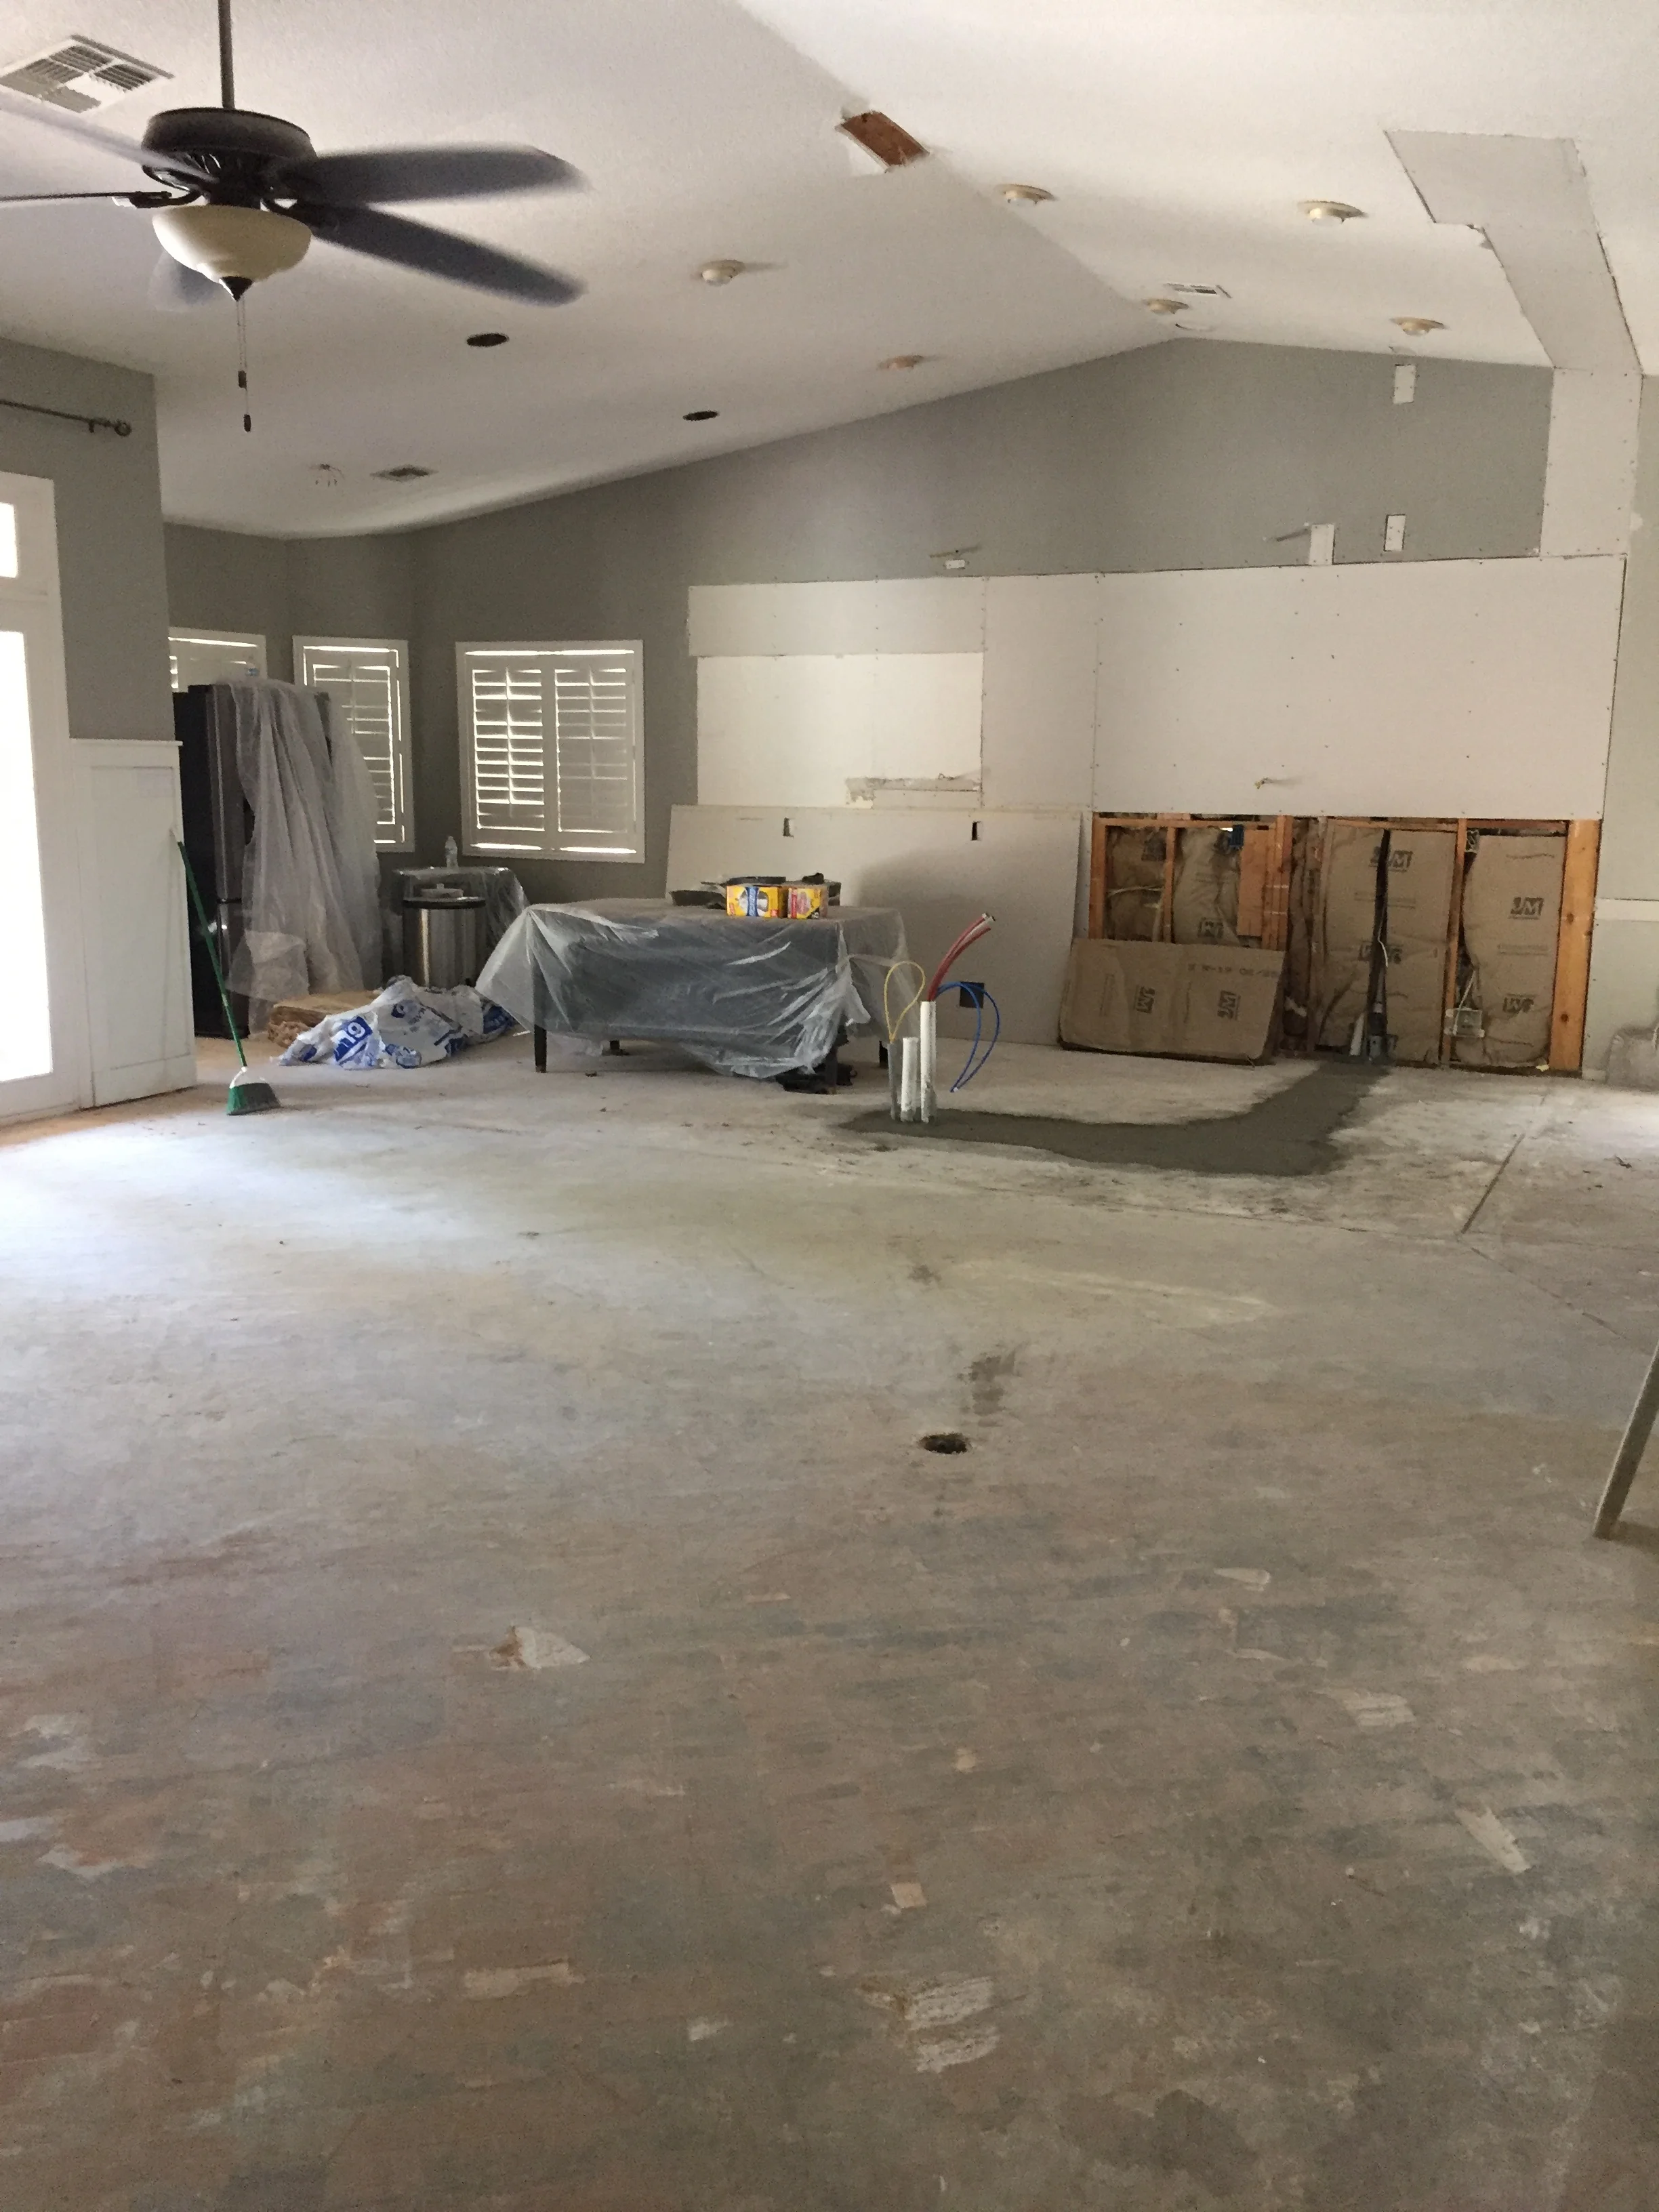
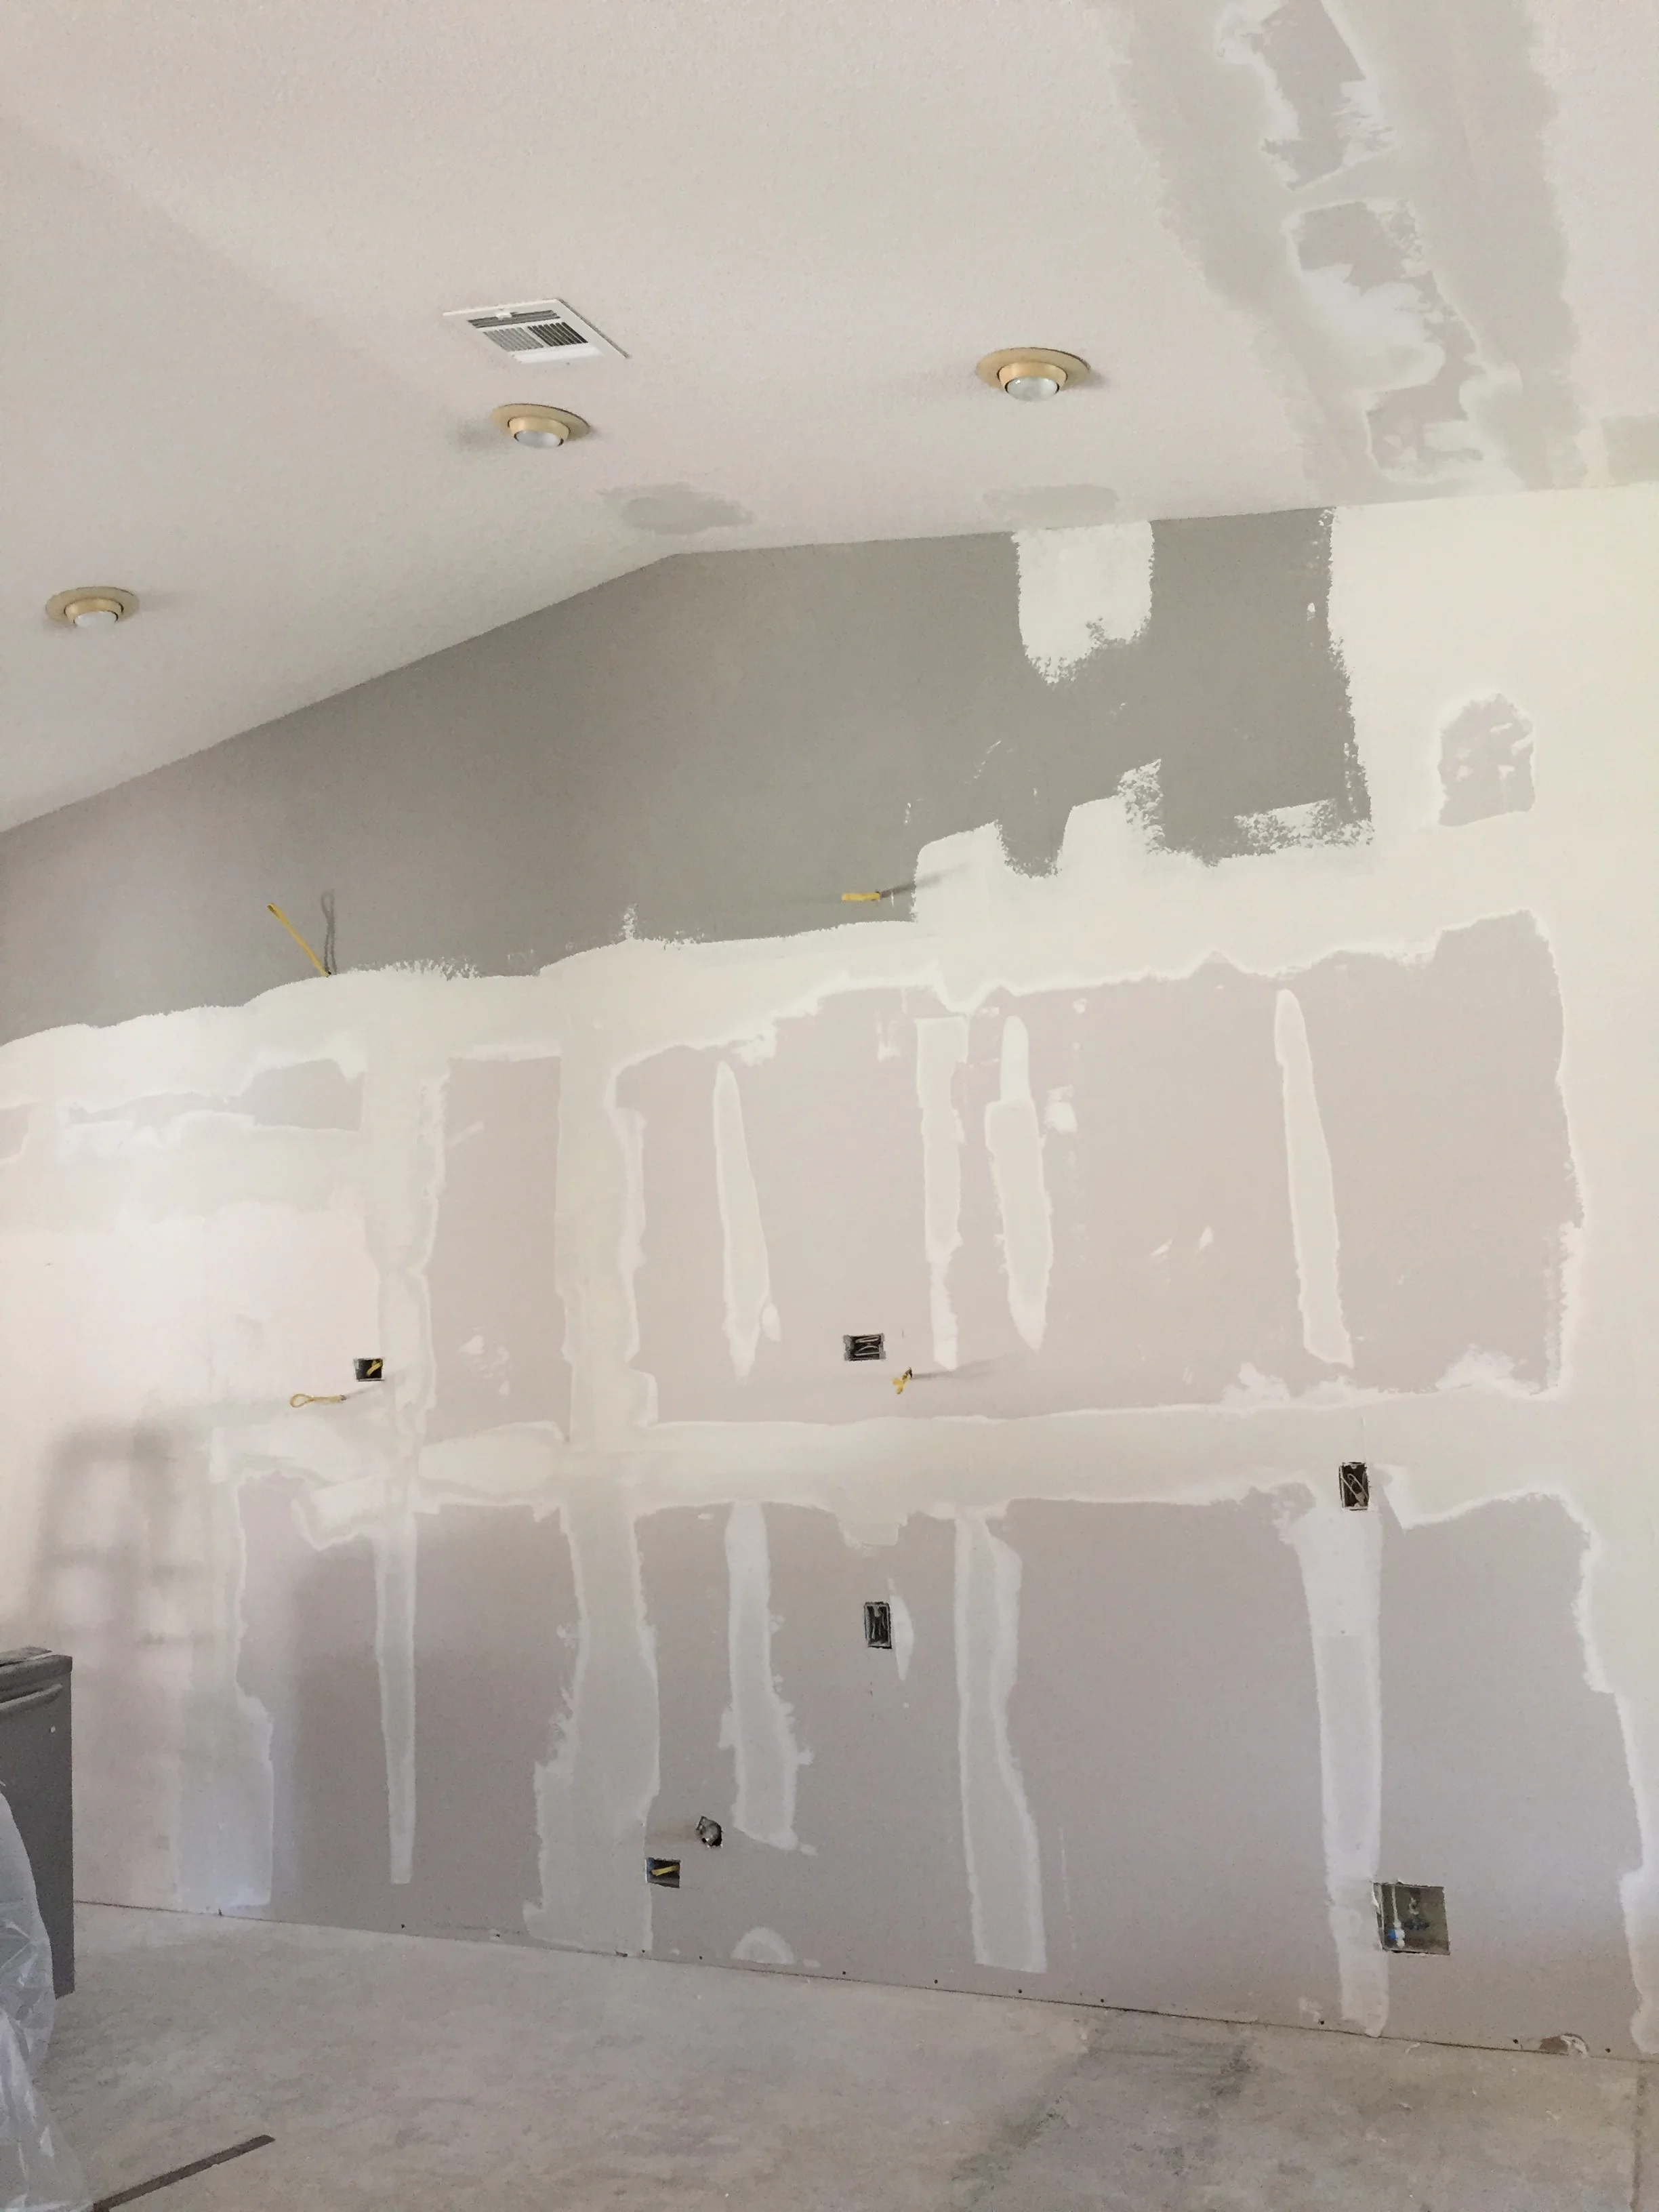
Sooooo, imagine my excitement when it was finally time to renovate the kitchen of our 1990's home. Pure elation! And we're not talking about a little room redo here either. This was a full gut job. We took out walls, removed windows, trenched under concrete, and ripped up 2000 square feet of flooring...all during the summer months...when my kids were off from school. Yah, slightly crazy but totally worth it. I love our new space and how open the kitchen and great room feel. But before I reveal our new digs, check out where we started:

kitchen remodel/ A Fresh Coat Yuma 6.jpg
kitchen remodel/ A Fresh Coat Yuma .jpg

Look at these "before" pics above. Those soffet "dust shelves" took away from the overall design of the house, making the vaulted ceilings less grand and just plain awkward. The tile? Oy. Those grout lines still give me nightmares and the almond ceramic squares were way outdated, not to mention um, plentiful. They were everywhere!. While this kitchen was big, it just wasn't functional at all. And not to sound ungrateful (in any way), but it was ugly...seriously ugly. In fact, I'd spent four years waiting for the opportunity, scheming, planning, and pinning all the ways I could change it. 

It started with this design.

kitchen remodel 4.jpg

Followed by the gut job. #demodays

Hardin Construction, LLC of Yuma, AZ did an awesome job ripping this bad boy up and then putting it back together. They were fast, efficient, and made all of those ideas I'd been dreaming up for years a reality. They even let my boys in on the action during demo day as we all got the chance to deconstruct that 20+ year-old kitchen.

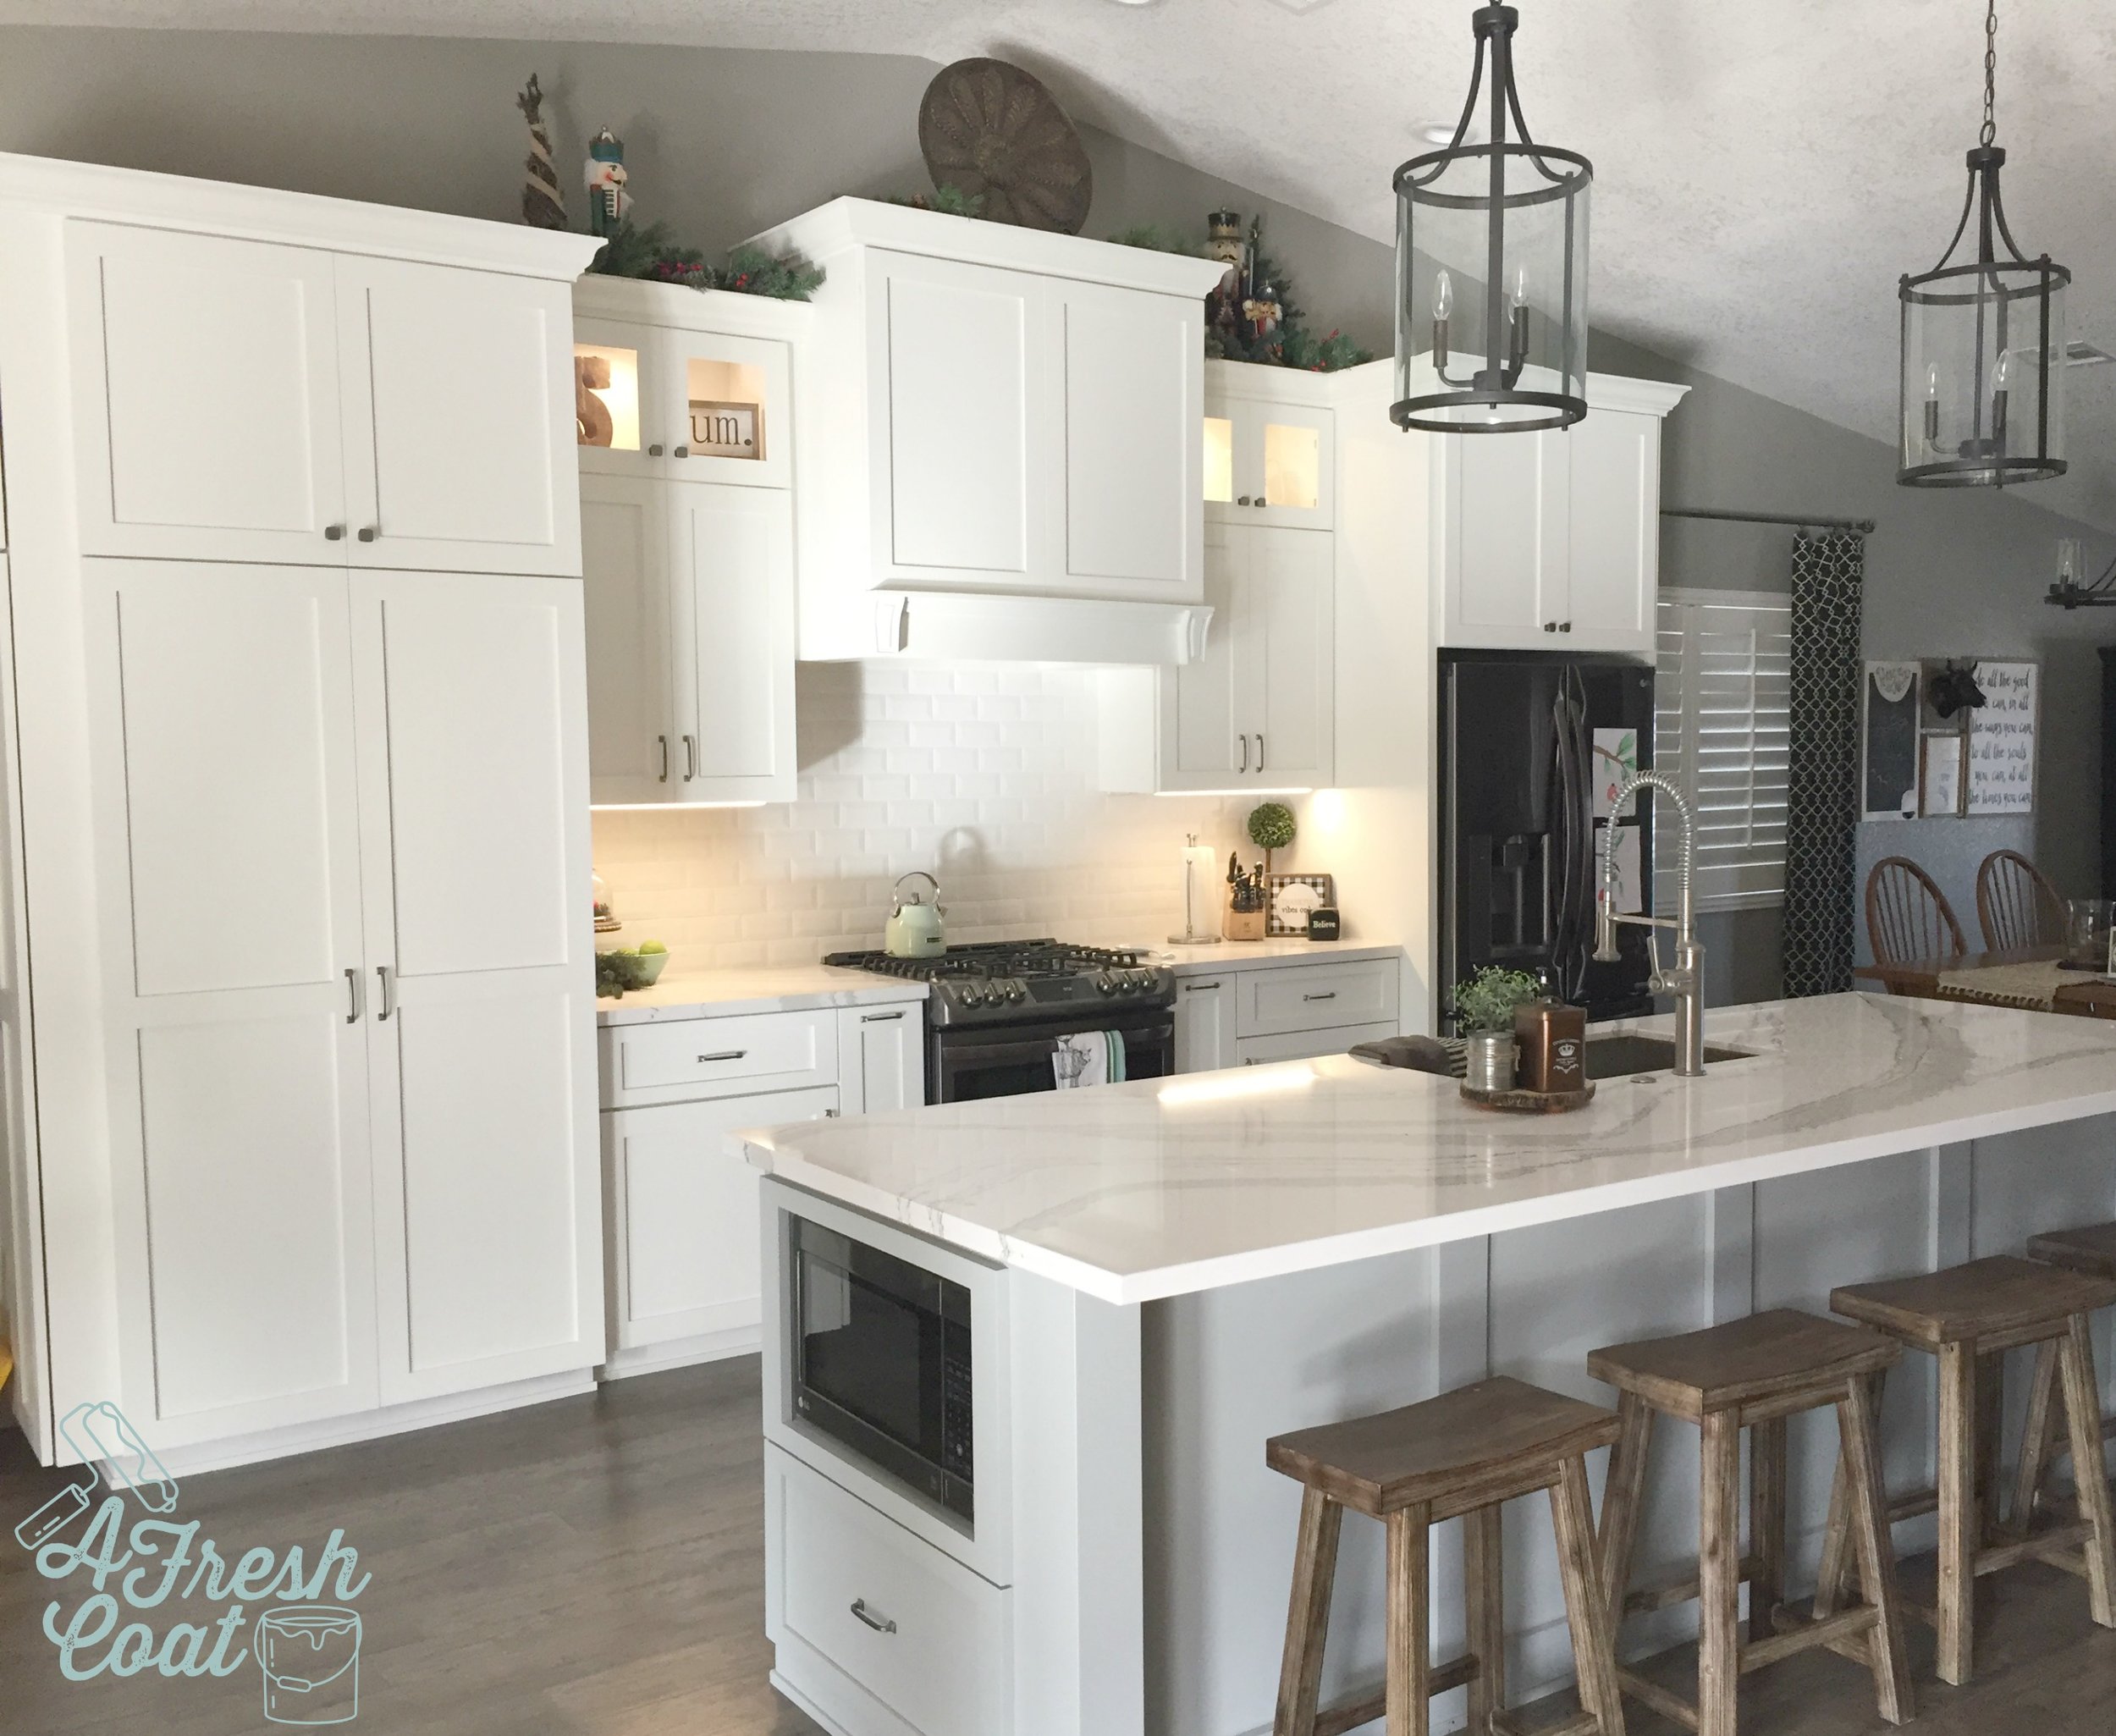
Ready for the reveal? Eek!

kitchen remodel/A Fresh Coat Yuma 20.jpg
kitchen remodel/A Fresh Coat Yuma 15.jpg

The kitchen is now a place where I totally want to hang out with my family and friends. The cool thing? After this remodel we can now house seventeen people in this space! Not only that but it's fresh, clean, and totally functional (even after removing over half of the cabinetry). 

Here are just some of the details:

1. Cabinetry: It had to be efficient and pretty! White shaker custom cabinets in SW Alabaster White. Pantry and pots and pan cabinets all have sliding drawers, while the two long cabinets on either side of the stove house gadgets galore. There's plenty of storage space found in the hood and above the pantry and refrigerator.

2. The Hood: I wanted the hood to be grand and Hardin Development, LLC achieved the exact look I was going for. The cool thing? They took two black corbels I purchased from Hobby Lobby (for just $17.99 each), cut them down to size, added molding up top and down below, and painted it white. Amazing!

kitchen remodel/ A Fresh Coat Yuma .jpg
kitchen remodel 18.jpg
kitchen remodel 25 / A Fresh Coat Yuma

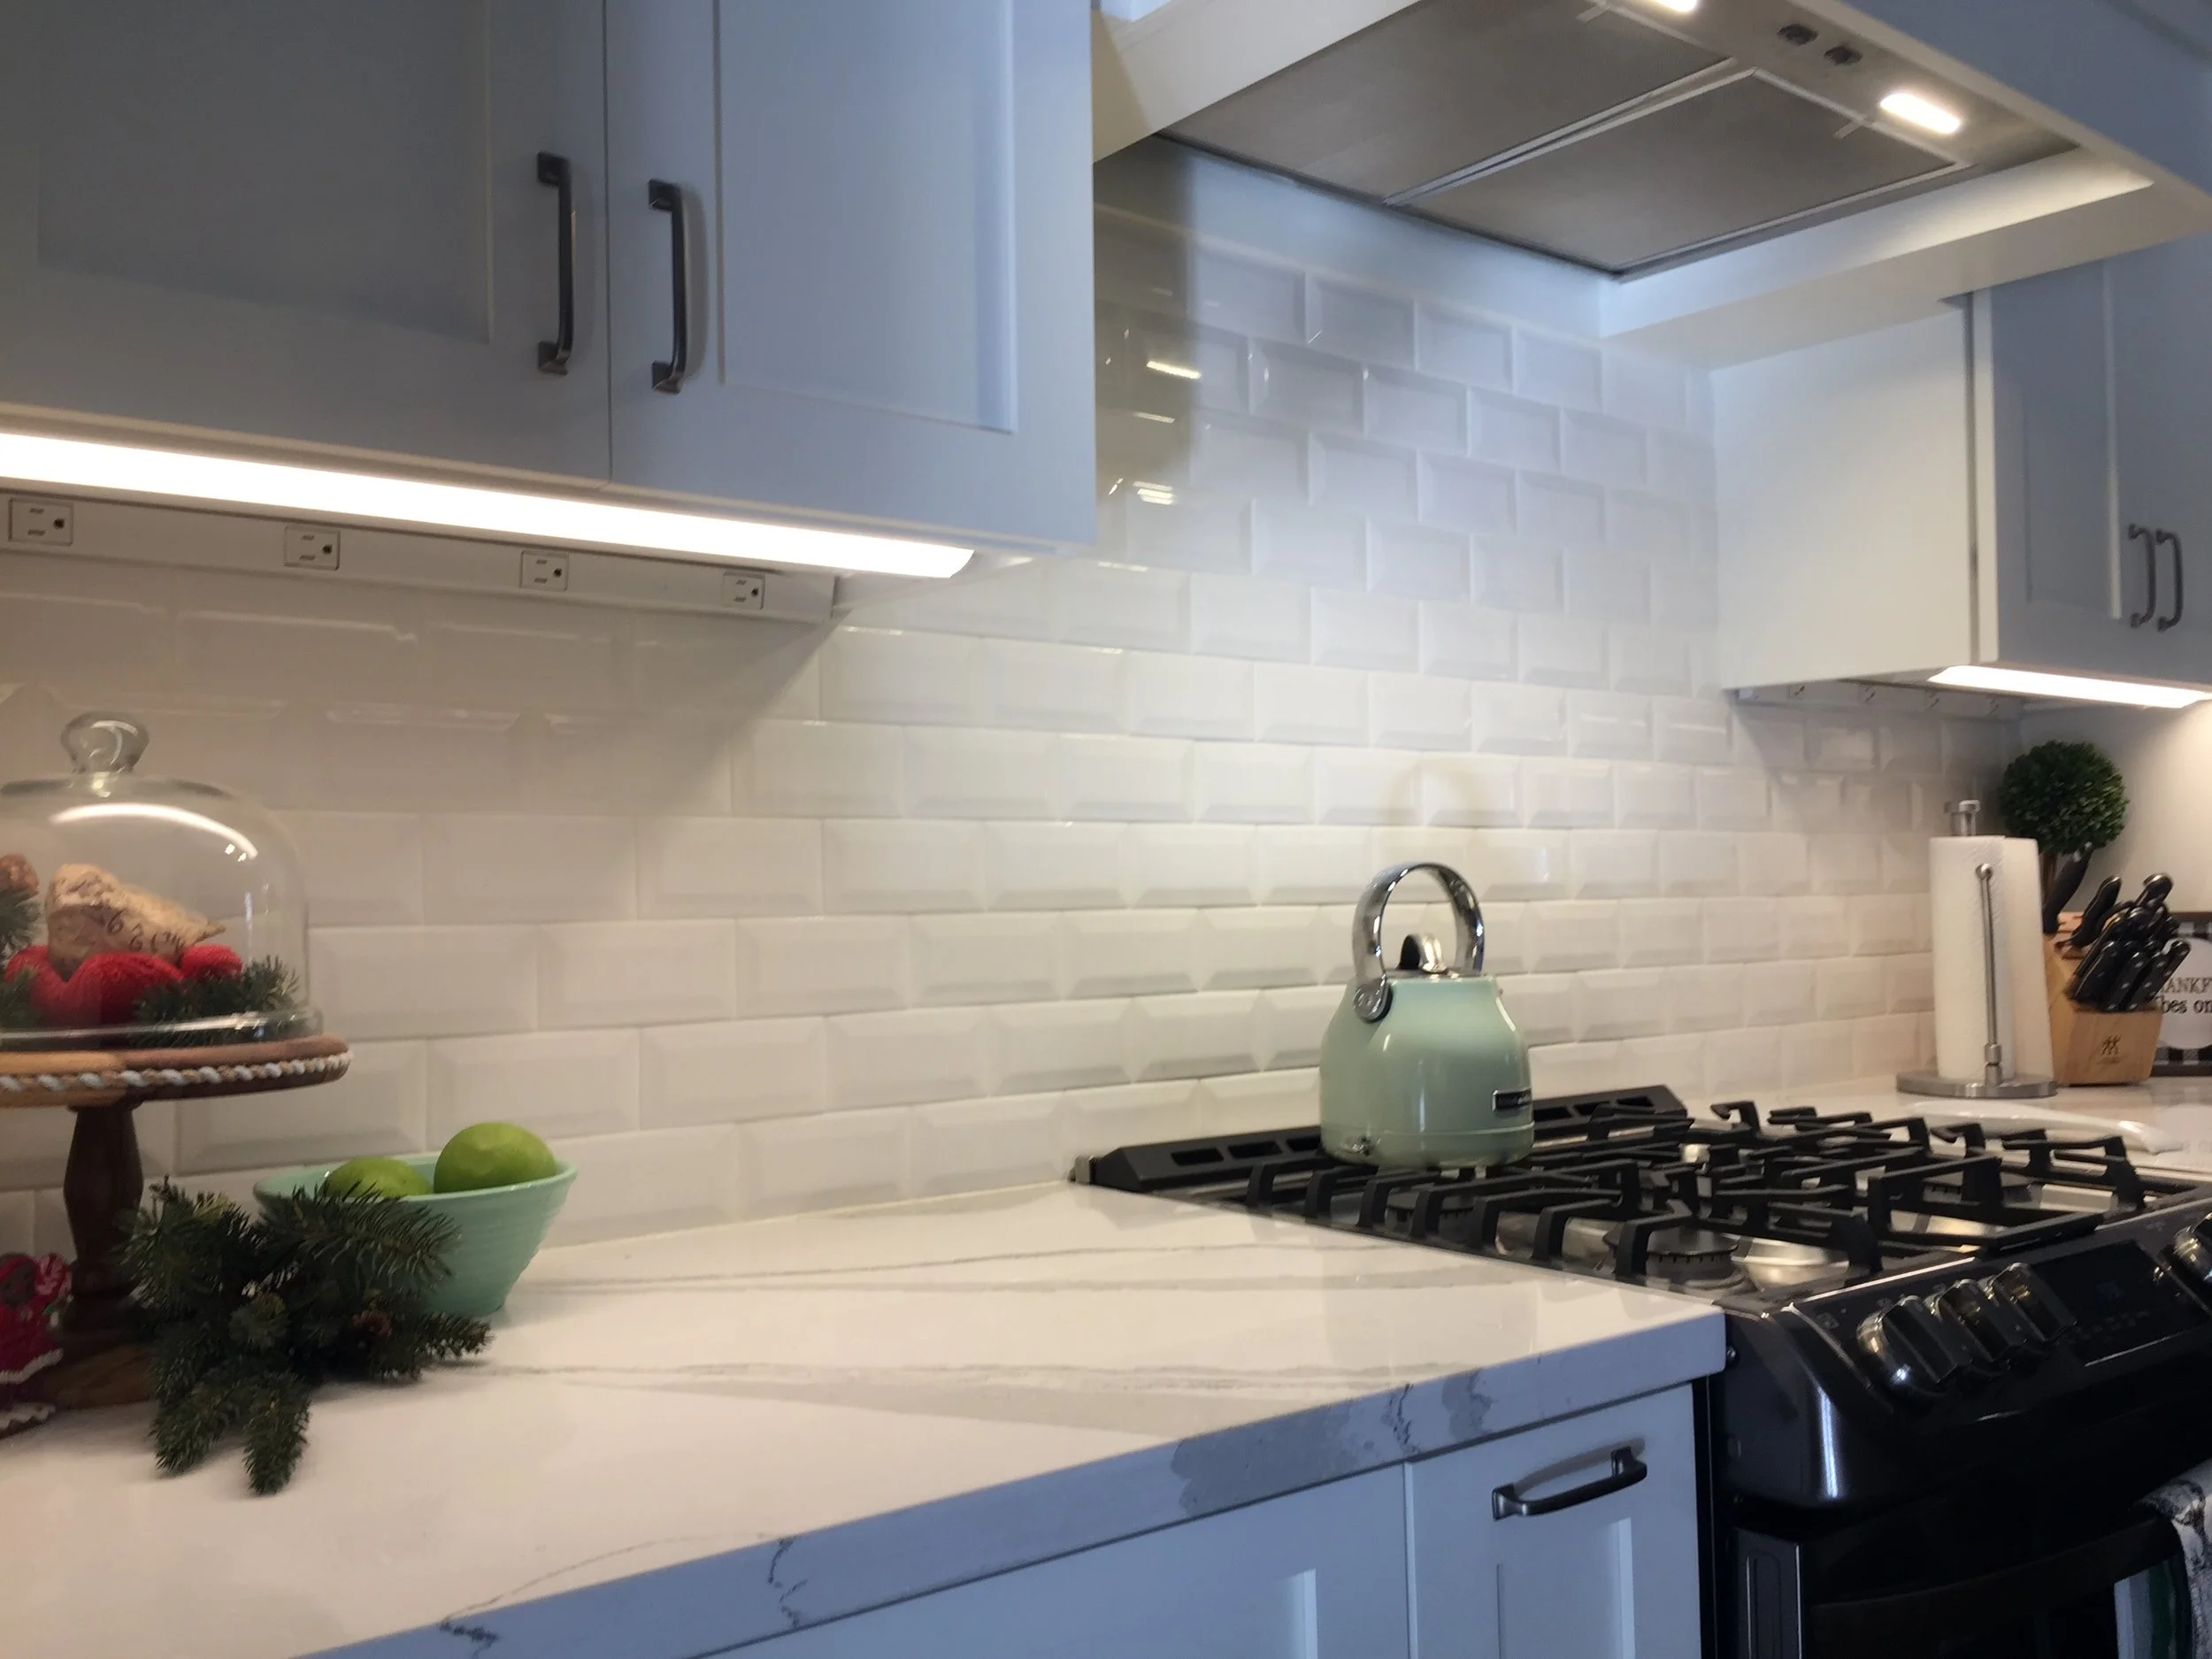
3. The Backsplash: I knew from the very beginning of this project (and even before that) that I wanted white subway tile for my backsplash. I had the opportunity to splurge on materials here because the backsplash of my kitchen consumes a very small space. However, I found just what I wanted at Lowe's for around $.89 per tile. Not bad and I really love the boldness it adds to the kitchen and the depth it provides. The only thing I would do different? Add a pot filler. I debated and went back and forth with the idea. I guess I can still add one but for now, I'm good. ;)

Kitchen Remodel/ A Fresh Coat Yuma

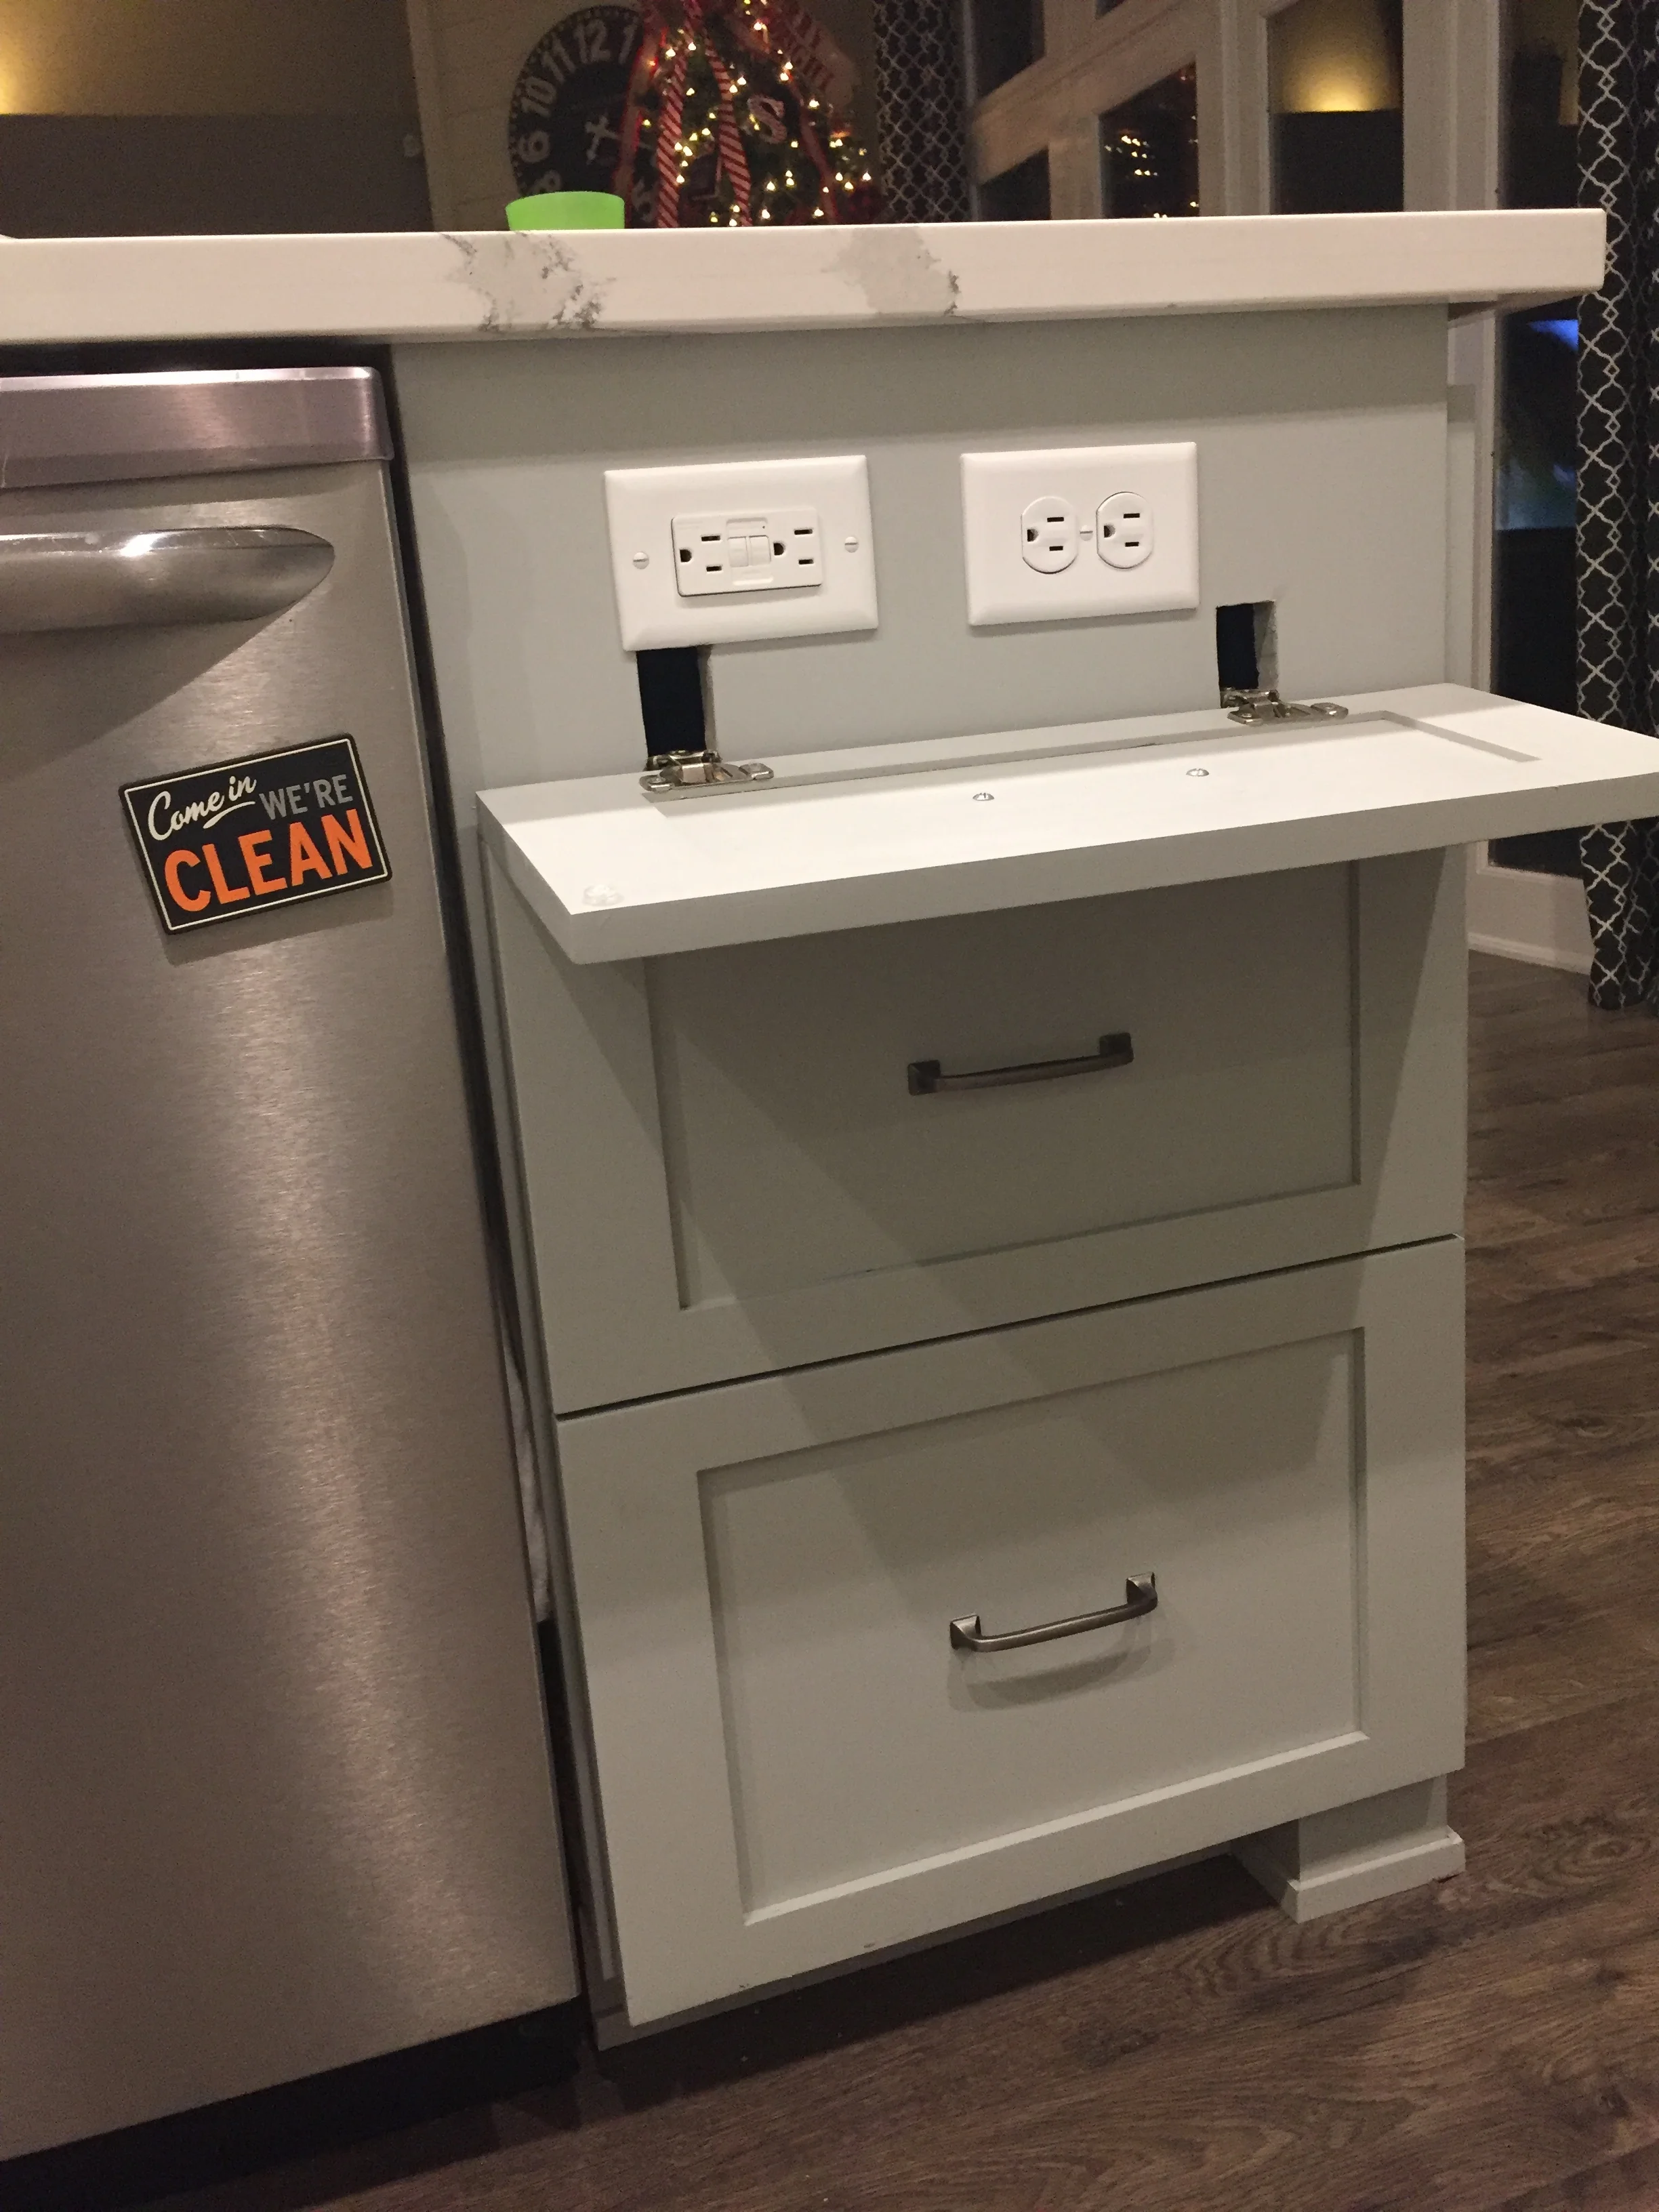
4.) Electrical: This may sound weird but I did not want any outlets interfering with my backsplash and disrupting the flow of the pattern. When it came to the center island, same thing. I asked that all outlets appear hidden as to not mess with the design on the end caps.

kitchen remodel/ A Fresh Coat Yuma 2.jpg
IMG_3098.JPG

5. The Island: This nine foot behemouth of a piece was exactly what I had hoped for. It's big, stout, fully functional, and I dig it. I really dig it. However, I knew that once I implemented the hood cabinet, our microwave would have to be housed in the island. This presented a problem as far as drawer space goes since two of my island drawers would have to be dummies/fakes/faux. Only the bottom drawer (pictured above) actually has contents within it. But it works!

The other thing? I didn't want to spend a ton of money on a new microwave. The built-in models are pricey. Like, koo-koo pricey. Instead I bought an LG model intended for a counter, and had the island constructed around it. My options as far as finishing touches included a flush mounted piece I could buy (for the same price as the microwave--um, no thank you). Instead, I headed to Pinterest and here is what we came up with. Wood moldings. They're awesome...and much less expensive.

Kitchen Remodel/ A Fresh Coat Yuma

6. The Countertops: Two words: Cambria Britannica. It's Quartz which means there is no variation in pattern of slabs like there is with granite. This piece was pricier than other Quartz options but I'm so glad I went with it. It's stunning and incredibly durable. 

kitchen remodel/ A Fresh Coat Yuma

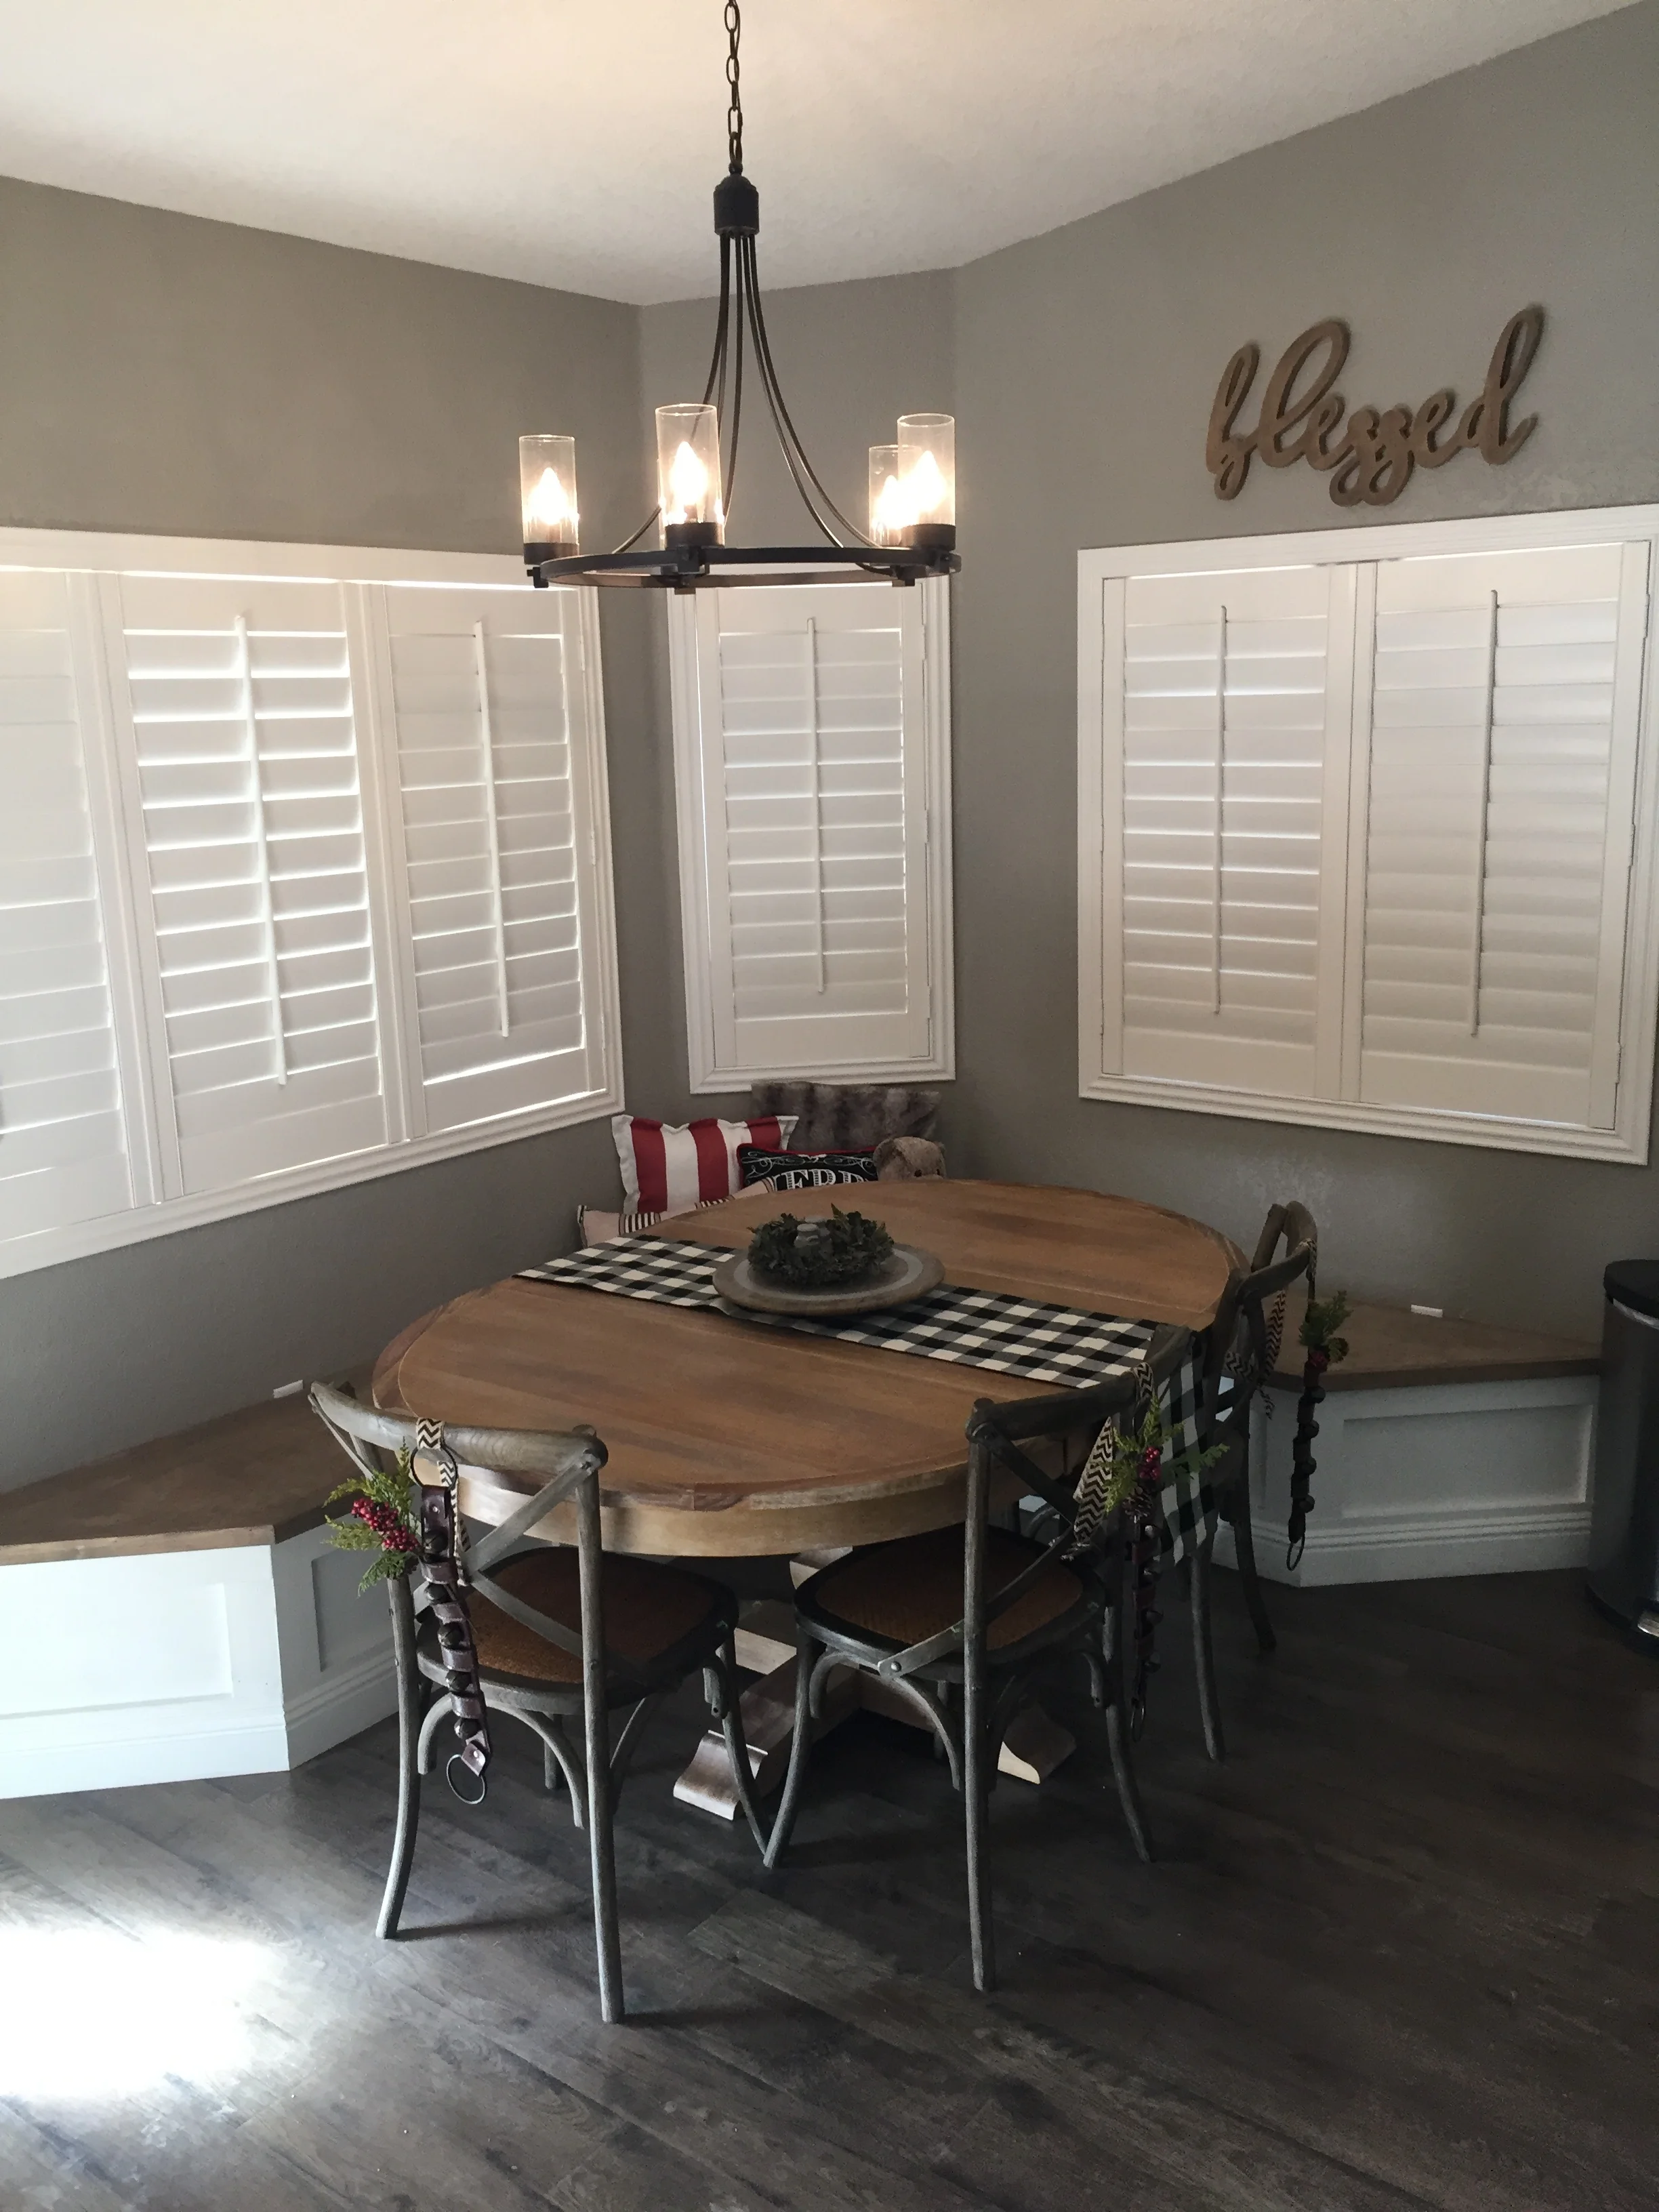
7. The Breakfast Nook: This area of the kitchen screamed "nook" from the moment we first looked at this home. Thanks to master carpenter, Nate Koogle, he made it happen. He created the banquette and it blended in perfectly with the rest of the kitchen. The wood tops can be removed for extra storage as well (yay for storage!), The table (purchased at Pier One) and chairs (Dandy Home and Ranch Boutique) made it all come together.

Kitchen Remodel/ A Fresh Coat
Kitchen Remodel/ A Fresh Coat Yuma

That's it! Lots of work, tons o' planning, a decent amount of moola, and it's complete. Next up? The master bath. Once I come up for air! ;)

The Details:

Flooring--Lowe's

Lighting-Joss & Main

Faucet/Sink-Home Depot

Subway Tile-Lowe's

Cabinetry Hardware-Amazon

Black Stainless Steel Appliances-Lowe's

Stools-Target

Kitchen Table-Pier 1

Kitchen Table Chairs- Dandy Home & Ranch--Yuma, AZ

Trinkets/Monograms/wood platters/succulents/hand towels/etc--Dandy Home & Ranch Boutique, Hobby Lobby, Marshall's, Home Goods, Kirkland's